How to turn on the power, How to use the manual mode, Insert the key into the console – NordicTrack NTL14010.0 User Manual
Page 16: Select the start menu, Start the walking belt and adjust the speed
Attention! The text in this document has been recognized automatically. To view the original document, you can use the "Original mode".
HOW TO TURN ON THE POWER
HOW TO USE THE MANUAL MODE
IMPORTANT : If the treadmill has been exposed to
cold temperatures, allow it to warm to room tem
perature before turning on the power. If you do not
do this, you may damage the console displays or
other electrical components.
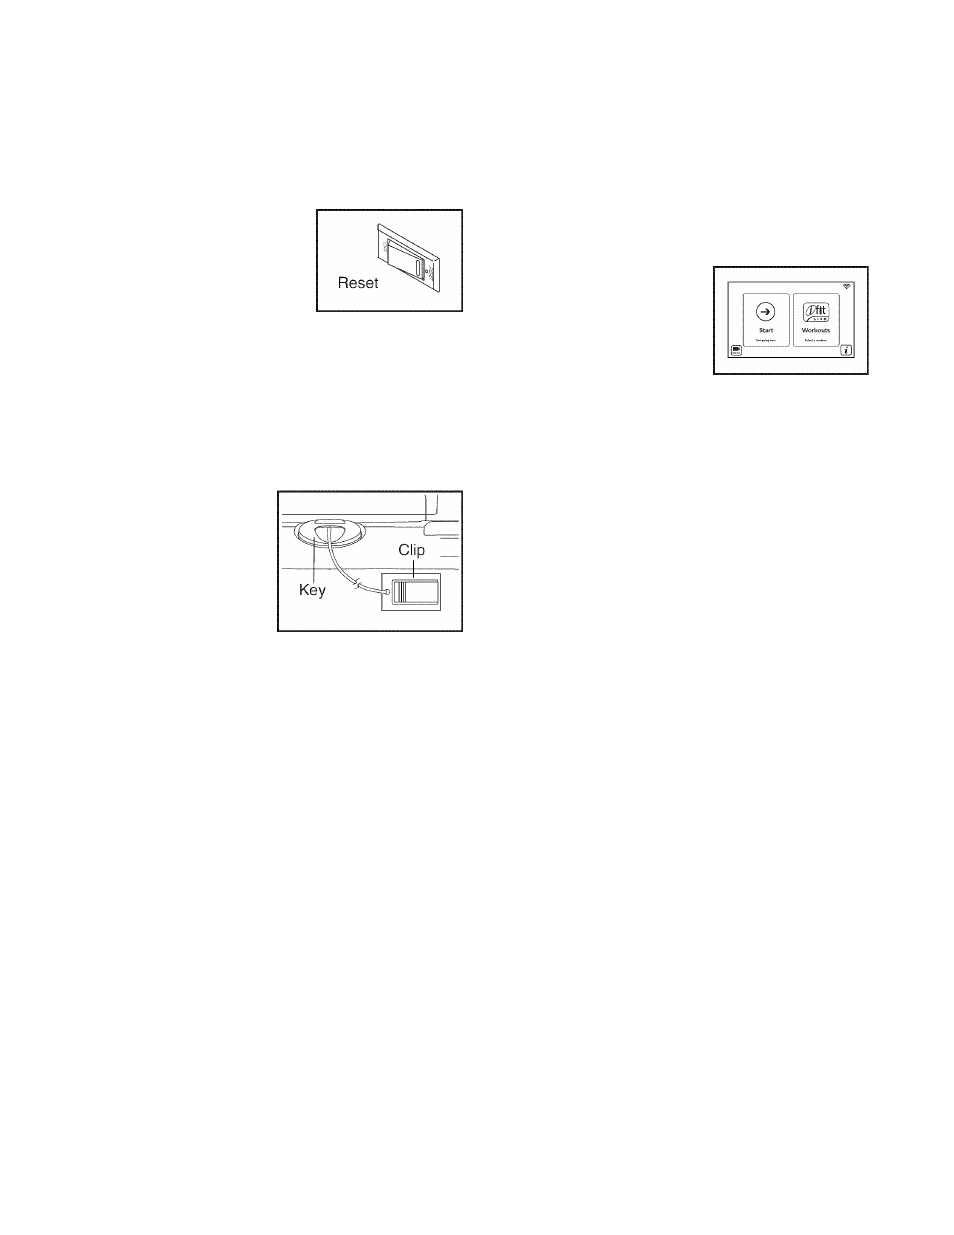
Plug in the power cord (see
page 14). Next, locate the
power switch on the treadmill
frame near the power cord.
Make sure that the switch is
in the reset position.
IMPORTANT: The console features a display demo
mode, designed to be used if the treadmili is dis
played in a store. If the demo mode is turned on,
the displays show a preset presentation after you
plug in the power cord and press the power switch
into the reset position, before you insert the key.
To turn off the demo mode, see step 5 on page 24.
Next, stand on the
walking platform of the
treadmill. Locate the
clip attached to the
key, and slide the clip
securely onto the
waistband of your
clothes. Then, insert
the key into the con
sole. After a moment, the displays will light. IMPOR
TANT: In an emergency, the key can be pulled from
the console, causing the walking beit to slow to a
stop. Test the clip by carefuiiy taking a few steps
backward; if the key is not pulled from the console,
adjust the position of the clip.
Before using the treadmill, please check for firmware
updates (see step 8 on page 26).
Note: The console may be able to display speed and
distance in either miles or kilometers. To find which
unit of measurement is selected, see step 4 on page
24. For simplicity, all instructions in this manual refer to
miles.
1. Insert the key into the console.
See HOW TO TURN ON THE POWER at the left.
If necessary, press the Incline buttons to adjust the
incline level to 0 percent. Note: It may take a
minute for the console to be ready for use.
2. Select the start menu.
Each time the key is in
serted, the start menu
will appear.
If the iFit login screen appears, press the Main
Menu button and then press the Back button to re
turn to the start menu.
If you have selected a workout or the iFit Live
mode, press the iFit Menu button in the upper right
corner of the screen. Next, press the End Workout
button and then press the Done button to return to
the start menu.
Note: A Demo button may appear in the lower left
corner of the screen. If you press the Demo button,
the treadmill will run a preset presentation.
3. Start the walking belt and adjust the speed.
To start the walking belt, press the Start button on
the screen or the Start button on the console. The
walking belt will begin to move at 1 mph. As you
exercise, change the speed of the walking belt as
desired by pressing the Speed increase and de
crease buttons. Each time you press one of the
buttons, the speed setting will change by 0.1 mph;
if you hold down the button, the speed setting will
change in increments of 0.5 mph.
16