To prepare for sewing – SINGER 404K User Manual
Page 19
Attention! The text in this document has been recognized automatically. To view the original document, you can use the "Original mode".
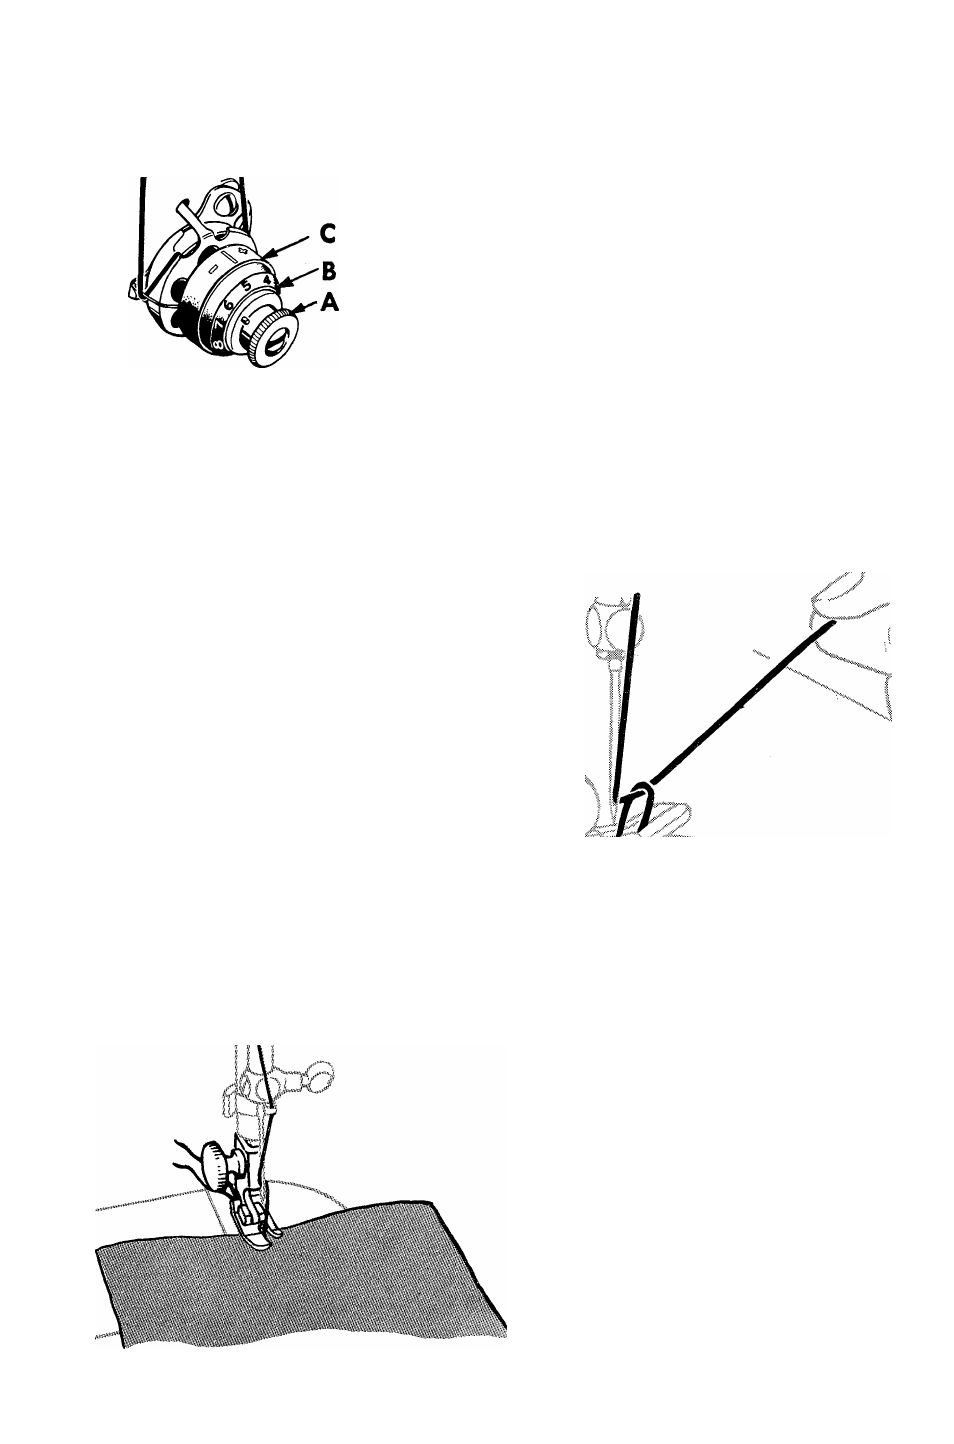
Machines 99K, 185K, 201K, 327K, 328K and 329K are furnished with a
tension indicator and flange (C and B, Fig. 38). The index flange (B) is
marked
with
numbers
0
to
9
indicating
the
different degrees of tension that can be produced.
By
noting
a
particular
number
opposite
the
white line when set for a satisfactory tension on
work being stitched, this number can be readily
reverted
to
when
changing
from
one
class
of
material
to
another.
The
higher
numbers
denote increased tension and the lower numbers
less
tension.
Notice
also
that
the
tension
indicator (C) is marked with the signs + and —
which indicate the direction to turn the thumb
nut (A) for more or less tension.
F
ig
. 38.
To Prepare for Sewing.
Pull sufficient thread through the needle and with the left hand hold the
end, leaving it slack from the hand to the needle. Turn the hand wheel
towards you until the needle moves
down and up again, thus catching
the under thread ; then, when the
take-up lever is at its highest point,
pull the end of the needle thread
you
are
holding
and
the
under
thread will be brought up with it
through
the
needle
hole
in
the
throat plate, as shown in Fig. 39.
Lay both ends of thread under and
to the back of the presser foot, and
having inserted the material to be
stitched, lower the presser bar lifter
and
commence
to
sew
by
turning
the hand wheel toward you.
NOTE.—Do not try to help
the feeding of the work by pulling
the material, as this may deflect
the needle and cause it to break.
The machine feeds without any
assistance.
1/
\
F
ig
. 39. P
ulling
U
p
U
nder
T
hread
.
The
edge
of
the
garment
to
be
stitched
should
be
placed
just
far enough under the presser foot
to allow the first stitch to be taken
in
the
material.
Never
place
the
material
so
that
the
first
stitch
will not be taken in it, as this
would cause the thread to become
entangled in the lower mechanism.
Always
lower
the
presser
foot
before starting to sew. See Fig. 40
for the proper starting of material
under the presser foot.
F
ig
.
40.
B
eginning
a
S
eam
.
19