Adjusting stitch length, Setting the dial, Reverse stitching – SINGER 6136 User Manual
Page 18: Needle thread tension
Attention! The text in this document has been recognized automatically. To view the original document, you can use the "Original mode".
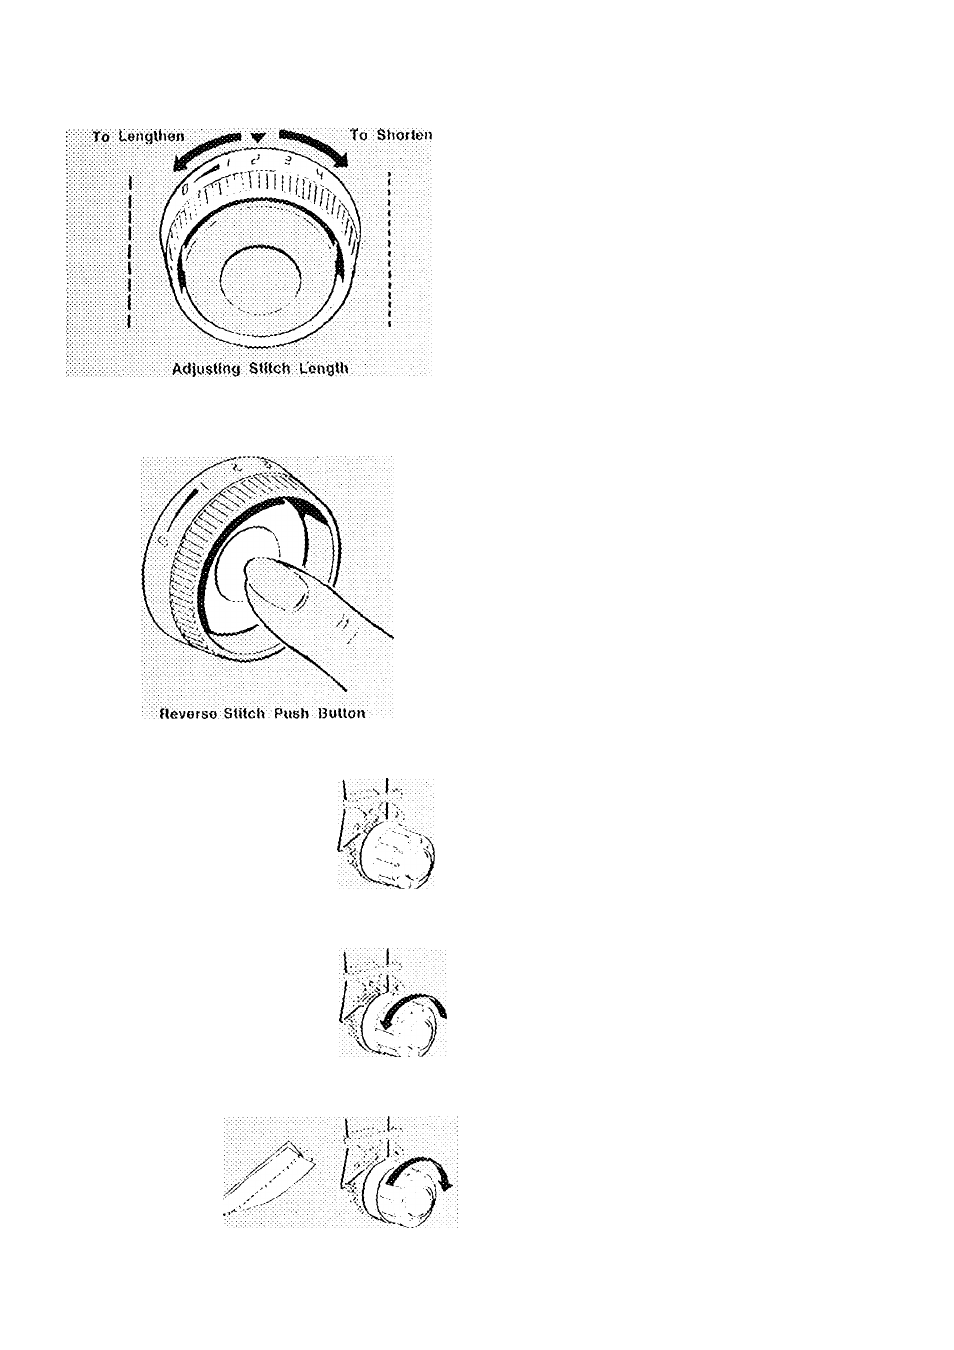
ADJUSTING STITCH LENGTH
The stitch length dial cofitrols the length of
stitches, ihe numbers around ttio edge of the
dial express stitch length in mm; the lower
the number, the shortor the .s'///c/i. Generally,
shorter stitches arc best for lightweight fabric;
longer stitches for heavy fabric. The area from
0 to 1 is used for the adjustment of ;rig'/.ag
satin stitclang {see page
Setting the Dial
• Turn dial so that stitch length desired is
positioned under V symbol.
• To shorten stitch length, turn dial clockwise
to a lower number.
• To lengthen stitch length, turii dial coufUer-
cloi^kwise to a hiolua' number.
REVERSE STITCHING
(•or reverse stitching, depress push button lo-
cated in (centre of dial, hold in until reverse
stitching is completed, then release push but
ton. Push button can be depressed while ma
chine is sowing.
Note: Peverse stitching cannot be done when
using a stretch stitch pattern.
,7 V
e
xT:;;;
NEEDLE THREAD TENSION
Correct tension is important because too much
or too little will weakiMi your seams or cause
your fabric to pucker. Make a tost sample with
the fabric and the thread you plan to use and
examine it. A well balanced stitch, as shovvri in
illustration A. will have the noecile and bobbin
threads locked bctwecii the two layers of fabric
with no loops on top or bottom and no puckers,
rho tension dial regulates the degree of tetv
Sion on your necKilo thread. Sol it according
to the type of thread and fabric you uso. The
numi)ers on the dial eliminate guesswork.
if the fabric puckers B. decrease tension, if
tho stitches in your tost sample look loose C.
increase needle thread tension.
® To decrease tension, turn dial to lower
iiumbor.
• To increase tension, turn dial to higher
number.
t/.