Changing presser feet, Removing and repiacing needie plate, Attaching snap-in feed cover – SINGER 8019 User Manual
Page 9: Removing and replacing needle plate
Attention! The text in this document has been recognized automatically. To view the original document, you can use the "Original mode".
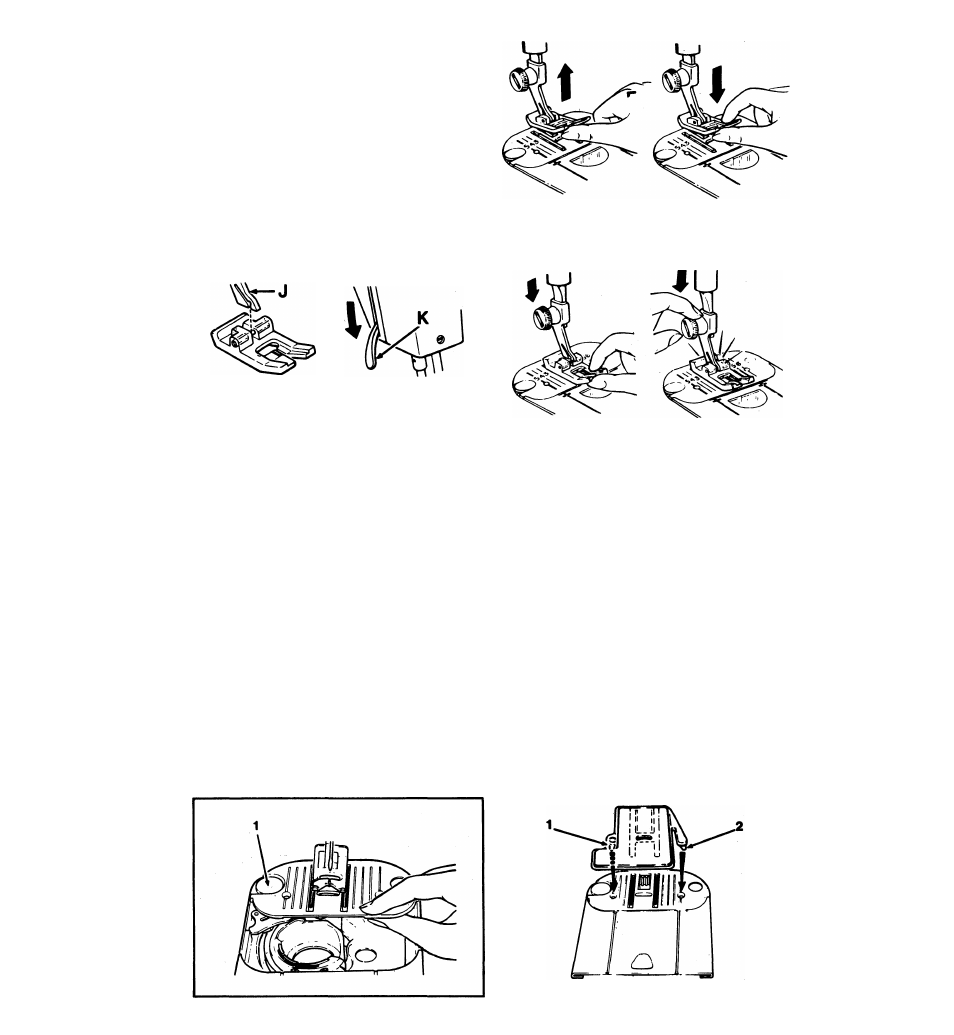
Changing Presser Feet
Most presser feet furnished with your machine
snap on and off a common shank.
e Raise needle and take-up lever to highest
position by turning hand wheel toward you.
• Raise presser foot.
To remove the complete presser foot (with
shank), of snap-on presser feet and one-
piece presser foot for button sewing, loosen
the presser foot screw and remove shank and
foot together.
1. Press toe of presser foot upward as far as it
will go. Then snap down to remove.
2. Center the new presser foot under the
shank J.
Lower the presser foot lifter K so that the
shank fits over the presser foot pin.
3. Press presser foot screw down firmly until
foot snaps into place.
Removing and Repiacing
Needie Plate
e Raise presser foot.
e Turn hand wheel toward you until the needle
is in its highest position.
• Open the slide plate. Lift needle plate up and to
the right until it snaps free.
• Insert new needle plate by placing it under the
clamping pin (1) push it gently to the left and
press down until it snaps into place.
a Close slide plate.
Attaching Snap-In
Feed Cover
• Raise needle to highest position by turning
hand wheel
toward you.
• Raise presser foot, open slide plate and in
sert zig-zag needle plate.
• Slide snap-in feed cover away from you over
needle plate until points (1) and (2) are positioned
directly over holes in needle plate as illustrated.
Snap in point (1). Then push (2) in toward point
(1) until it snaps into place. Close slide plate.
• To remove, open slide plate then simply lift
up front edge of feed cover, and remove.
Close slide plate.