Buttonhole length, Cutting button opening, Four-step buttonhoiing – SINGER 8019 User Manual
Page 43: Four-step buttonholing
Attention! The text in this document has been recognized automatically. To view the original document, you can use the "Original mode".
Buttonhole Length
A buttonhole length should be just long
enough to allow the button to slip through the
opening without stretching. You can esti
mate the proper buttonhole length by mea
suring the width plus the thickness of the
button. To make sure the measurements is
correct, cut a slit in a scrap of fabric the
diameter of the button you intend to use.
Increase length of opening until button slips
through easily. This test Is particularly ad
visable for buttons of unusual shape or
thickness.
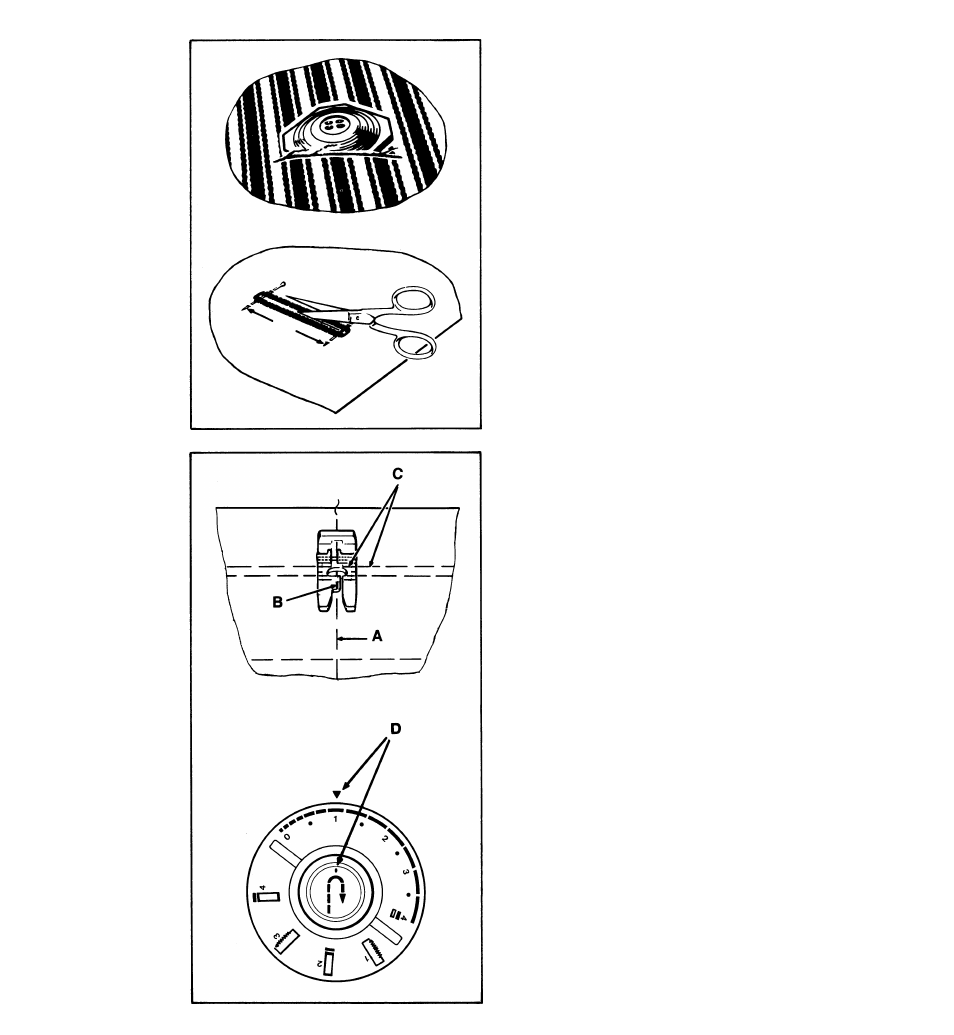
Cutting Button Opening
Place a pin across the cutting space at each
end of the buttonhole to protect the end
stitching. Use a pair of small sharp scissors to
cut button opening. Insert blade in center of
cutting space and cut from this point in either
direction.
Four-Step Buttonhoiing
(only 8007 and 8019)
The four dial settings for buttonholing are lo
cated on the opposite side of the stitch length
selector. As you turn the dial for each step,
your machine is automatically set for the cor
rect needle position, stitch width, and stitch
length, as well as for stitching direction for
that step. You need not turn the fabric during
buttonholing.
* •
• Pattern Group: ¡|f Yellow
• Buttonhole Foot
• Zig-Zag Needle Plate
Procedure:
• Follow the Instructions beginning on page
40 for preparing and marking the garment.
• Raise the needle above the fabric.
• Position the work under the buttonhole foot
aligning centre marking A of buttonhole
with centre red line B on the foot.
• Align end marking C of buttonhole with the
horizontal red lines on the foot.
• Set reverse-stitch push button in neutral
position D. Adjust if necessary to equalize
difference in stitch density between left and
right side of test buttonhole. Turn to page 43
for detailed instructions.
41