Regulating needle-thread tension, Setting stitch length, Setting stitch width – SINGER 8019 User Manual
Page 18
Attention! The text in this document has been recognized automatically. To view the original document, you can use the "Original mode".
Regulating Needle-Thread
Tension
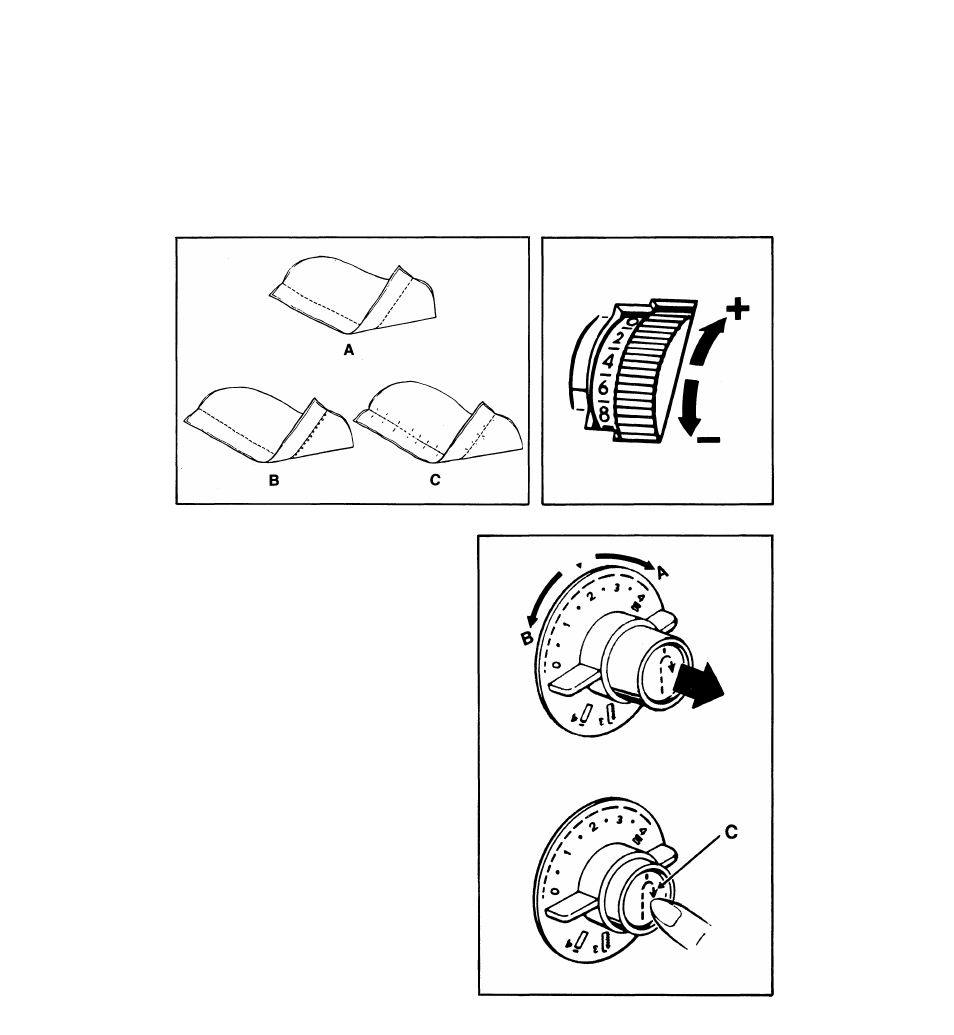
The needle-thread tension dial regulates the
amount of tension on the needle thread and
lets you select just the right setting for your
fabric and thread. The numbers on the dial
eliminate guesswork in duplicating settings.
Correct
A
tension is important because too
much or too little will weaken your seams or
mar the appearance of decorative work. To
determine the correct tension, make a test on
a sample of your fabric. If the stitches look
loose
B,
increase tension. If the fabric
puckers
C,
decrease tension.
(For instructions on adjusting zig-zag stitch tension,
see page 24.)
• To increase tension,
turn to higher number.
• To decrease tension,
turn to lower number.
Setting stitch Length
The stitch length selector dial controls the
length of both straight and zig-zag stitching.
The numerals from
1
to
4
represent the length
of each stitch in millimeters: the higher the
number, the longer the stitch. Generally,
shorter stitches are best for lightweight fabric,
longer ones for heavier fabric.
The area between 0 and 1 represents stitches less
than 1 mm long, and is used for closed zig-zag or
satin stitching.
• To shorten stitch iength,
turn dial clockwise
A
to a lower number.
• To lengthen stitch iength,
turn dial coun
terclockwise
B
to a higher number.
For reverse stitching,
depress push button
C
located in center of dial, hold in until reverse
stitching is completed, then release push but
ton. Push button can be depressed while
machine is sewing.
Note:
Reverse stitching cannot be done
when using a
Flexi-Stitch*
pattern
16