How to adjust thread tensions – SINGER 14U52 User Manual
Page 25
Attention! The text in this document has been recognized automatically. To view the original document, you can use the "Original mode".
3. How to adjust thread tensions
(1) 1-needle 3-thread
• Standard rolled hem stitching
Tension Dial
Blue
Green
Orange
Yellow
1.0
2.0
2.0
Right looper thread wrapped rolled hem stitching (rolled hem variation).
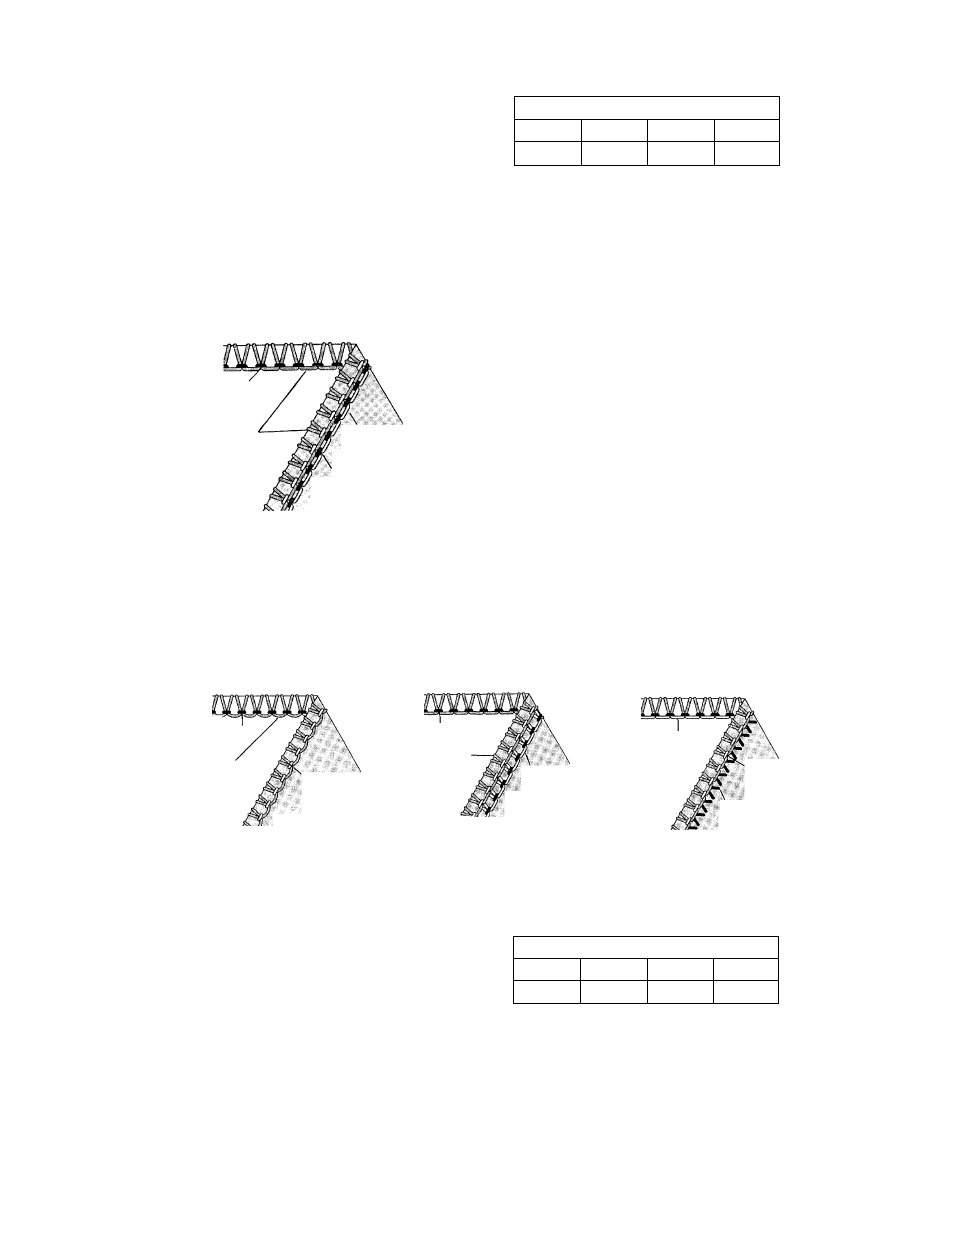
• Correct thread tension
Needle thread
(green dial)
Right looper
thread
(orange dial)
Topside
Left looper thread
(yellow dial)
Needle thread
(green dial)
Underside
A beautiful seam can be obtained on hard-to-
roll lightweight fabrics by this method of
stitching.
To correctly adjust the thread tension, set the dials as follows from the standard thread tension dial sett
ings.
a. Turn the right looper thread tension dial (orange) one half graduation toward the (—) mark.
b. Turn the left looper thread tension dial (yellow) 3 graduations toward the (+) mark.
Slight adjustment will give better thread tensions.
When right looper thread
is too loose
Needle thread
Right looper
thread
Topside
Left looper
thread
Underside
Turn right looper thread tension
dial (orange) toward the (+)
mark.
When left looper thread
is too loose
Needle thread
Right looper
thread
Topside
Left looper
thread
*Uhderside
Turn left looper thread tension
dial (yellow) toward the (+)
mark.
Or, turn right looper thread ten
sion dial (orange) toward the
(—) mark.
When needle thread
too loose
Right looper
thread
Topside
Left looper
thread
Needle thread
Underside
Turn needle thread tension dial
(green) toward the (-I-) mark.
(2) 1-needle 2-thread
• Standard rolled hem stitching
Tension Dial
Blue
Green
Orange
Yellow
1.0
Spreader
3.0
23