SINGER 14U52 User Manual
Page 22
Attention! The text in this document has been recognized automatically. To view the original document, you can use the "Original mode".
9. How to sew four-thread ultra-stretch mock safety stitch
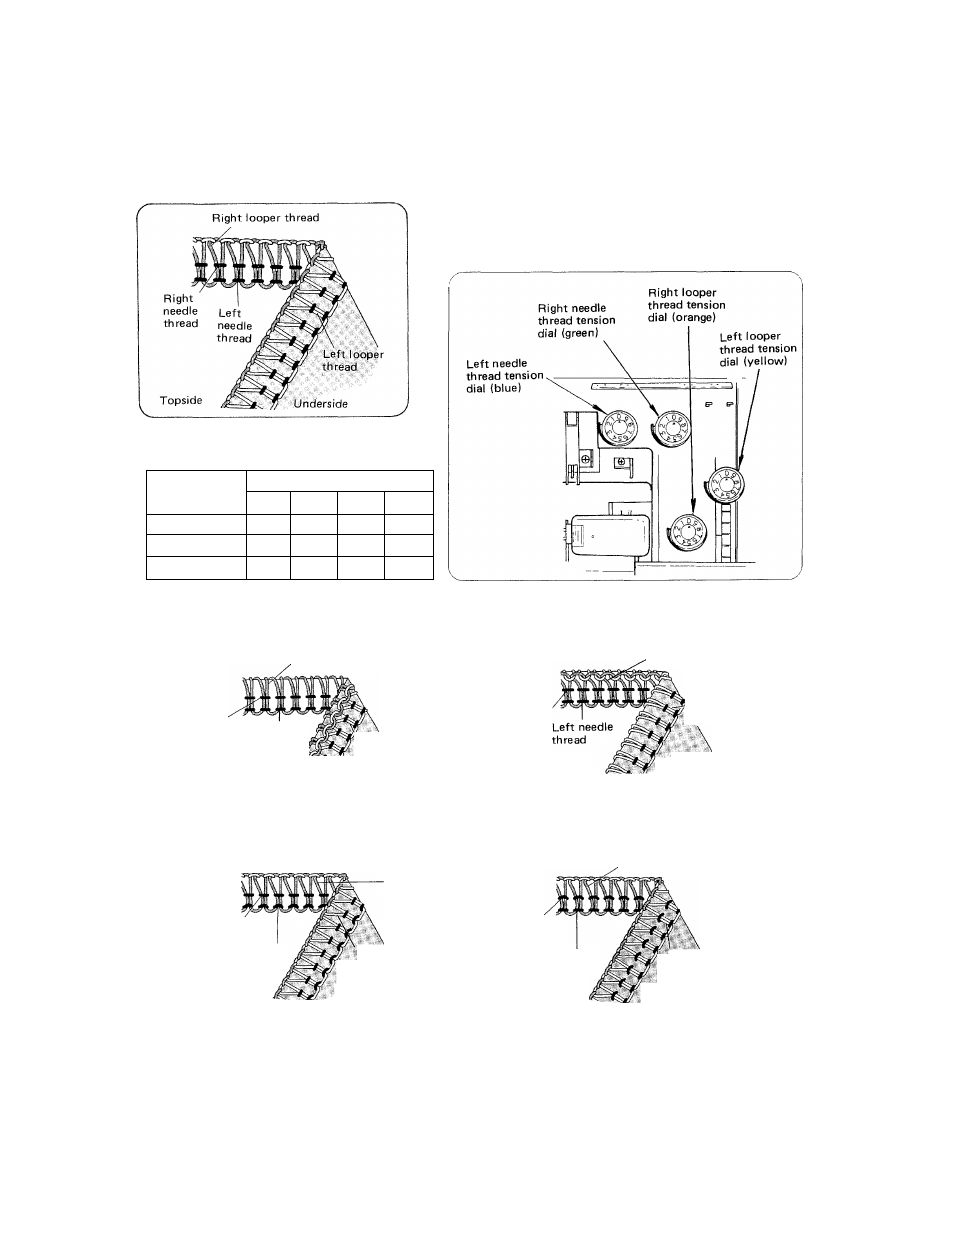
The 4-thread ultra-stretch is sewn with two needles and two loopers.
(1) Thread right looper (orange path) (see page 15)
(2) Thread left looper (yellow) (see page 11)
(3) Thread right needle (green path)
]
(4) Thread left needle (blue path)
j
(5) Correct thread tensions for 4-thread ultra-stretch
(see page 12)
Be sure the threads are correctly threaded otherwise
proper tension cannot be obtained.
Set each tension dial to settings shown below
and test sew on a sample of your fabric.
Fabric
Tension Dial
Blue
Green Orange Y ellow
Light weight
1.5
1.5
1.0
1.5
Medium weight
2.0
1.5
1.5
1.5
Heavy weight
2.5
2.0
2.0
1.5
Adjust thread' tensions to suit your fabric making reference to table below. Make adjustments in
increments of no greater than half a number at a time.
When right looper thread lies on the underside
of fabric.
Right looper thread
Right needle
thread
Left needle
thread
\ Left looper
thread
Topside
Underside
Turn right looper thread tension dial (orange)
toward the (+) mark.
Or, turn left looper thread tension dial
(yellow) toward the (—) mark.
When left looper thread appears on the top.
Rightlooper thread
Right needle
thread
X Left looper
\ th read
Underside
Topside
Trun left looper thread tension dial (yellow)
toward the (+) mark.
Or, turn right looper thread tension dial
(orange) toward the (—) mark.
When left needle thread tension is too loose.
Rightlooper
thread
Right needle
thread
Left needle
thread
Topside
When right needle thread tension is too loose.
Rightlooper thread
Right needle
thread
Left looper
thread
Underside
Left needle
thread
Topside
Left looper
thread
Underside
Turn left needle thread tension dial (blue)
toward the (+) mark.
Turn right needle thread tension dial (green)
toward the (+) mark.
20