SINGER 513 Stylist User Manual
Page 46
Attention! The text in this document has been recognized automatically. To view the original document, you can use the "Original mode".
CONSTRUCTION DETAILS (Continued)
BLIWDSTITOH hlEMS
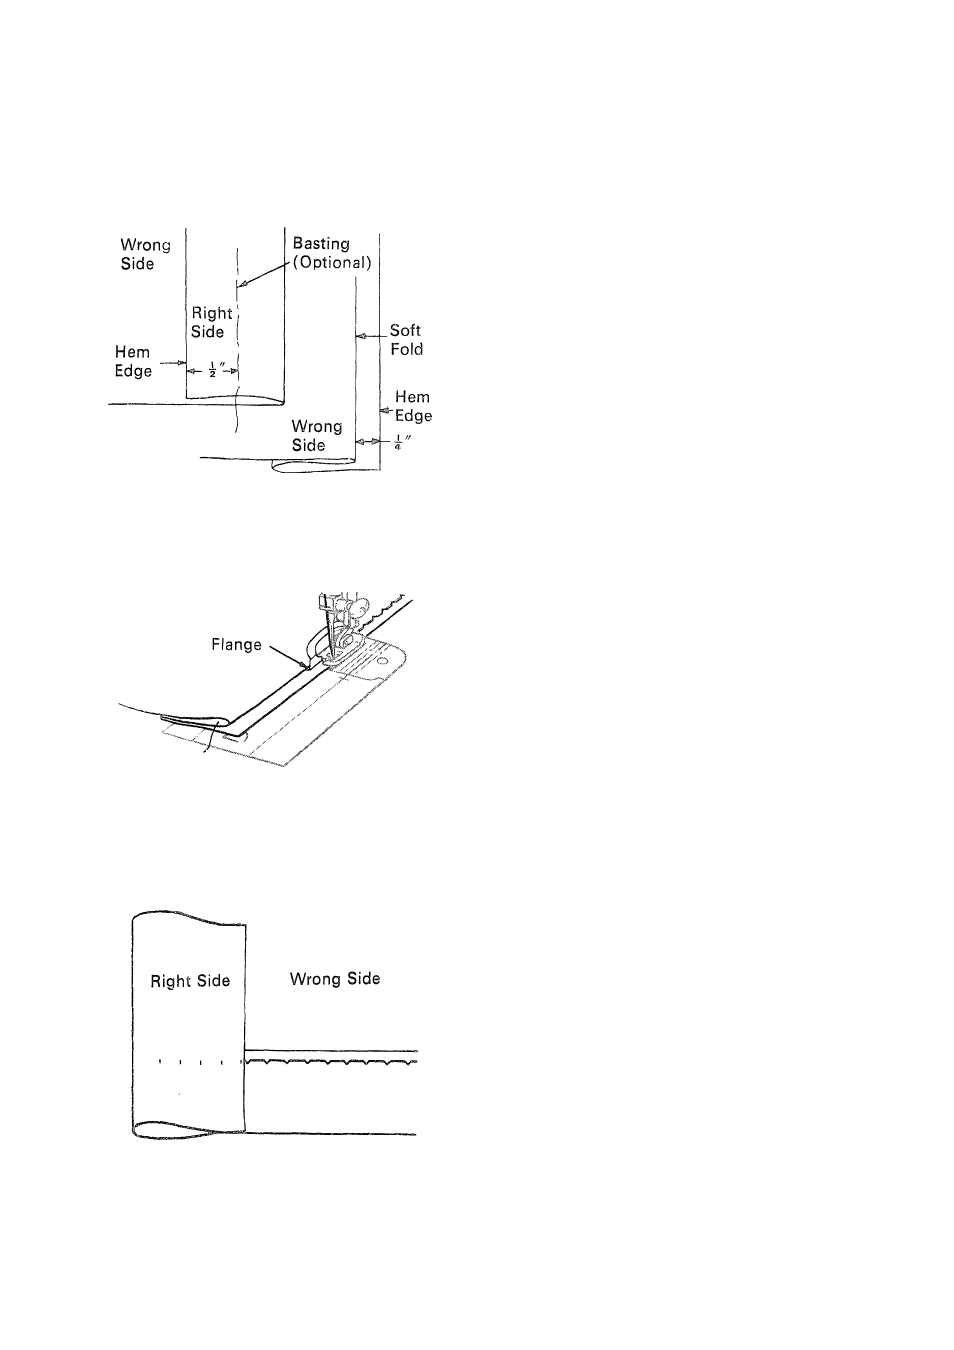
Creating Soft Fold
Blindstitching Hem
Biindstitcii Hem Completed
Flexi-Stitch Dial: O (Off)
Pattern Selector:
(blindstitch)
Needle Position: J or^
Stitch Width : I to ^
Stitch Length: 10-20
General-Purpose Needle Plate and Foot
Blindstitch Hem Guide
Blindstitching provides a durable hem
finish that can be used on a variety of
light and medium weight fabrics, ft is best
suited to straight hems. Taped, bound,
turned, or unfinished hem edges can be
blindstitched with equal ease. Blind-
stitching takes a little practice, however,
so make a test sample first.
1. Attach blindstitch hem guide as in-
Instructed on page 6.
2. Mark, turn, and press hem in the usual
way. (You may want to baste the
turned hem to hold it in place. If so,
be sure to place the basting at least
i inch from hem edge.)
3. With the work wrong side up, turn the
hem under, creating a soft fold about
i inch from hem edge. Press lightly.
4. Position the hem under the foot with
the soft fold resting against wall of
guide. Make sure flange of guide is
between the soft fold and top of hem.
5. Lower the presser foot and stitch so
that the straight stitches fall on the
hem edge and the sideward stitches
pierce the soft fold. While stitching,
guide hem edge in a straight line and
feed the soft fold evenly against the
wall of the hem guide.
44