Samples of creative embroidery, Samples of embroidery – SINGER W167 User Manual
Page 17
Attention! The text in this document has been recognized automatically. To view the original document, you can use the "Original mode".
Adjusting the stitch width
, , o
i on ^ u lu ■
To stitch continuously at one width of zigzag stitching set lock d rig. idc i to hold zigzat
lover at width chosen. Should you wish to move freely between any two widths, in doing fr&
hiind embroidery, move zigzag width lever to the right and set left hand stop at desired width
Then move lever to the left and set the right hand stop. To move stops, press with thumb ant
move to selected position.
iSmbroidery Patterns
■ .v
With the machine set for a short stitch length, different designs can be made by swinging thi
stitch width or zigzag lever back and forth between 0 and 4 or any other combination of widths
Try setting the locks at 1 and 4, 2 and 3, etc. Set a rhythm for yourself and
proceed
After a while you will become quite skillful, varyinq your desiqns by the speed of the machine
stitch length and width end the manipulation of the lever;
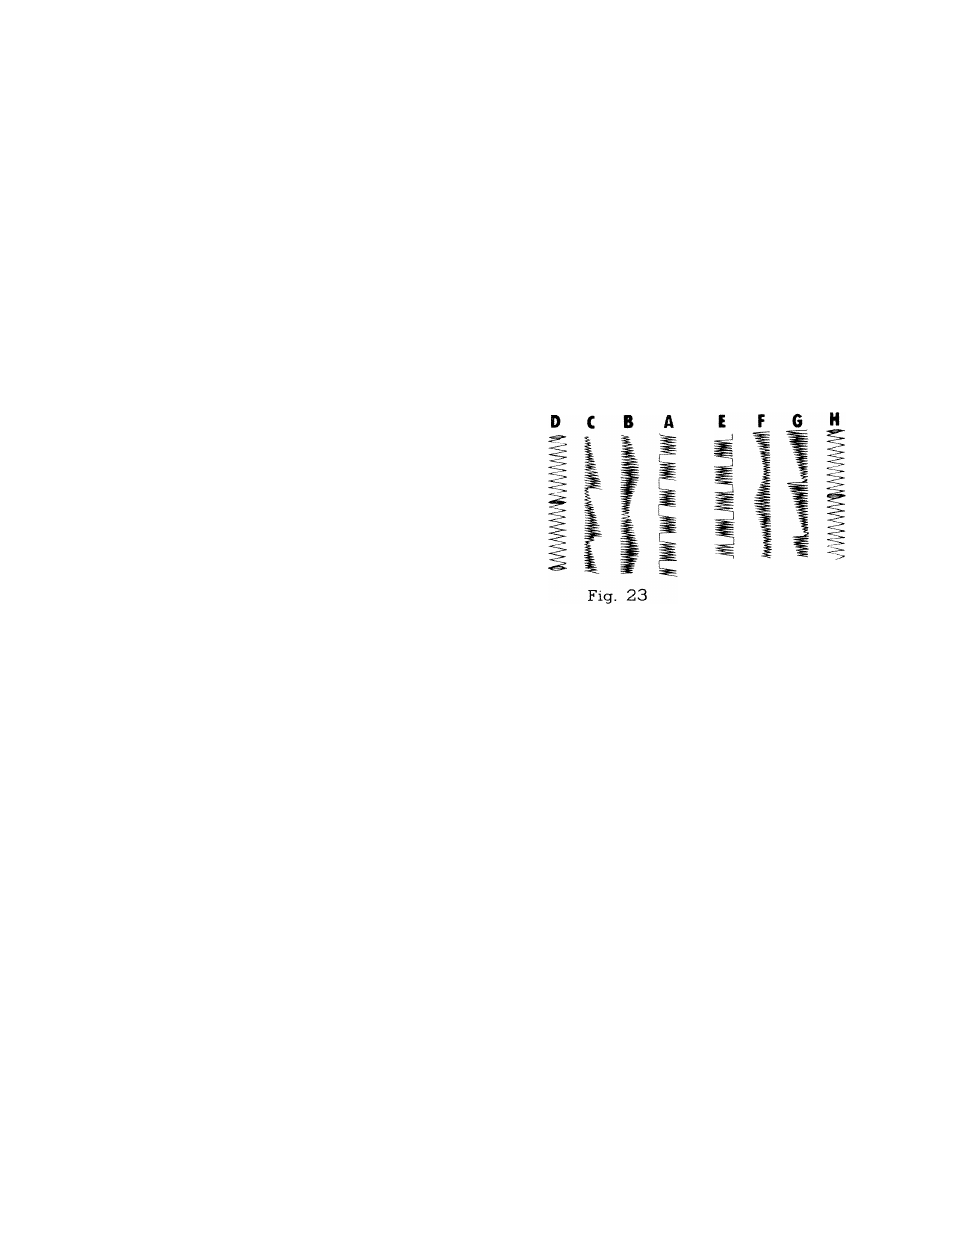
SAMPLES OF CREATIVE EMBROIDERY
You can sew the patterns A, B, C and D when you set the button hole change lever 23 Fig
1
at M position. When you set the lever at red point position beside the first step for button
hole, you get E, F, G and H patterns by operating stitch width lever back and forth between C
and 4.
A & E Sew a few stitches at 4 width, then quickly
move lever back to 0 for a short period.
Count, if necessary, to establish a rhythm.
13 & F Set stops at 2 and 4, then move lever slowly
between
settings,
operating
machine
rather
fast.
C & G Set stops at 1 and 4. Gradually move lever
from 1 to 4, then snap it back quickly to 1.
D & H Set both stops at 4, stitch length at IT's- Do
a few zigzag stitches, drop feed for 3 or 4
stitches then raise it again. By operating the
drop feed knob rhythmically it is not neces
sary to count stitches.
Fig. 24