Zigzag stitching – SINGER W2134 User Manual
Page 14
Attention! The text in this document has been recognized automatically. To view the original document, you can use the "Original mode".
=* -I- -r-
__ ___ __
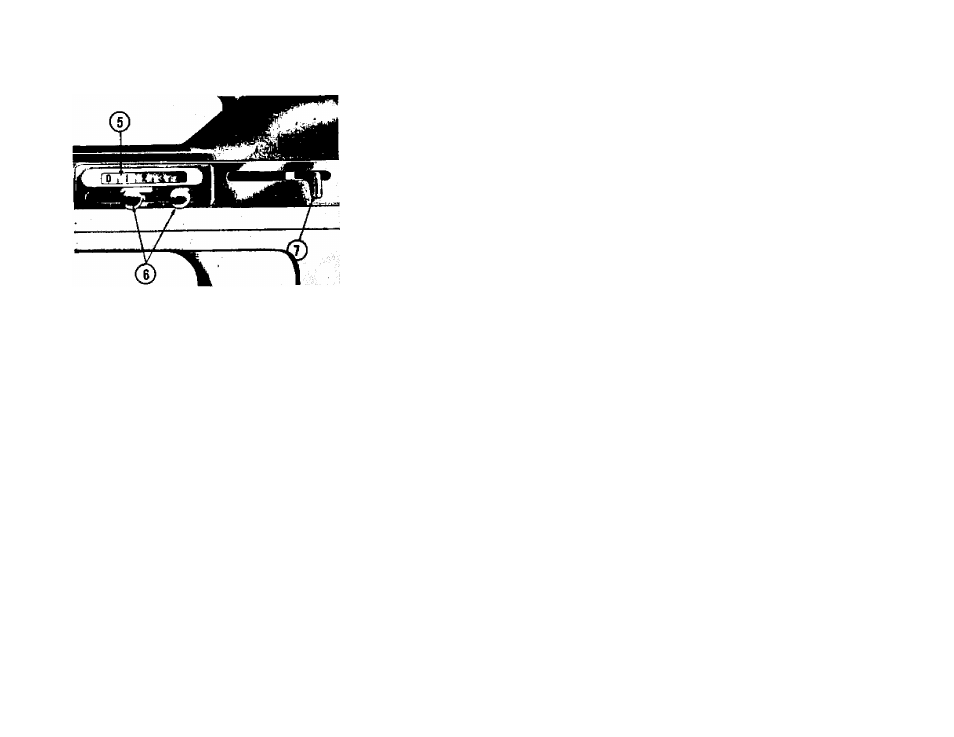
ZIGZAG STITCHING
Setting
the
Stitch
Width
and
Locks.
Move
zigzag
lever
7,
Fig.
22,
clear
over
to
right
edge
oi
its
channel.
Pull
left
stop,
6
,
out
slightly
and
slide
it
to
the
right
until
the
black
pointer
on
the
lower
part
of
indicator,
5,
is
under
the
width
required.
Then
move
Pig.
2 2
lever,
7
, back to the left until it forces left
lock to snap into its groove. The red pointer on the upper part of the indicator is
then above the number stitch width required.
To set the right stitch width lock, move lever to the left and slide the lock toward
the right to the width required. Move lever back to snap lock into its groove.
When the left and right locks are set at two different widths the zigzag lever can
be moved freely between the two settings.
Hit
» ^
(. '
4' '
"
^ '
r
Ctfs* r
G i
r
C- I
i|:
I
:
C«'
■
^ :
^ I
№■
t,'
C.' .
k
c- .
18