Darning stitch, Use four direction sewing for free-arm sewing, Select pattern no.94 begin sewing and – SINGER XL1 Quantum User Manual
Page 38
Attention! The text in this document has been recognized automatically. To view the original document, you can use the "Original mode".
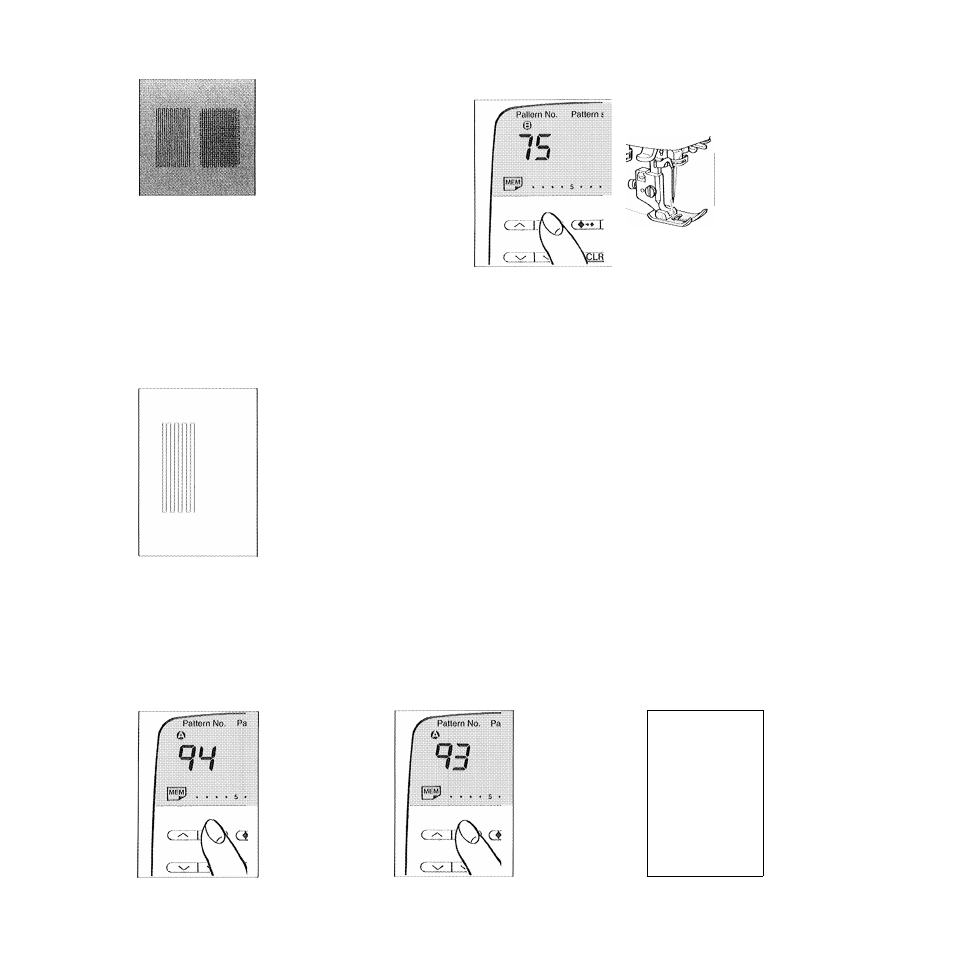
Darning Stitch
I
Push pattern panel to
side B.
Select the pattern No.
Patterns on B side
75 pattern No.
Select pattern No. 75 from
patterns on B side.
* See pages 30 & 31 for how to balance the shape of a pattern.
Begin sewing.
To sew 8 wider darning stitch, begin sewing after
the needle entry position has been set so that the
pattern can be continued after the previously
5
stitched pattern.
Needle entry •
\ position I
’"11--
H
n
Starling position
/
The machine will stop automatically
when the sewing of one pattern is
complete.
3
Attach the decorative
stitch foot
(T).
Siitch foot symbol
:.T„
Decorative stitch foot (T)
Use four direction sewing for free-arm sewing.
Select pattern No.94 Begin sewing and
I
from the patterns on n stop at the desired
A side.
£
point.
Select pattern No.93
3
from the patterns on
A side.
Begin sewing and
stop at the desired
point.
Sew as illustrated
1
« in the Fig. 1 and
3
Fig. 3 alternately.
A part is fed manually.
l i m i ]
i X
i i i. i
% i M i M
i i V i i i ¥ i
’ < i i n • i
f • U 4 i ' f f » * j
1 4 i i i : J 1 n 4 i
4 ' i i i ! 4 . i > i
4 4 4 i i : 4 : : # i 4
i 4 4 i < : 4 : ¡fit
i i i 1 1 Ä i
? % i i t ¥ Ä i
% i ¥ t % Ä i
¥ i i
> i . ¥ ¥ i i
^ i ! i i i i
4 :4 4 4 :4 : 4 4 4
4 4! 4 4 4 i 4 4 : 4 : 4 4 4
4 4 4 4 4 : 4 4 4 4 4
4 4 4 4 4 : 4 : Ì 4 4 4
4 4 4 ;4 .4 4i 4 4 : 4 : 4 4
4 ^ j > 4 4 . w > 4
i 4 i 4 S ? i 4 4 i 4 I
4 > 4 : : 4 4 4 4 4 4
i • i > : i i
4 4 4 i i 4 4 4 4 4 4
4 4 4 4 4 4 4 4 4 4 4 4
Set right direction cross-feed.
Set left direction cross-feed.
36