Select, Begin sewing, Adjust the sewing speed – SINGER XL1 Quantum User Manual
Page 18: Cut the thread, Lift the presser foot and remove the material
Attention! The text in this document has been recognized automatically. To view the original document, you can use the "Original mode".
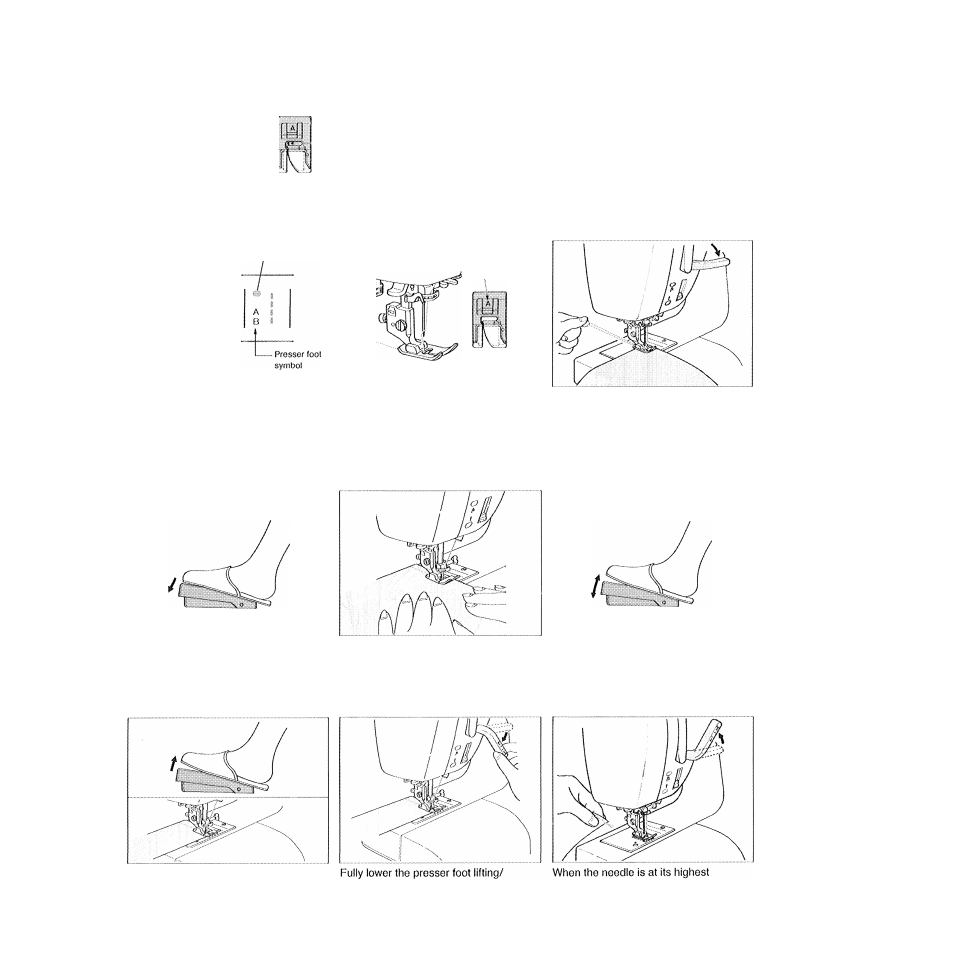
straight stitch
„,L„
When the power switch is turned on, the straight stitch is automatically selected and the needle will
be in position at the left of the pressor foot (A).
To move the needle position use patterns 80, 81 on B side of pattern display panel.
Needle entry position
(left needle position)
Stitch produced in
automatic setting.
The straight stitch is
the basic stitch.
Select
a stitch pattern.
{ndicator light
Begin sewing.
7
Stop sewing.
2
Make sure that the presser foot
is correct.
3
Set the material, and lower the
presser foot.
Presser foot
symbot
Standard presser foot A
Use the presser loot bearing the symbol
indicated on the instant pattern button,
*See page 10 for how to attach the
presser foot.
Ig Lightly hold the material with
3 your hands.
Place the material under the pressor
foot so the needle will enter the sewing
start point of the material. Pull both the
upper and bobbin threads to the rear of
the machine and lower the presser foot.
6
Adjust the sewing speed.
Be careful not to apply excessive pulling
force to the material while sewing.
Cut the thread.
g
(For the automatic thread cutter
see page 18.)
9
Lift the presser foot and remove
the material.
thread cutter lever until the needle
moves. This will cause the upper and
bobbin threads to be cut at the same
time.
position, raise the presser foot lifting/
thread cutter lever and remove the
fabric.
16