Stitch length control, Stltc¡’j sslsctor – SINGER W ET 10 User Manual
Page 18
Attention! The text in this document has been recognized automatically. To view the original document, you can use the "Original mode".
STlTC¡’j SSLSCTOR
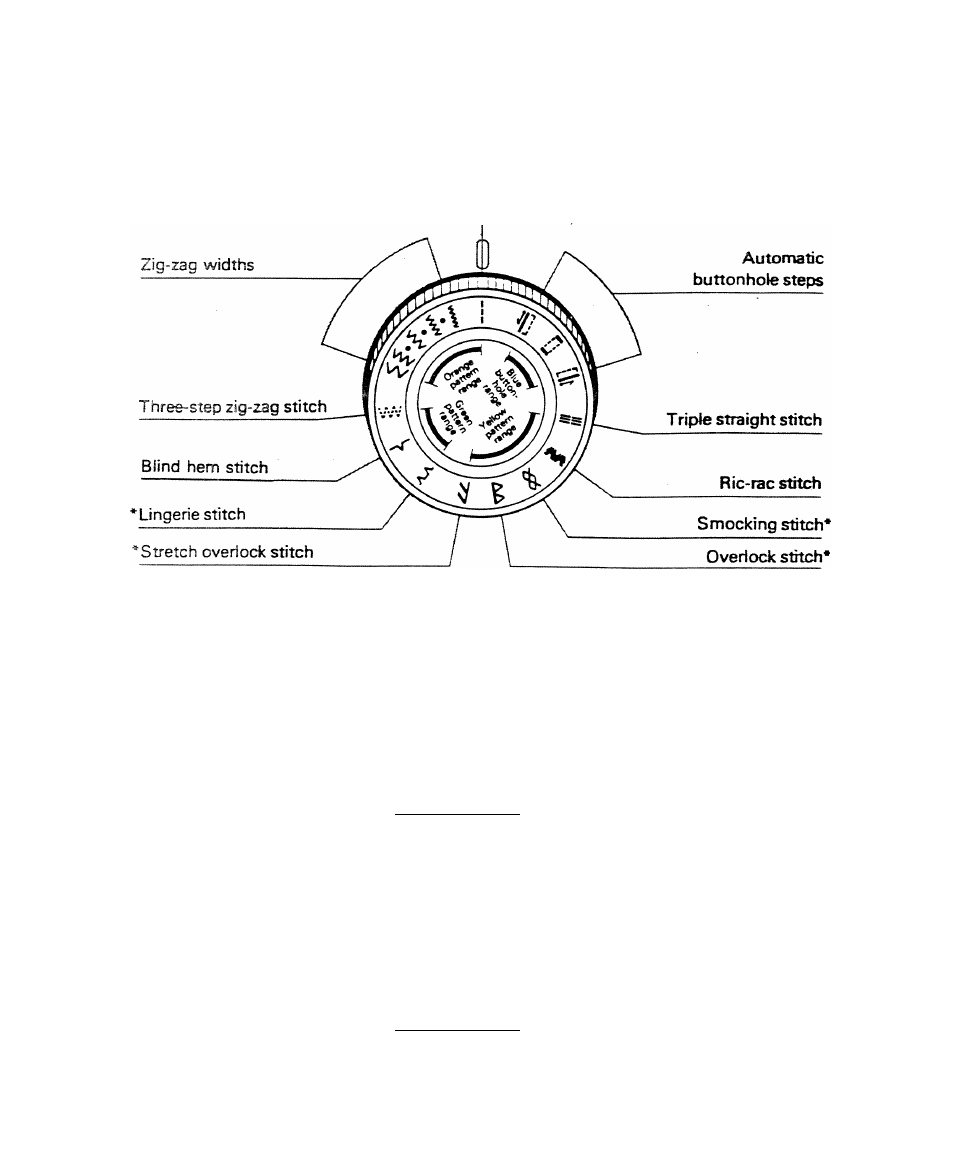
Your sewing machine can sew a variety of
stitches, and these are shown on the Stitch
Selector Dial’. In addtion, there are three
buTtonhoie Slaps pictured on the dial also.
NOTE: Beginning on page 19, you will find
detailed instructions on the use of
each stitch.
Straight stitch
STITCH LENGTH CONTROL
To lengthen a stitch, turn the dial towards
you. To shorten a stitch, you turn the dial
away from you. THE HIGHER THE NUMBER-
THE LONGER THE STITCH.
NOTE; Study the orange, green, yellow and
blue sections on this control. These
are recommended ranges of stitch
•Model ET-10 only.
length
and
colour-coded
to
the
stitches pictured on the • Stitch
Selector.
The orange line between 0 and
1
is the sening
used for the shonest stitches such as in satin
stitch.
Orange zone
— Straight stitch
1
1
j
Zig-zag stitch
M'M$
I Green zone
— Three-step zig-zag
stitch
5: . .
BBnd tern stitch
* Lingerie stitch
J ■
Yellow zone
— Ric-tac stitch .
1 .
Triple straight stitch
■
■
* Stretch overlock stitch
li
* Overlook stitch
* Smocking stitch
s
Blue zone
— Buttonhole stitch
a fl
16
* Model ET-10 only.