Sectioiv: 3. leaf n the st:tches, Zigzag stitches (continued), Set the machine – Sears 385.17724 User Manual
Page 37
Attention! The text in this document has been recognized automatically. To view the original document, you can use the "Original mode".
SECTIOiv: 3.
LEAF N THE ST:TCHES
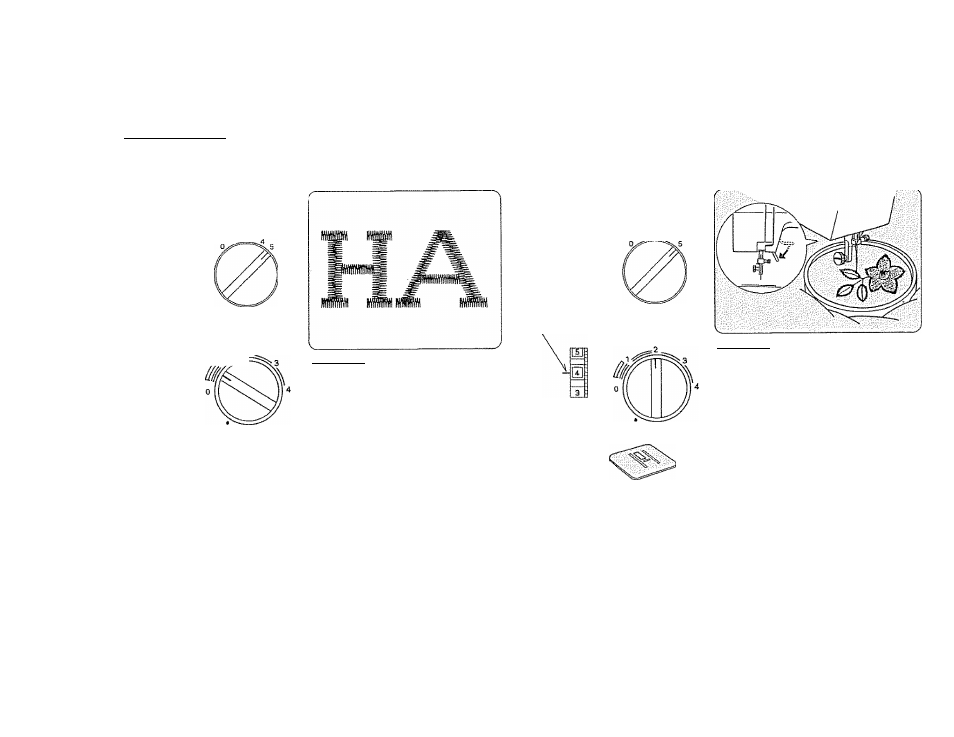
Zigzag Stitches (Continued)
B Monogrammi ng
B Embroidery
Set the Machine
Stitch width
control 5
2 3
Top thread tension
control 2 to 6
PI
Stitch length
control 0.5 to 1
Stretch Stitch
F ‘ Satm stitch
foot
Here's How
1. Set the same as satin stitch.
2.
Back the fabric with paper or
interfacing.
3.
Draw the letters on the fabric
with tailor’s chalk.
4.
Satin stitch, adjusting the stitch
width as necessary to form each
pattern.
5.
If using paper, carefully remove it
when you have finished sewing.
Set the Machine
Stitch width
control 1 to 5
1 J-i
Top thread tension
control 2 to 6
Stitch length control
Any number (not
necessary to adjust}
No presser
foot
Stretch Stitch
Darning plate
Here's How
1.
Put the darning plate on the needle
plate (see page 29).
2.
Remove foot holder (see page 1_0).
3.
Adjust the stitch width as desired
(see page 21).
4.
Draw
the design on to the fabric
With tailor's chalk.
5.
Stretch the, fabric between embroi
dery hoops and place under the
needle,
6.
Lower the presser foot lever to
engage the top thread tension.
7.
Holding the top thread in your left
hand, rotate the hand wheel toward
you one complete turn.
Pull the top thread to draw the
bobbin thread through to the surface
of the fabric.
8.
Using a medium speed, stitch along
the
marked
outline,
guiding
the
fabric carefully by hand.
34