Section 2. prepare your machine for sewing, Stitch selector – Sears 385.17724 User Manual
Page 23
Attention! The text in this document has been recognized automatically. To view the original document, you can use the "Original mode".
SECTION 2. PREPARE YOUR MACHiNE FOR SEWING
Stitch Selector
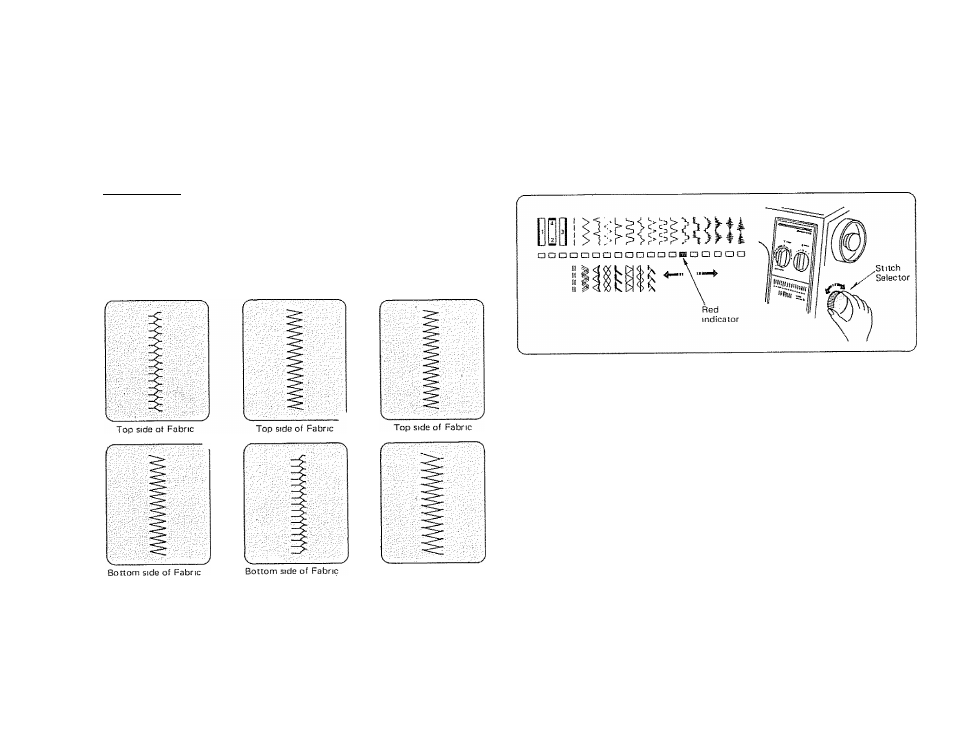
For Zigzag Stitch
In the correct zigzag stitch, the bobbin threads will not show on the top side
of fabric and the top threads will show slightly on the bottom side. See
below for the correct appearance. To match this appearance, adjust your top
tension.
Top tension
Too Tight
Too Tight:
Comer
oi
each
zigzag
will
puli
together
on
the
top side of fabrics.
Top tension
Too Loose
■N
Too Loose;
The
lop
thread
will loop through
bottom
side
oi
labric and will be
pulled
almost
togslher.
Just Right
J
Bottom side oi Fabric
Just Right;
Minimize
the
amount
oi lop thread visible on
the
bottom
side
ol
tabnc without causing
excessive puckering or
causing
the
bobbin
thread to show on the
top side. Results vary
with tabnc, thread and
sewing conditions.
The stitch selector control determines the stitch you select.
Simply turn this control until the desired stitch is indicated by the red indicator
on the stitch indicator panel. The bottom row of stitches is selected when the
stitch length control is set at the stretch stitch position.
NOTE. To avoid needle or fabric damage, be sure your needle is up and out of
fabric when selecting a stitch.
Stitch patterns are color-coded to recommend setting zones at the stitch lengtli
control.
ZONES
o Orange .
e Green , .
e Blue - . .
o Yellow .
Straight, Zigzag and Utility Stitches
Geometric Decorative Stitches
Built-in Buttonhole Making
Stretch Stitches
20