Proper operating procedures, Lubrication, Standard saw operations – Sears 113.29003 User Manual
Page 13: Note
Attention! The text in this document has been recognized automatically. To view the original document, you can use the "Original mode".
6.
foilghteti oil h«K head sa-avo and
holcktewn
screw. (Do noJ ollow occenirk bushing to rotate when
fightentng.)
7. Correct adjostroenf exisfs when there it no ploy between
the cafrioge and radial am), ond yet the carriage moves
freely. After adjustment is completed snugly %ht«n the
Iwo adjusting set Krews.
Caution: Do
not
avortightm.
8. Reploee corriage cover and lock knob assembly.
PROPER OPERATING PROCEDURES
DRESS PROPERIY — Operation of the sow is simple, safe
and easy—when properly done. Always be alert. Do not
wear a fie or other loose articles. Keep long sleeves down
with cuffs fastened or wear short sleeves, NEVER STOP
BEING CAREFUL One moment of inattention can cost you
a painful injury.
AVOID AWKWARD HAND POSITIONS —Do not get
hands info
a
position in which o sudden slip con couse them
to move into the sow blade. NEVER OPERATE THE SAW
WITH THE ARMS IN A CROSSED POSITION. Never hold
work on right side of blade with left hand while pulling sow
with the right hand. Do not ottempt free-hand cross-cutting.
Use o push stick when bond gets too close to the btode in o
ripping position.
- Twisting work will bind blade ond
NEVER TWIST WORK
cause
a
kickback.
Safety Pracaitihn
The motor is shipped with a shoft cap (Item 21,
figure 4) threaded onto the stub end of the motor
shaft. When this shoft end of the motor Is not being
used, this cop should olways be In place.
LUBRICATION
Your sow is
0 fine mochine and should be given the best of
core. If kept cleon ond properly lubricated, it will give шопу
yeors of trouble-free service. Before describing the various
points which may periodicolly require lubrication, ГГ IS
MORE IMPORTANT TO FIRST MENTION THE VARIOUS
SPOTS WHICH SHOULD NOT BE tUBRICATED.
NO LUBRICATION REQUIRED
Do not lubricate ony bolt races or any ball bearings.
Do not lubricate bearing fH of bevel Index handle (Hem 52,
figure 3) in yoke.
Do not lubricate the motor bearings. These ore sealed boll
bearings and require no added lubrication.
Do not lubricate bevel lortch pin (Item 31, figure 3) in yoke.
Do not lubricóte between radial arm cap fltem 12, figure 1)
and radial arm.
PERIODICALLY LUBRICATE THESE POINTS
Use SAE No. 10-30 Auto Engine Oil.
Apply o few drops of oil along the swive! latch pin (Item 6,
figure 3) only if the pin has o tendency to stick. Remove the
left-hand corrioge cover and use oil sparingly to prevent it
from getting on the ball bearings or races.
A light film of oil can be wiped on the lote of the column
tobe (Item 15, %ure 1) and keyway to lubricóte the fit
between this port and the key and column support (Items
21 and 19, figure
2).
Apply a few drops of oil to the bearing surfaces of the
olevotion crank shaft assembly (Item 29, figure 2), An oiling
hole is provided in the elevation shoft bearing brocket 0tem
23, figure 2) to facilitate the lubrication of the reor bearing
support.
The thread on the elevation shaft assembly (Item 30, figure
2}
con be lubricated through the oiling hols in the center
of the fodto! orm cop (Item 12, figure 1}.
STANDARD SAW OPERATIONS
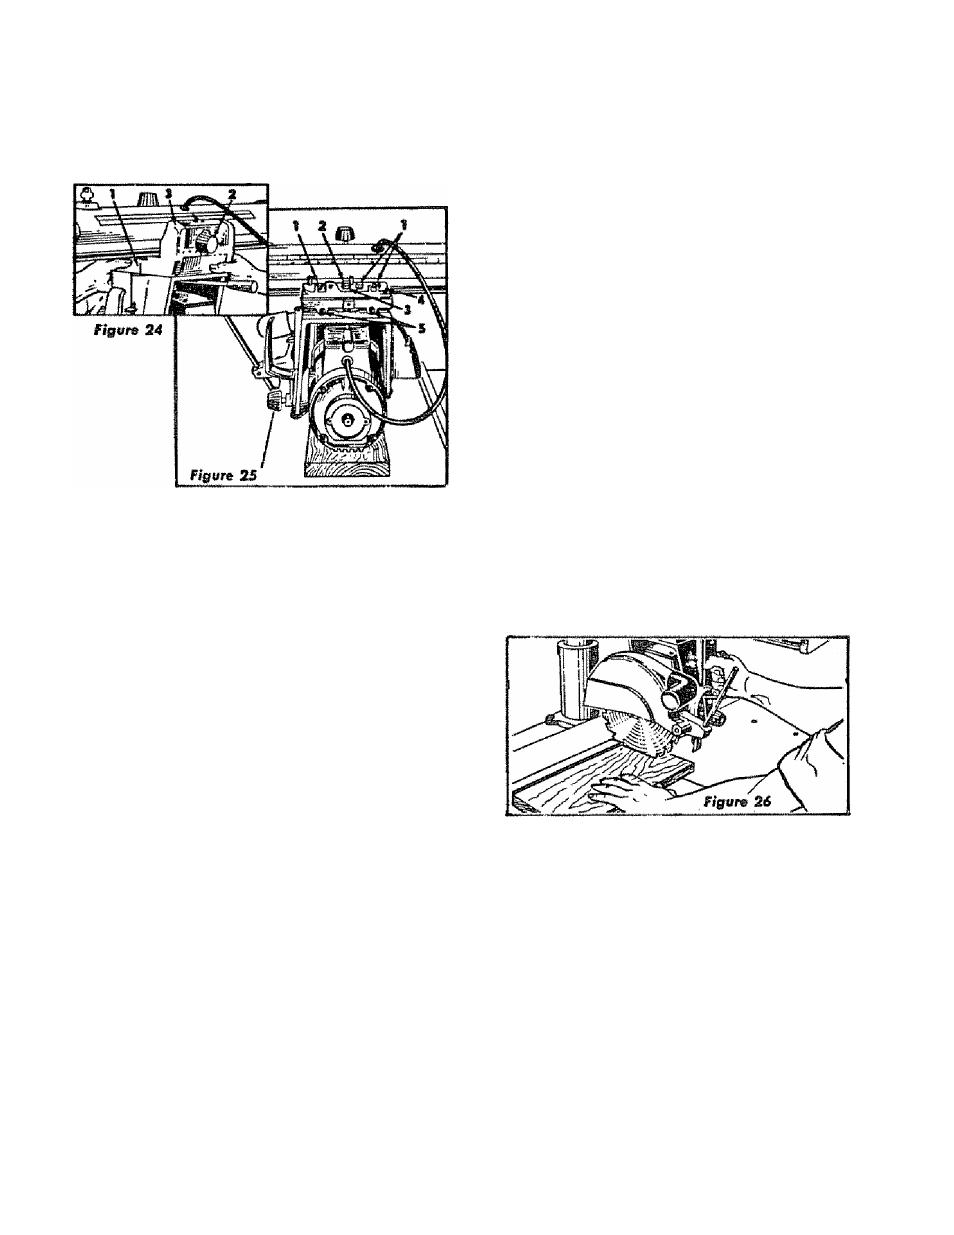
CROSSXUniNG
Cross-cutting is the sawing of wood across the groin. Pionki
ore milted with the groin running the length of the plonk. If
a
straight cross-cut is desired, the board is placed on the
sow toble ogainst the fence so fhot the grain is parallel to
the fence, Figure 26.
NOTE
When cross-cutting normal pieces of lumber, the
long end of the board should be placed to the left
of Ae saw blade as the board is normally held by
the left hand during opereiian.
The radial arm must be positioned ot 0“ as indicated by the
radial arm position indicolor. The orm latch handle must be
indexed and tightened. See page 11 “Angular Movement
and Locking of the Radial Arm" for the most occurate setting
ert the 0* index position. The yoke must be indexed at the 0°
position, making the saw blade perpendicular to the rip
fence, and the yoke damp handle ploced in the locked posh
fion. The bevel index handle must be positioned at 0“, os
indicoted by the bevel scale, and locked. Turn the elevation
crank to lower the tow until the blade teeth are opproxi-
mafely 1/32" below the table surface in the sow slot
mode when performing the “PRELIMINARY CROSS-CUT
AT THE 0“ POSITION". Push the sow corrioge to the rear
of the rodio! arm so the blade is behind the rip fence. Adjust
the sow guard so the bottom is parallel to the table ond set
the onti-kickback paw! assembly so it Just dears the board
to be cut. Turn the switch key “On" to start the
taw
motor.
Hold the board firmly ogoinst the rip fence with the left hond
and grasp the bevel index handle with the right hand. The
cut is then made by pulling the corrioge forward until the
13