Kodak EKTAGRAPHIC 470 User Manual
Page 6
Attention! The text in this document has been recognized automatically. To view the original document, you can use the "Original mode".
Using an External Front-Projection
Screen
NOTE: For optimum image
brightness and quality, the sug
gested distance between the exter
nal front-projection screen and
AudioViewer/Projector is 3 to
12 feet (0.91 metre to 3.7 metres).
9. To project onto an external
screen:
a. Place the projection-lamp
switch at high (HI) and move
the front-projection door to the
right. This will expose the per
manently installed 77 mm //3.5
front-projection lens.
b. Refocus the image on the exter
nal screen.
10. To raise and level the image
a. Press and hold down both inde
pendently adjustable elevation
latches.
b. Raise and adjust the front of
the AudioViewer/Projector to
the desired angle.
Raising and Leveling the Image
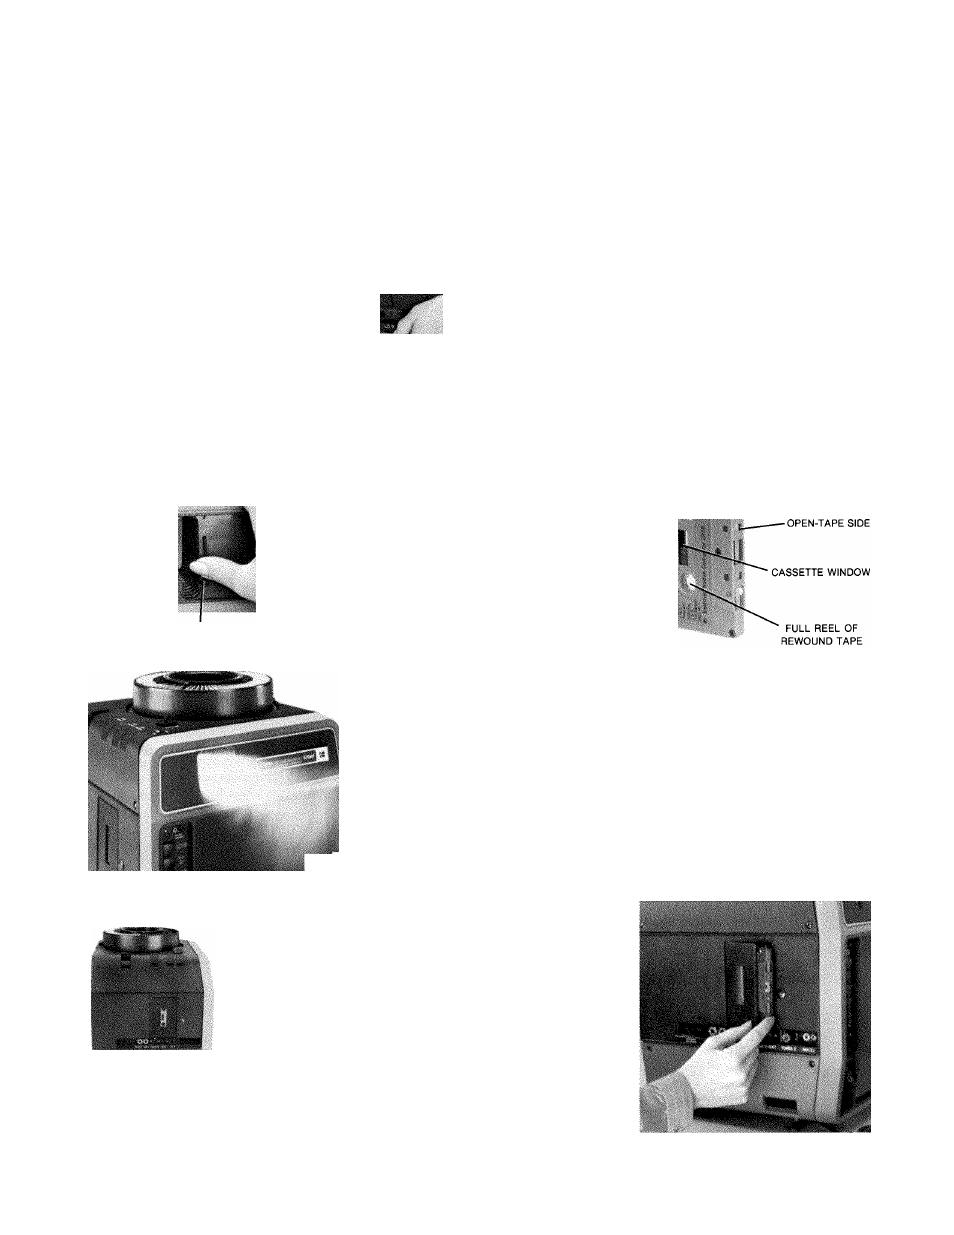
12. Press the tape stop/eject
button (STOP/EJECT) to open
the cassette well.
IMPORTANT: Unlike most cas
sette machines, the AudioViewer/
Projector requires the cassette to
he oriented so that
a. The full reel of rewound tape
on the supply reel is located on
the bottom—not at the top.
(The empty takeup reel is
located on top.)
b. The open-tape side of the cas
sette faces forward (toward
you).
c. Side A of the tape faces away
from the machine.
Using the Built-In Cassette Machine
FRONT-PROJECTION DOOR
c. Release the latches.
11. Reverse the tray to the
beginning of the program.
Press the slide-reverse button un
til slide-number "0” is at the gate
index.
s
■ SIDE A
13. Insert the Cassette into the
Cassette Well.
a. Orient the cassette as de
scribed above and gently press
the cassette into the cassette
well; then close the cassette-
well cover.
b. Press the tape-play button. The
tape will start playing.
c. Adjust volume and tone.
d. Refocus if necessary.
\(
iS
Suggested front-projection distance is 3-12 feet.