Sears 385.12514 User Manual
Page 36
Attention! The text in this document has been recognized automatically. To view the original document, you can use the "Original mode".
SECTION 3. REARN THE STITCHES
Buttonholes
Set the Machine
Stitch
Stitch seleclOE
_l_,
A Í
Top theead tension
contro! S to 5
Stitch length control
blue zona
Sliding buttonhole tool
NOTE:
34
Adjusting the Stitch Density
Depending upon your fabric or your
own preterence in buttonholes, you
may alter the buttonhole stitch density
within the blue buttonhole range on the
stitch length dial.
© For more density, turn the dial
toward " 0
® For less density, turn the dial toward
"
1
" ,
Always
make
a
practice
buttonhole on a scrap of fabric
you plan to use to find the more
suitable stitch length.
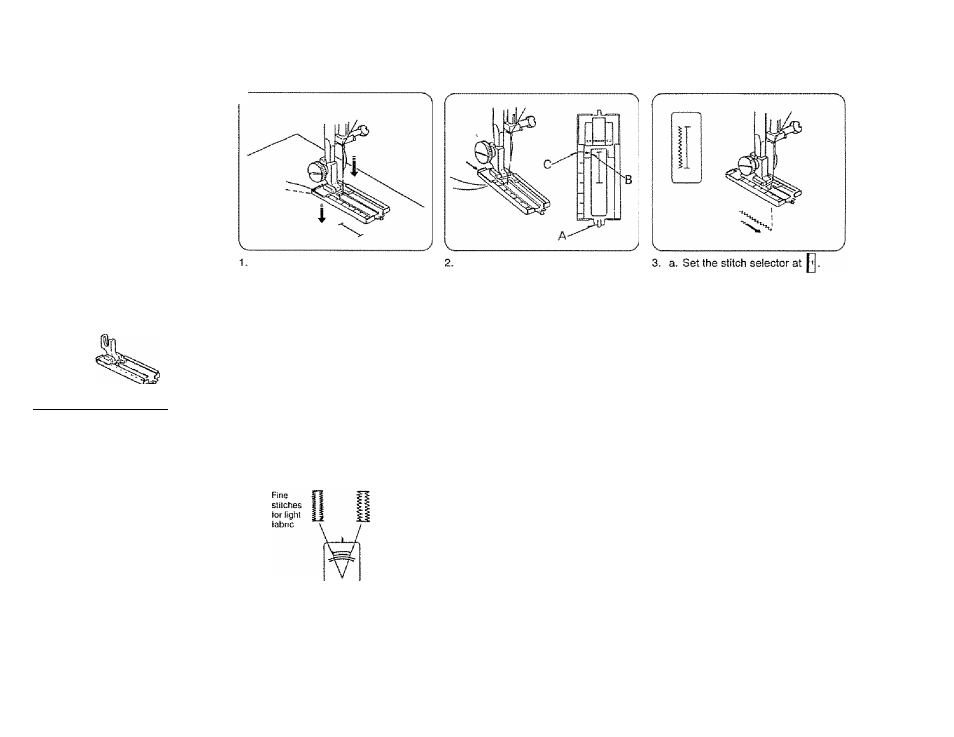
a. Carefully mark the buttonhole
length on your garment,
b. Change to the sliding buttonhole
foot.
c. insert the garment under the toot
with the buttonhole marking run
ning toward you.
©
Coarse
stitches
lor heavy
iabrics
a. Move the slider (A) toward you so
that the top mark (C) on the slider
meets the start mark (B).
b. Line up the markings on the toot
with the top mark on your garment.
c. Lower the presser foot.
NOTE. The markings on the slider
are engraved in centimeters.
b. Sew torward until you reach the
tront marking of your buttonhole.
0
. Stop sewing at the left stitch.