Sears 385.12514 User Manual
Page 31
Attention! The text in this document has been recognized automatically. To view the original document, you can use the "Original mode".
SECTION 3. REARN THE STITCHES
Biind Hemming
Set the Machine
Stitch
Sliicii saleclor
(Regular)
Top thread tension
contro! i to 4
Siitch length
contro! 1 lo3
Zigzag tool
Set the Machine
Stitch
(Stretch)
Stitch selector
Top thread tension
control i to 4
Zigzag loot
Stitch length
contro! 1 to 3
,..I......
1Ì4"
T r
Light weight
Fabric
1/4"
Heavy weight
Fabric
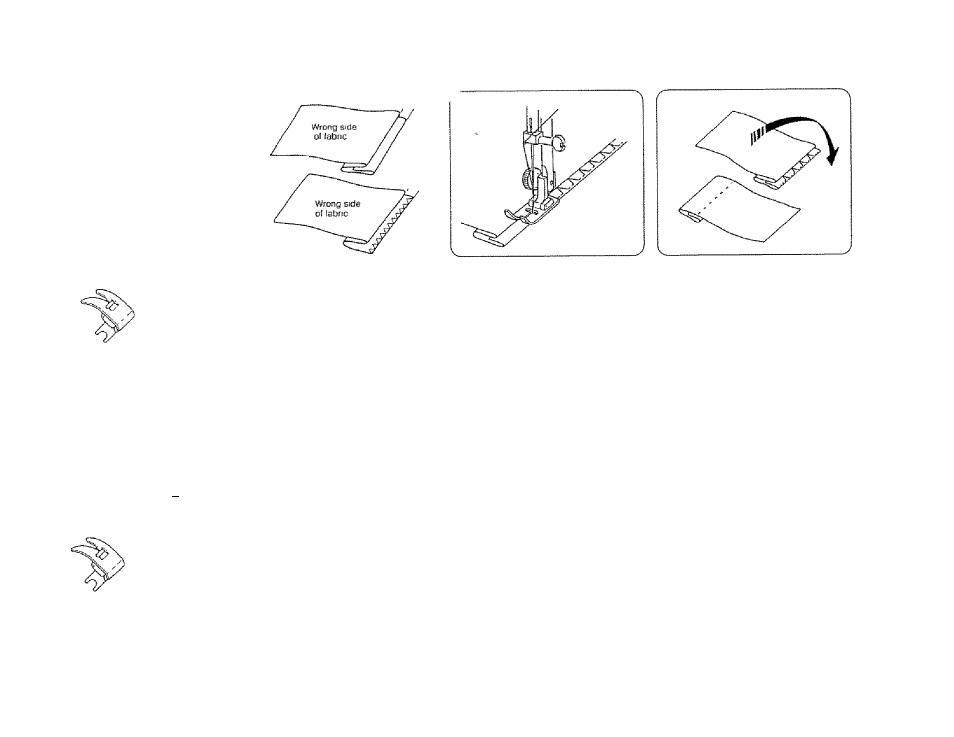
There are two blind hem stitches on your machine. The regular blind hem is used tor woven fabrics. The stretch blind hem is
wider and will "give” and is used for knit and stretch fabrics.
1. Finish the raw edge of your hem any way you desired. (See Overcastingf p. 27 )
2. Measure, turn up your hem and pin.
NOTE; For light weight labrics, you may need a double fold.
3. Fold the material (wrong side out} on the edge to be stitched, as shown, leaving 1/4" ot the finished hem edge showing.
4. Place garment under presser toot in such a manner that straight stitches will be sewn on extended edge. The zigzag stitch
should just catch the told of the garment.
6. After hemming, press both sides of the finished hem. The top side ot the garment will show only the blind stitches.
NOTE:
The blind hem stitch also can be used tor Lace Work. (See p. 28)
29