Sears 385.12514 User Manual
Page 28
Attention! The text in this document has been recognized automatically. To view the original document, you can use the "Original mode".
SECTION 3. REARN THE STITCHES
» Sew a Button
Set the Machine
Stitfh
Zigzag loot
Slllrh seleclor
I
lltIJiliij
plus,
Top ihreatl tension
control i to 4
Stitch length control
any number inol
necessary to adjust)
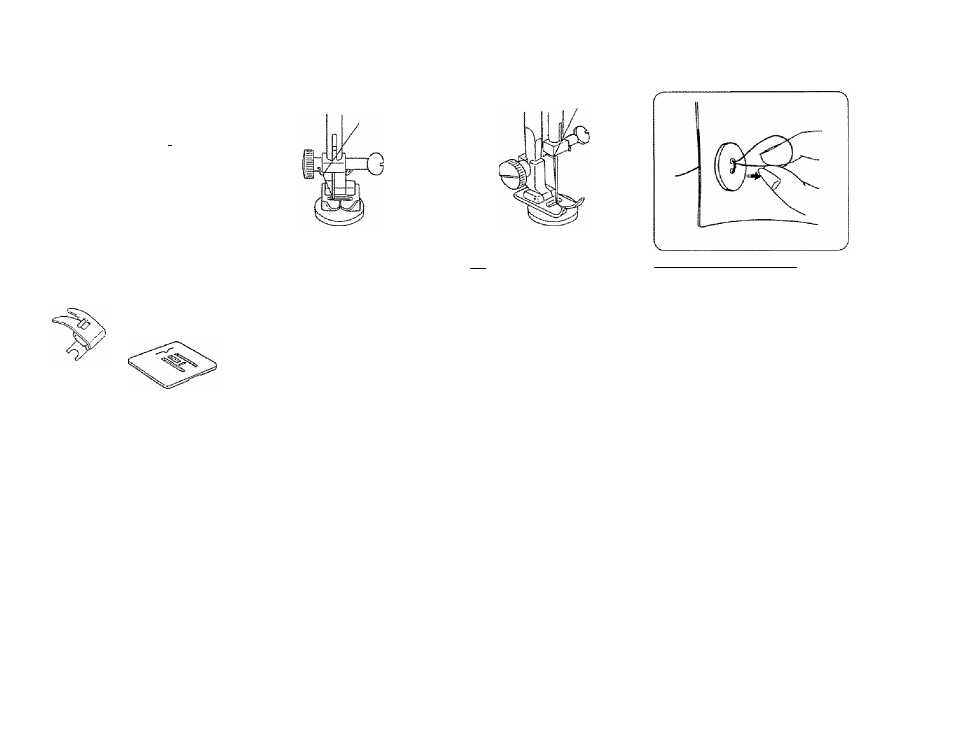
Darmrtg plate
_____________________________ / v_______________________________
Use the darning plate lor button sewing {see p. 22).
1. Set the sti Ich selector at " J "
2. Align both holes ot the button with the slot of the toot and place the left hole of
the button Just below the needle point.
3. Lower the foot and turn the stitch selector to zigzag until the needle point
comes just above the right hole of the button,
4. Sew about five stitches and raise needle.
6. Set the stitch at ’’('o’* again and sew a lew stitches to lock thread.
To strengthen the shank, cut the
threads leaving a 20 cm (&") tail. Bring
the needle thread down through the
hole in the button and wind it around the
shank.
Draw the thread to the bottom side and
knot.
26