Carrier 38EC User Manual
Page 10
Attention! The text in this document has been recognized automatically. To view the original document, you can use the "Original mode".
Compatible Fitting Repair
MECHANICAL CONNECTION — Frontseat unit
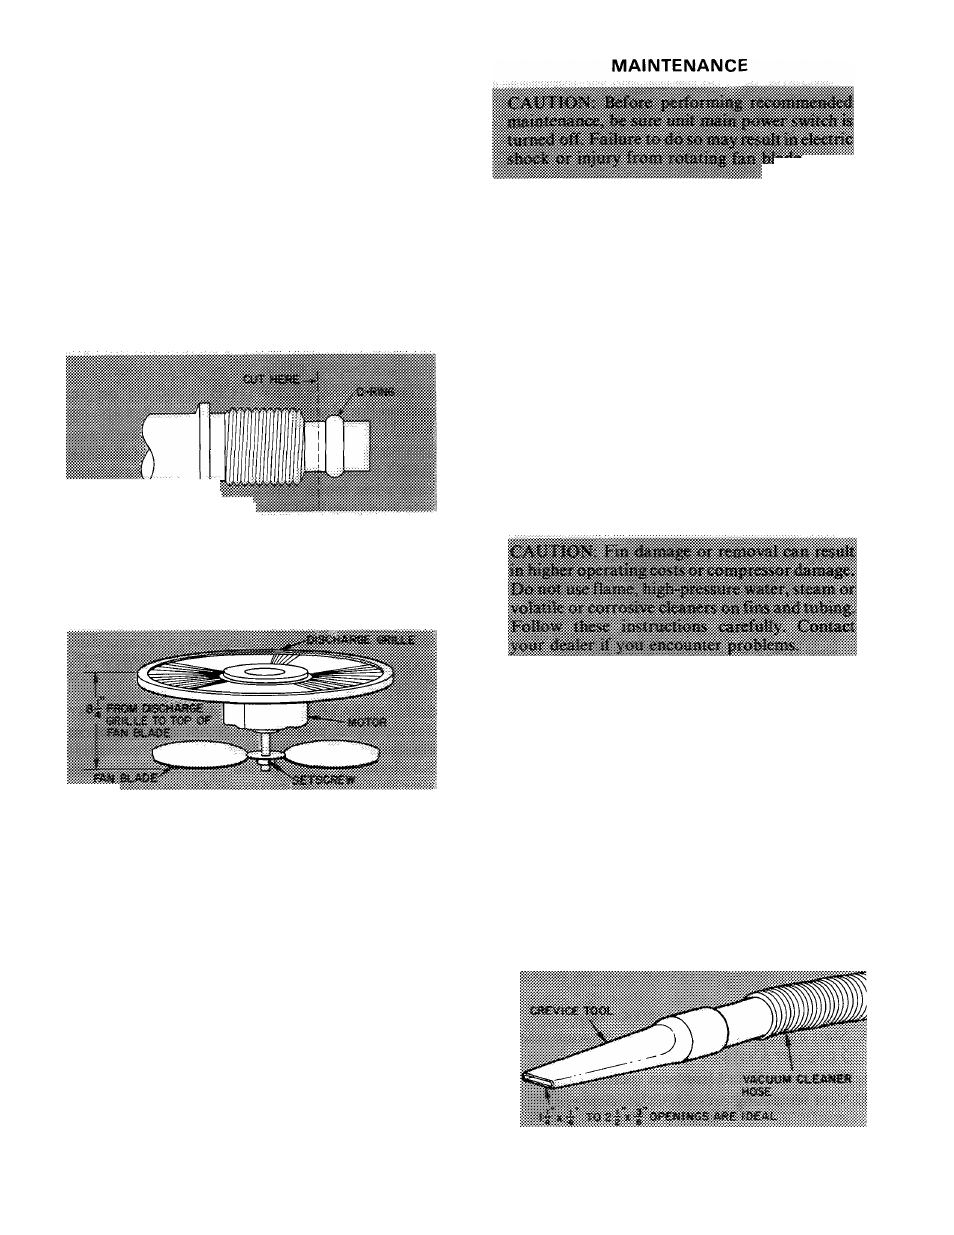
service valves. Relieve refrigerant pressure from
tubing. Back off locknut from Compatible Fitting
onto tube. Cut fitting between threads and 0-ring
as shown in Fig. 8. Remove tubing section
remaining in threaded portion of fitting. Discard
locknut.
Clean, flux, and insert new tube end into remain
ing portion of Compatible Fitting. Wrap valve in
wet rag. Heat and apply low-temperature (430 F)
solder. Do not overheat valve.
Evacuate or purge evaporator coil and tubing
system. Add refrigerant charge. See Refrigerant
Charging instructions described previously.
Fig. 8 — Repair of Mechanical Connection
Condenser Fan Adjustment
— Required fan
position is shown in Fig. 9. Adjust fan by loosening
setscrew(s) and moving fan blade up or down.
Fig. 9 — Condenser Fan Position
Condenser Fan Motor Removal
1. Shut off power to unit. Failure to do so may
result in electric shock or injury from rotating fan
blade.
2.
Remove top cover, referring to Compressor
Removal, step 1.
3. Disconnect fan motor leads from control leads.
See Fig. 7.
4. Remove 4 screws (38EC018 thru 030) or 8 screws
(38EC036 thru 060) holding fan motor/discharge
grille in place and lift assembly from unit.
5.
Remove Carrier nameplate by straightening
tabs.
6. Remove 4 nuts holding fan motor to discharge
grille. Remove motor and leads.
7. Reassembly is reverse of above procedure. Make
sure fan is positioned correctly as in Fig. 9.
Lubrication
■COMPRESSOR contains factory oil charge. Re
place oil when lost. See Table 8 for oil recharge and
refer to Carrier Standard Service Techniques
Manual, Chapter 1, page 1-21, for oil recharg
ing procedure. Use Carrier PP33-1, Texaco WFl-32
or Suniso 3GS oil.
FAN MOTOR BEARINGS are prelubricated for 3
years heavy duty or 5 years normal duty. When
lubrication is necessary, send motor to authorized
motor repair shop.
^Coil Repair
— A flare-union coupling repair kit
is available, with instructions, thru Carrier Service
Parts.
Coil Cleaning
to be done at the beginning of
each cooling season or more often if required.
1. Shut off power to unit.
2. Remove louvered casing by taking out 16 screws
securing it to the cabinet and sliding it away from
the coil.
3. Clean coil using vacuum cleaner and its crevice
tool (see Fig. 10). Work crevice tool vertically
making sure tool only touches dirt on fins. To
prevent fm removal, do not “scrub” fins with tool
or move tool horizontally.
4. If oil deposits are present, spray coil with house
hold detergent (Fantastic, Lestoil, 409, or any
similar type). Wait 10 minutes then proceed to
step 5.
Fig. 10 — Crevice Cleaning Tool
10