Top Flite Elder 40 User Manual
Page 3
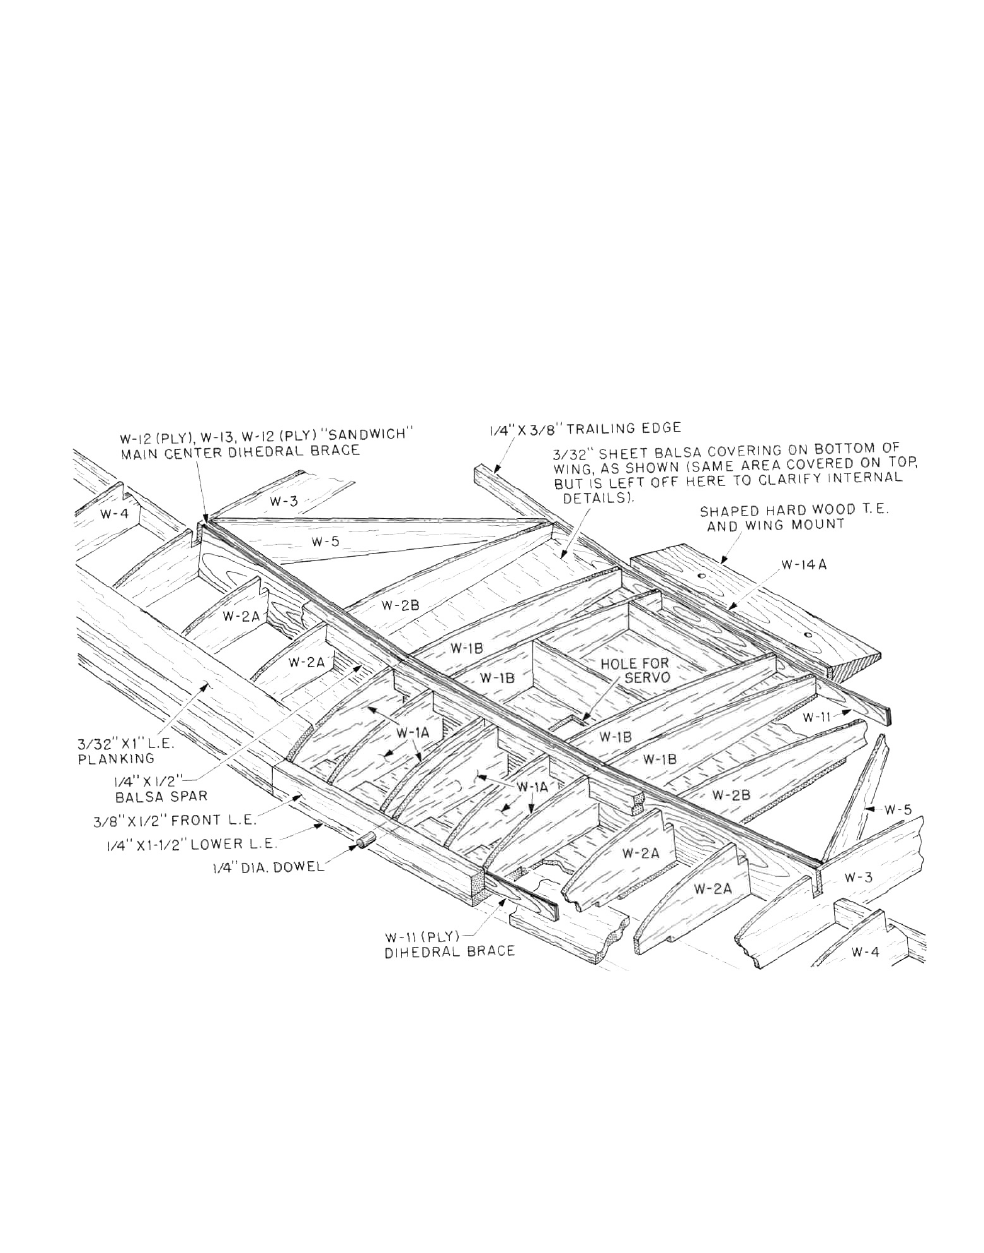
the 3/8" x 1/2" upper leading edge. Glue one of the
W-11 ply dihedral braces in place against the inside
surface of the leading edge—be sure that it's
centered. Glue the outer W-1A half-ribs in place
against the rear face of the dihedral brace, lined-up
with the edges of the bottom sheeting at right angles
to your work surface. Now glue in place two more
W-1A's, 1" inboard of the two outer ones.
3 As shown on the plans, the center dihedral brace is a
composite made by laminating the two W-12's (ply)
to each side of W-13, which results in a 1/4 "thick part
—do this now. Glue the completed composite
dihedral brace in place to the bottom sheeting and
up against the rear edges of the four W-1A's. Be sure
this part is centered.
4 Locate two of your 1/4" x 1/2" pieces of spar stock.
From each, cut one 5" length. Glue one of these
pieces in the top rear slots in the W-1A's and against
the top forward face of the center dihedral brace.
Glue the other on bottom sheeting against the bot-
tom rear face of the center dihedral brace.
5 Now glue the four W-1 B rear half-ribs in place behind
the main dihedral brace. Glue the remaining W-11
(ply) dihedral brace in place on the bottom sheeting
against the rear edges of the four W-1B's. Locate the
1/4" x 3/8" trailing edge material and cut a 5" length.
This is now glued in place against the rear face of the
rear W-11 brace and to the bottom sheeting.
NOTE: For now this completes the center section con-
struction. You will finish it after it has been used in the
construction of the fuselage. Set it aside for now and
build the two wing panels. Both panels are built directly
over the plans at the same time.
3