Top Flite TOPA0955 User Manual
Page 7
7
o o
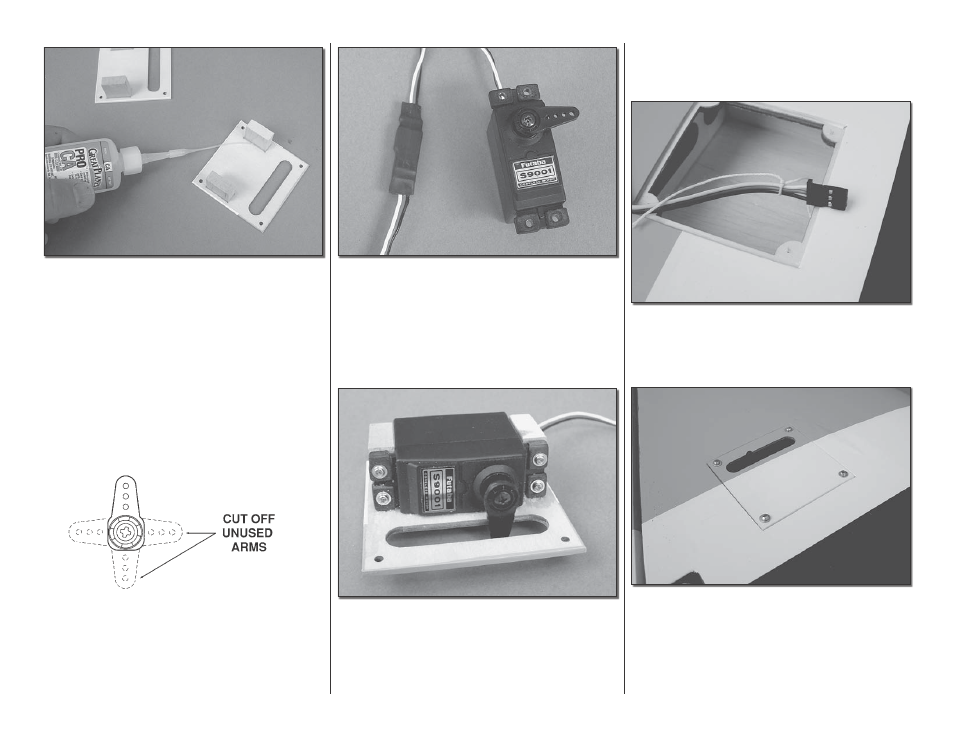
1 . Remove the tape holding the aileron and flap
covers to the wing . The servo mounting blocks are
pre-attached to the covers . To assure the blocks have
been adequately glued, apply a few drops of thin CA
to each of the blocks .
o o
2 . Cut three arms from a four-armed servo arm
included with the aileron servo . Enlarge the outer hole
of the remaining arm with a 5/64" [2mm] drill bit .
o o
3 . Attach a 24" [610mm] servo extension to
each aileron servo and secure the connector using
tape or heat shrink tubing (not included) . Center the
servos with your radio system and install the servo
arm to the servo perpendicular to the servo case as
shown . Be sure to reinstall the servo arm screw into
the servo .
o o
4 . Position the servo against the underside of
the aileron servo hatch cover between the mounting
blocks . Drill 1/16" [1 .6mm] holes through the mounting
tabs on the servo case into the blocks . Insert and
then remove a servo mounting screw (included with
the servo) into each hole . Apply a drop of thin CA
to each hole to harden the wood . When the CA has
dried, install the servo onto the hatch cover using the
hardware supplied with the servo .
o o
5 . Tie the string taped inside the aileron servo
hatches to the servo lead . The opposite end of the
string is taped to the wing's root rib . Pull the servo
lead through the wing ribs .
o o
6 . Insert and then remove a #2 x 3/8"
[9 .5mm] self-tapping screw into each hatch
mounting hole . Apply a drop of thin CA to each
hole to harden the wood . Once the glue has dried,
install the aileron hatch cover to the wing as
shown using four #2 x 3/8" [9 .5mm] self-tapping
screws and four #2 flat washers .