Top Flite TOPA0705 User Manual
Page 7
7
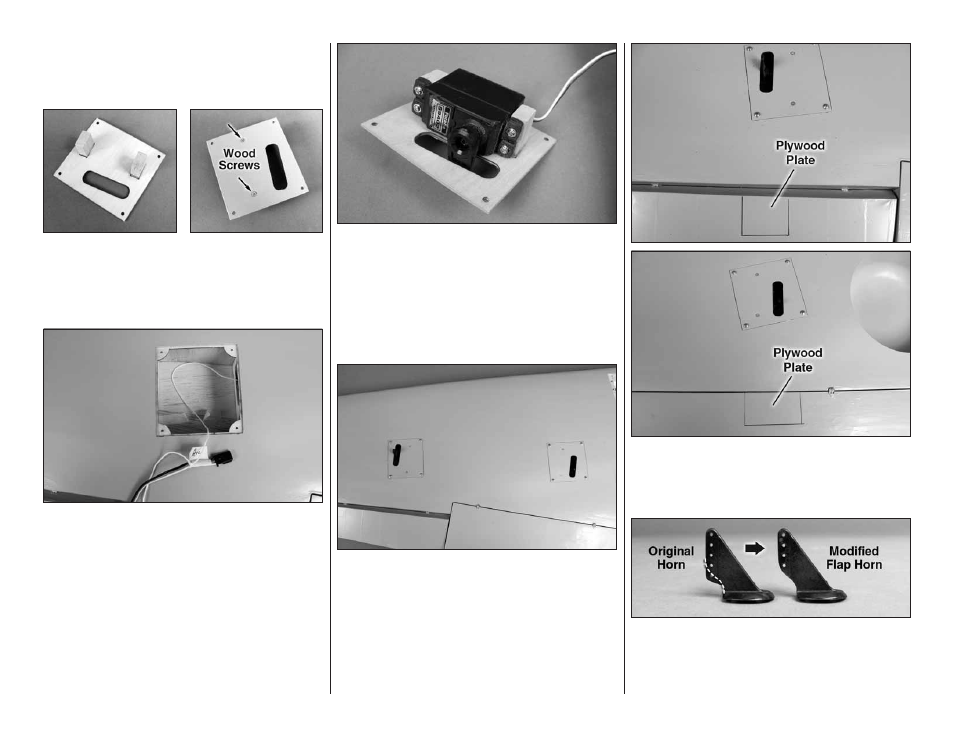
Futaba servos. Place your particular brand of servo on
the cover making sure they fi t between the locations
for the blocks. Adjust the positioning of the blocks for
your brand of servo.
❏
❏
4. Glue the blocks to the servo cover. Once the
glue has cured, drill a 1/16" [1.6mm] hole through the
cover and into the servo mounting blocks. Secure the
block to the cover with a #2 Ч 3/8" [#2 Ч 9.5mm] wood
screw. Do this for both of the servo covers.
❏
❏
5. Inside the aileron and fl ap servo compartments
you will fi nd a string. Tie the string to the servo lead.
The other end of the string is taped to the root wing
of the rib. Pull the leads through the wing.
❏
❏
6. Install the servo arms onto your servos. The
aileron servo will require a 1" [25mm] servo arm to get
the required aileron throw. A standard length arm will
work for the fl ap. Place your servo onto the mounting
blocks. Drill a 1/16" [1.6mm] hole through the servo
mounting tabs into the mounting blocks. Secure the
servos to the mounting blocks with the screws that
came with your servos.
❏
❏
7. Install the servo covers to the wing securing
them to the wing with four #2 × 3/8" [9.5mm] screws
and four #2 fl at washers.
❏
❏
8. Located in both the aileron and the fl ap is
a plywood mounting plate. If you look at the control
surface at a slight angle you will be able to see the
plate through the covering.
❏
❏
9. The fl ap and aileron will each require a black
nylon control horn. The fl ap control horn needs to be
modifi ed. Cut a control horn as shown. A high-speed
motor tool works well for this.