Top Flite TOPA0210 User Manual
Page 24
❏ 10. After you have finished the final shaping and
sanding, glue the cowl bottom in place.
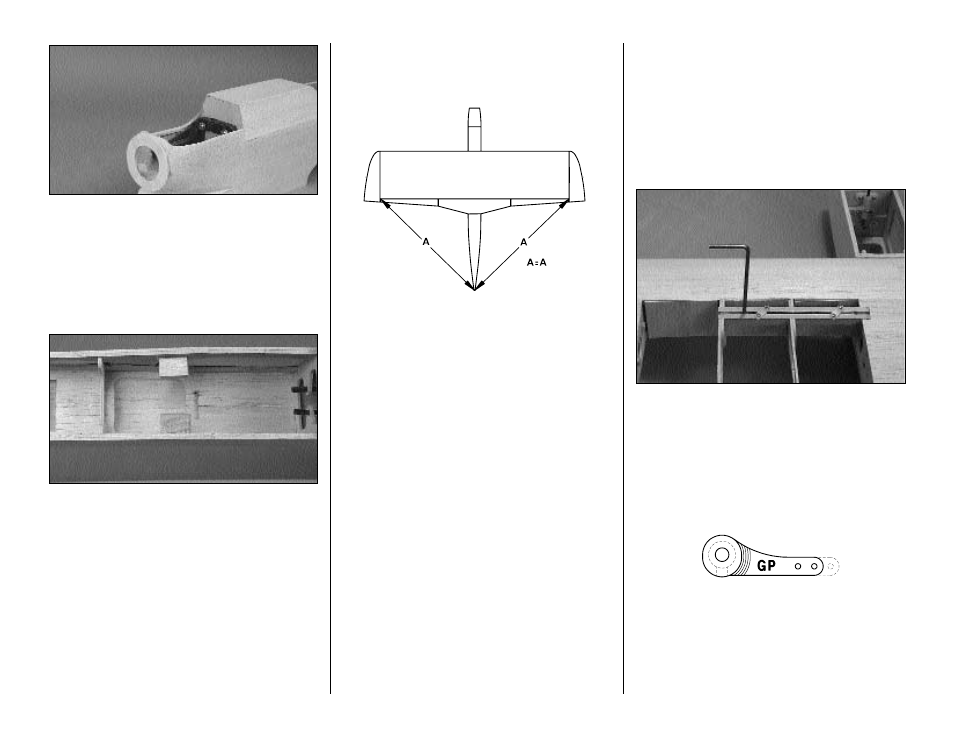
Mount the wing
❏ 1. Locate the 1/2" x 3/4" x 1" [12.7 x 19.1 x
25.4mm] maple wing mounting blocks. Test fit
them into the notches in the fuse doubler. Glue them
in place with 6-minute epoxy. Spread a fillet of epoxy
around the blocks for a secure bond.
(While you’re waiting for the epoxy to cure, jump
ahead to page 27, “Prepare the canopy.” By the time
you are finished cutting and fitting the canopy the
glue should be cured well enough to move on to the
next step.)
❏ 2. Position the wing in the saddle. If any minor
sanding needs to be done to get a good fit between
the fuselage and the wing do it now.
❏ 3. Insert a T-pin in the center of the fuse at the back
of the airplane. Place a Hobbico Retractable Fabric
Tape Measure (HCAR0478) (or any suitable
measuring device) over the T-pin and measure the
distance from the pin to the left tip rib of the wing and
then to the right tip rib of the wing. Adjust the wing until
the distance from the pin is the same on both sides.
❏ 4. With the plan as your guide, mark the drilling
location for the wing bolts on the wing bolt plate.
❏ 5. When the wing is properly positioned, drill a 1/8"
[3.2mm] pilot hole through the locations where the
wing bolts will go. Be sure you drill through the wing
bolt plate and the two maple blocks. Try to drill
straight in, perpendicular to the wing bolt plate.
❏ 6. Remove the wing and drill a 17/64"[6.7mm]
clearance hole through each of the pilot holes you
have drilled in the wing.
❏ 7. Use a #10 drill bit (or 13/64") [5.2mm] to drill
through each of the pilot holes in the two maple blocks.
❏ 8. Use a 1/4-20 tap to tap the threads in the maple
wing blocks. After you have the holes tapped, put a
couple of drops of thin CA on the threads to
strengthen them. Once the glue has cured, retap the
holes to clean out any excess glue.
Install the landing gear
❏ 1. Install the 5/32" [4mm] main landing gear in the
holes in the landing gear rail. Secure them in place
with the nylon landing gear straps. Place the straps
in position as shown on the plan then drill a 1/16"
[1.6mm] hole in the landing gear rails where the
straps will be located. Screw the straps in place with
#2 x 1/2" [12.7mm] sheet metal screws.
❏ 2. Locate the nylon steering arm. Shorten the
steering arm as shown in the sketch.
❏ 3. Insert the 5-32" [4mm] wheel collar into the
steering arm. Screw the 6-32 x 1/4" [6.4mm] socket
head cap screw into the steering arm assembly.
24