Warning – Toa PC-2268 User Manual
Page 6
6
5.2. Installation Procedure
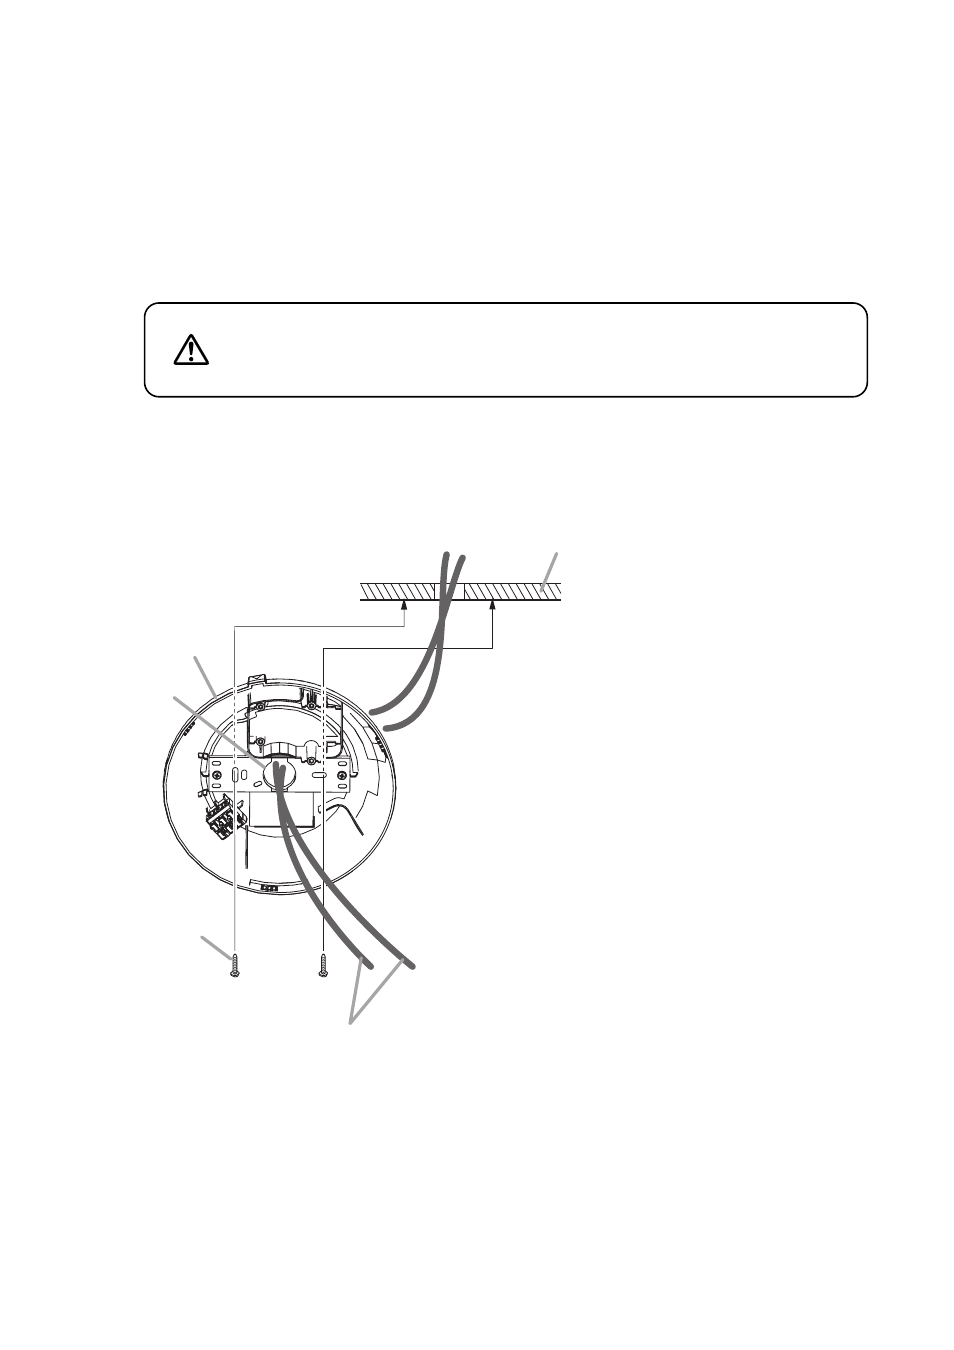
Step 1. Install the rear case to a ceiling or a wall.
Route the speaker cables through a cable entry opening (ø 30 mm) in the rear case, then secure the
rear case.
Following 2 kinds of screws are supplied with the unit. Use these screws properly depending on the
intended application.
Tapping screw 4 x 35 (2 pieces):
For plywood (9 mm or more thick)
Machine screw M4 x 35 (2 pieces): For an electrical box
Use screws that are appropriate for the ceiling's or wall's
material and structure. Failure to do so may cause the unit
to fall, resulting in material damage and possible personal
injury.
WARNING
1-1. When installing the rear case directly to a ceiling;
Ceiling
Rear case
Cable entry
opening
Mounting screw
Note
When installing the unit to a gypsum board or woody portion that is
not tough enough, reinforce the mounting location.
Also when installing an anchor bolt, ensure that the installation
location is resistant to pull-out.
Speaker cables (input line and bridge line)
Note
When routing the speaker cables, do not pull them out more than 30 cm.
If pulled out more than that, they may not be housed inside the case.