Warning – Toa HY-MS7W-WP User Manual
Page 7
7
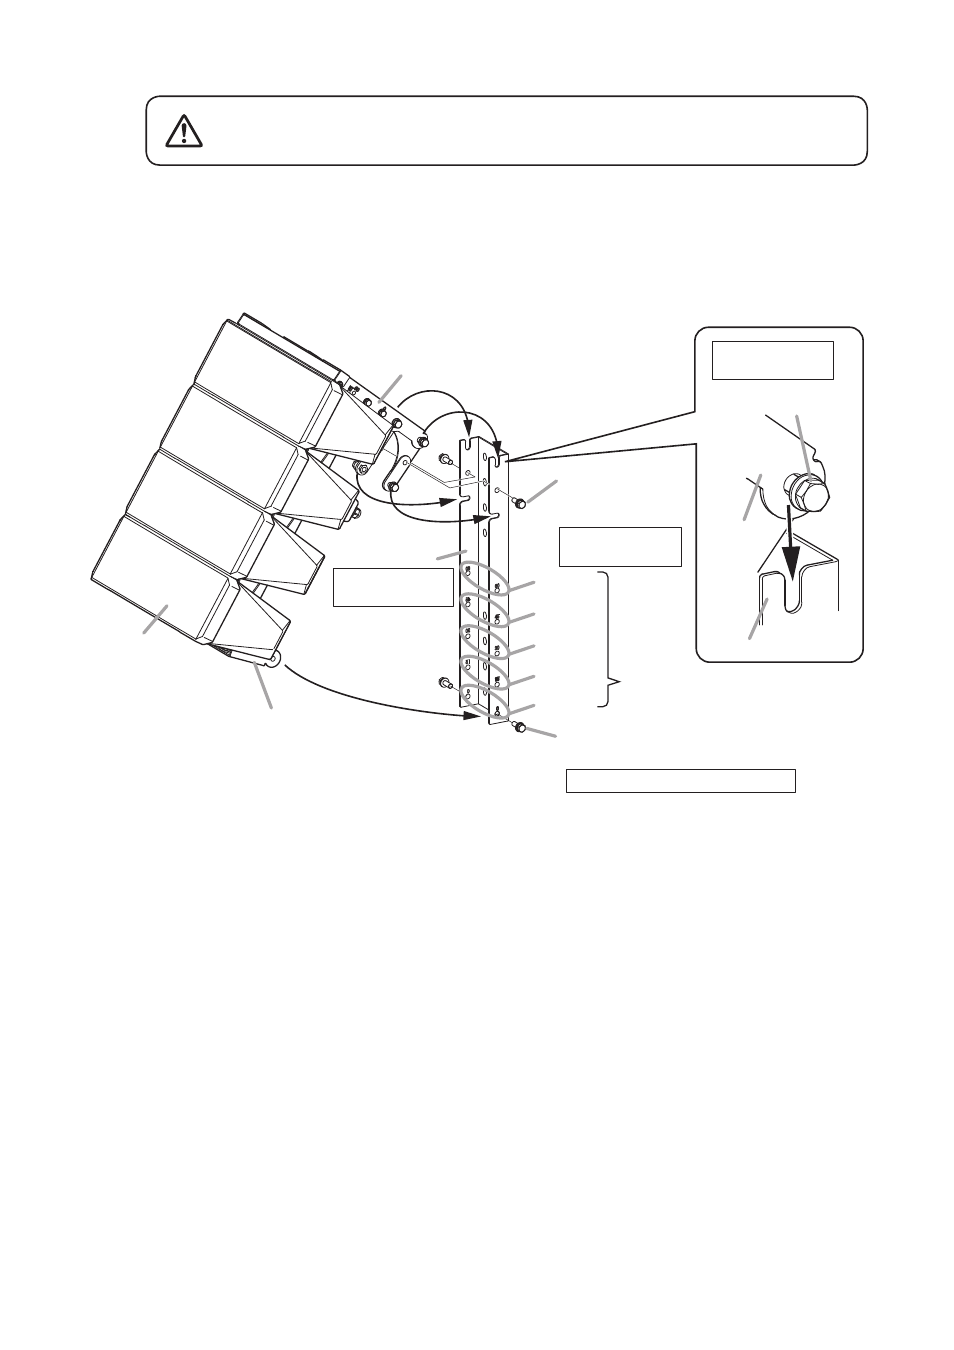
Step 7. Temporarily fix the speaker to the Wall bracket.
Be sure at least two people are employed to mount the speaker
to the wall. If handled by only one person, the speaker could
fall, potentially resulting in personal injury.
wArNINg
7-1. Insert 2 bolts lightly fastening the L- and Mode brackets into the Wall bracket’s uppermost slots from
above.
7-2. Insert 2 bolts lightly fastening the L-bracket’s lower ends into the Wall bracket’s lower slots from the
side.
7-3. Temporarily tighten all 4 bolts.
7
-1
7
-1
0° mode
15° mode
30° mode
Wall bracket
45° mode
60° mode
Bottom bracket mounting positions
Wall bracket
Bottom bracket
HX-7B-WP
or
HX-7W-WP
8
9
7
-2
Mode bracket
Mode bracket
Hex head bolt M10 x 30 with spring
and plain washers (accessory)
Hex head bolt
M10 x 30 with spring
and plain washers
(accessory)
Hex head bolt
partially inserted
Tightening torque
in Step 10: 15 N·m
Tightening torque in Step 10: 15 N·m
Tightening torque
in Step 10: 15 N·m
Tightening torque
in Step 10: 15 N·m
Step 8. Temporarily fix the speaker’s Bottom bracket to the Wall bracket.
Using the 2 supplied bolts, temporarily fix the Bottom bracket to the Wall bracket. The Bottom bracket’s
mounting position relative to the Wall bracket will differ depending on the speaker’s directivity angle
mode, as shown in the figure of the previous page.
Step 9. Temporarily install bolts to prevent falls.
Step 10. Tighten all the bolts partially inserted in Step 5 and Steps 7 through 9 to secure the speaker. (Tightening
torque: 5 N·m for bolts inserted in Step 5, and 15 N·m for bolts inserted in Steps 7 through 9)
Before tightening bolts, be sure to confirm that excessive force is not applied to these bolts.
Step 11. Attach safety wires for protection against falls.
Regarding the attaching method of safety wires, refer to the instruction manual supplied with HX-7
series speaker.