Tii 95S Series User Manual
Page 2
Installing Customer Bridge Module into Alternate
NID
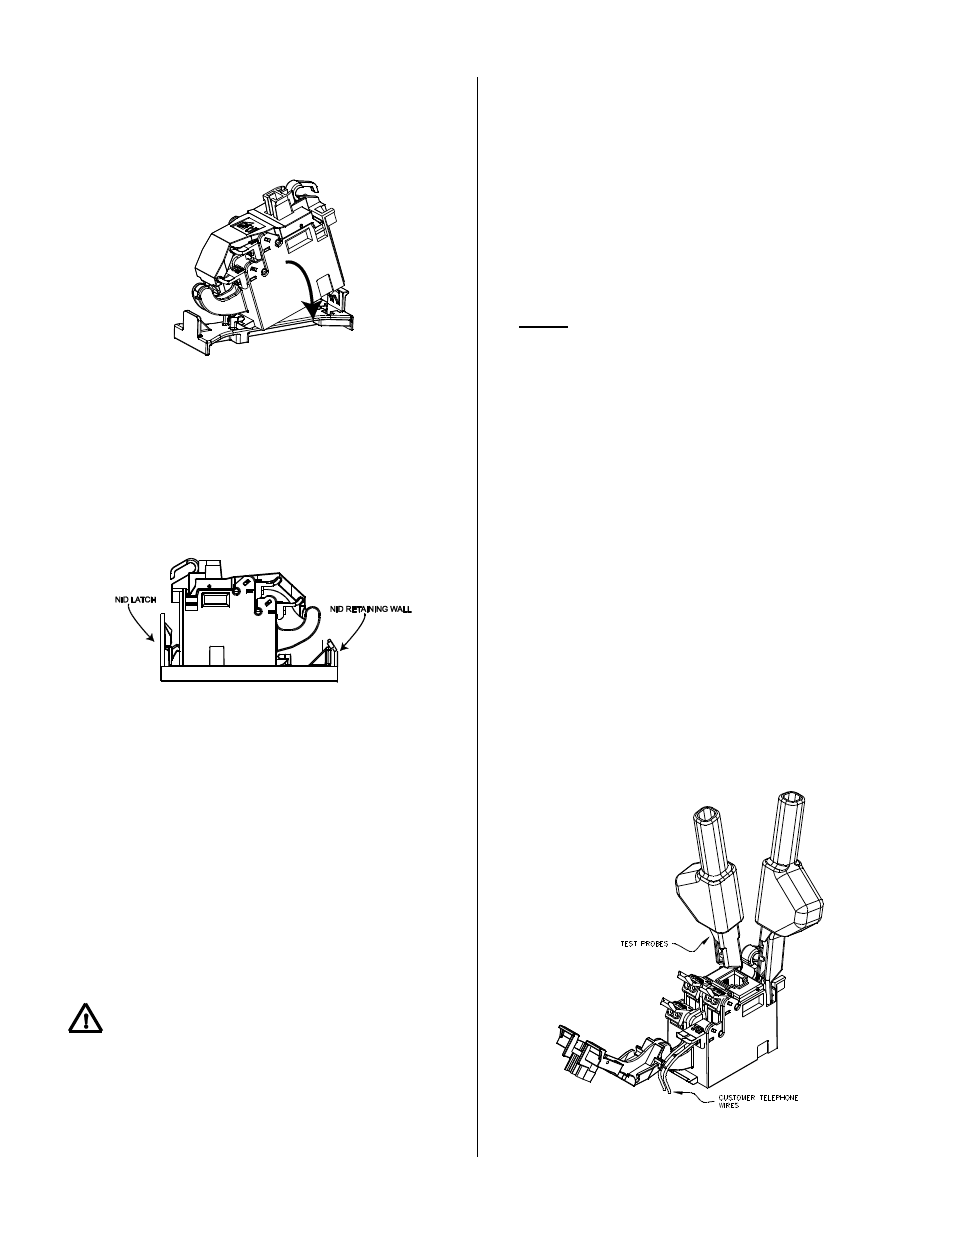
1. Snap the adapter onto the CBM module (See
Figure 4).
Figure 4
2. With the CBM and adapter turned so the wires
are to the left, put the right side of the adapter
under the NID retaining wall.
3. Using your thumb, pull the NID latch to the left.
Press the CBM down and release the NID
latch to secure the CBM into position, (See
Figure 5).
Figure 5
Wiring
CBM Wiring
1. Four independent telephone pairs can be
connected to a single CBM module. The
customer has the option of putting a #10
Master lock in the customer lock hasp (See
Figure 1).
2. When installing the first pair of customer
telephone wires, always begin with the bottom
terminating rockers (See Figure 1).
3. Do not strip wire insulation from wires to be
terminated to CBM.
CAUTION: TO REDUCE THE RISK OF
PERSONAL INJURY, INSERT A RJ-11
PLUG INTO THE CUSTOMER TEST JACK
PRIOR TO MAKING ANY WIRING
CONNECTIONS.
4. Dress terminating wires (to protector) over NID
divider (See Figure 2).
5. Insert and terminate TIP (GRN) & RING (RED)
wires into sealed IDC station protector (see
protector installation note for further details).
6. Open customer security cover on CBM
module.
7. Lift all CBM rockers to the open position as
shown (See Figure 1).
8. Dress wires around customer security cover.
9. Hold the customer telephone wires between
thumb and index finger (approx. 1/8”
separation between wires).
NOTE: Wires should be aligned to the corresponding
holes. Green wire to the “T” (GRN) labeled wire guide
and the Red wire to the
“R” (RED) labeled wire guide.
10. Insert wires into wire guides at the same time
until they bottom out.
11. While holding wires in wire guides, terminate
rocker with thumb (lower rocker all the way).
12. Terminate additional pairs to rockers as
required.
13. Assure all rockers are in the down position
and close customer security cover.
Central Office Signal Testing
1. Open customer security cover.
2. Insert RJ-11 plug into customer test jack to
isolate telco and customer wiring.
3. Using an ohmmeter, insert test clips into test
ports as shown (See Figure 6).
4.
If continuity is measured a “short” may exist in
the customer premise.
5. Wires are ok if meter shows a reading.
Figure 6