Wiring, Testing – Tii VIS-3 User Manual
Page 2
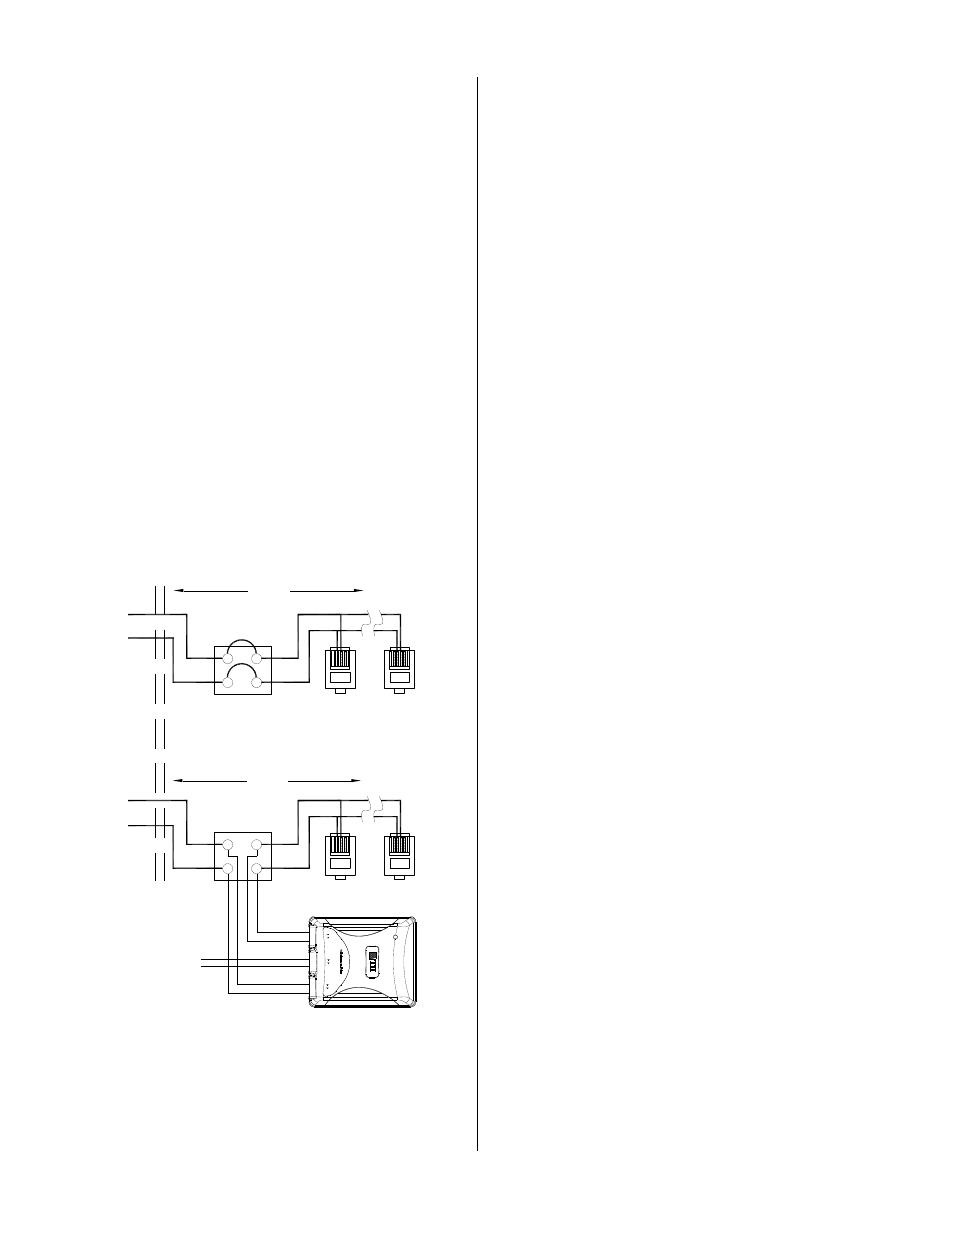
Figure 2
MODIFIED WIRING
WALLPLATE
FIRST PHONE LINE
APPEARANCE
UNMODIFIED WIRING
MDU
WALLJACK
ADD'L
WALLJACK'S
MDU
1 2 3 4
1 2 3 4
TELCO / DAS / INTERCOM
DAS / INTERCOM
PREMISES
PHONES
P
re
m
is
e
s
P
h
o
n
e
VIS
-3
D
igit
a
l
V
o
ic
e
S
e
rv
ic
e
P
o
w
e
r
P
h
o
n
e
D
A
S
In
te
rc
o
m
P
ins
2
,3
P
ins
2
,3
P
ins
2
,3
Ou
tp
u
t
In
p
u
t
In
p
u
t
D
igit
a
l
V
o
ic
e
TELCO / DAS / INTERCOM
WALLPLATE
FIRST PHONE LINE
APPEARANCE
WALLJACK
ADD'L
WALLJACK'S
1 2 3 4
1 2 3 4
WIRES FROM DIGITAL
VOICE SERVICE
Wiring
Premise Phones
1. Plug one end of the RJ-11 cable to the phone
at premises receptacle on the VIS-3. Connect
the other end of the cable to the phone
connection to the whole premises.
Digital Voice Service Device
1. Plug one end of another RJ-11 cable to the
Digital Voice Service receptacle on the VIS-3.
Connect the other end to the RJ11 output from
the voice output of ONT (Optical Network
Terminal) (Figure 1).
Intercom
1. Plug one end of the third RJ-11 cable to the
DAS / Intercom receptacle on the VIS-3
(Figure 2).
2. Connect the other end of the cable to the
rewired (Per Figure 2) intercom input.
Testing
1. On power-up the unit is in Digital Voice Mode.
The LED should start flashing within a few
seconds of powering up (Figure 3).
2. The VIS-3 will automatically switch to DAS /
Intercom Mode when the Local Digital Voice
Service power is disconnected.
3. When the DAS / Intercom rings and the Digital
Voice line is on hook, the VIS-3 will switch to
the DAS / Intercom. After answering the
intercom or the ringing has stopped, the VIS-3
will switch back to Local Digital Voice Service
mode.
4. To answer the DAS / Intercom when the
Digital Voice line is in use, press the flash
hook switch momentarily, this will hold the
Digital Voice line and at the same time switch
the VIS-3 to DAS / Intercom mode.
5. When finished with the DAS / Intercom call,
press the flash hook switch momentarily to
recover the Voice line. In some case the flash
switch may need to be activated twice to
recover the voice line.