Tie Down Jet Rail User Manual
Page 4
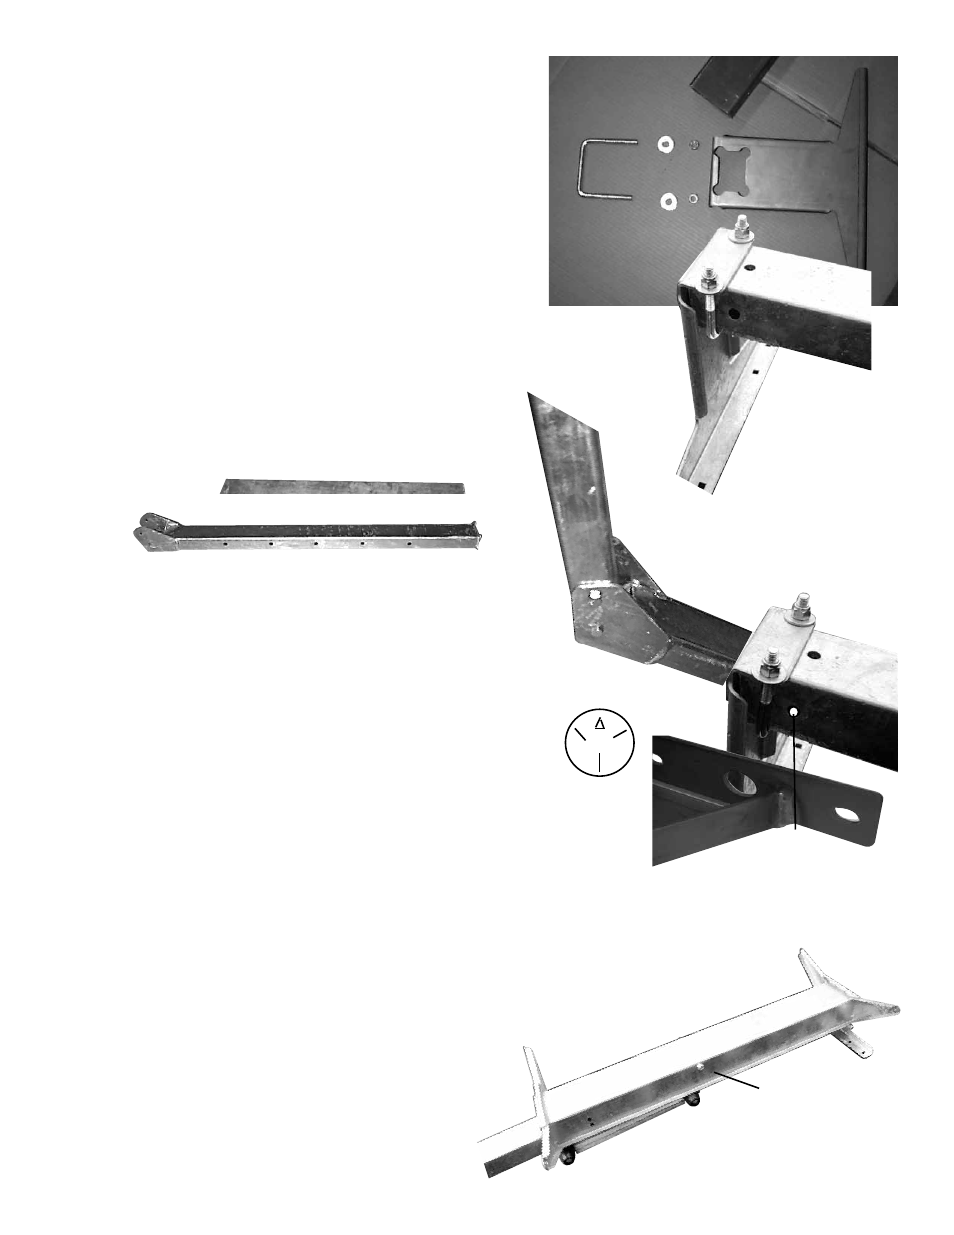
4. Attach Front Deck Mount to Frame Tube
Parts required for this step.
#
Stk. #
Description
Qty.
4
26608
Front Deck Mount
1
1
26605
Jet Rail Frame Tube
1
26
10985
1/2" U-Bolt
1
33
10645
1/2" Nyloc Nut
2
37
BBW500
1/2" Flat Washers
2
Slide Extension Tube into front of Jet Rail Frame Tube. Cut-out
in front deck mount matches the end that slides into the tube.
Bolt winch mount tube to extension tube using the 2- 3/8" x 4"
Grade 5 hex head bolts and nyloc nuts (Picture 7).
5. Attach Winch Mount Extension Tube
to Winch Mount Tube.
NOTE: At this time, place frame tube/carriage with deck
mounts attached, in the general area where you are plan-
ning to attach the Jet Rail to your dock. Make sure there
is room for the watercraft to be winched onto the Jet Rail
without obstructions.
Attach front deck mount to front of frame tube (front of tube
has a single hole on each side of the tube,Picture 6). Front deck
mount is mounted flush against end of the frame tube using the
U-bolt, metal washers and nyloc nuts as shown in Picture 5.
Parts required for this step.
#
Stk. #
Description
Qty.
1
26605
Jet Rail Frame Tube
1
6
26610
Winch Mount Ext. Tube
1
9
26613
Winch MountTube
1
28 BBB3750400
3/8" x 4" Hex Head Bolts
2
34 BBN375NL
3/8" Nyloc Nut
2
6. Attach Jet Rail Deck To Carriage Assembly
Lift Jet Rail deck assembly over carriage. Align carriage tube
hole with pivot hole in deck. (Picture 8) Install 1/2" x 7" bolt with
1/2" nyloc nut. (Front of deck has two holes on each side)
Parts required for this step.
#
Stk. #
Description
Qty.
5
26609
Jet Rail Deck Assembly
1
2
26606
Jet Rail Carriage Assembly 1
31
10936
1/2" x 7 " Hex Bolt
1
33
10645
1/2" Nyloc Nut
1
Picture 8
‘
Front
31
5
4
1
33
37
4
26
Picture 5
1
4
Picture 6
1
4
A locking pin is provided to hold winch
extension tube in place, using side holes
in frame tube and holes in estension tube
(above).
Markings on Grade
5 Hex Head Bolt
Picture 7
6
9
9
6