Installation, 5installation – SeaLand 4400 Series Toilet Installation User Manual
Page 6
6
Installation
Dometic 4300/4400 Series Toilets
5
Installation
5.1
Toilet installation
Note
If replacing an existing gravity-discharge toilet, make sure the center of the existing
discharge flange is at least 10 inches (254 mm) from the back wall, then proceed to
Step 5 for proper positioning of water line and electrical wiring .
1 . Carefully unpack the toilet bowl and floor flange adapter .
2 . Position the ceramic bowl in the space intended . Confirm that adequate clearance is available
for using the flush handle and opening the seat and lid .
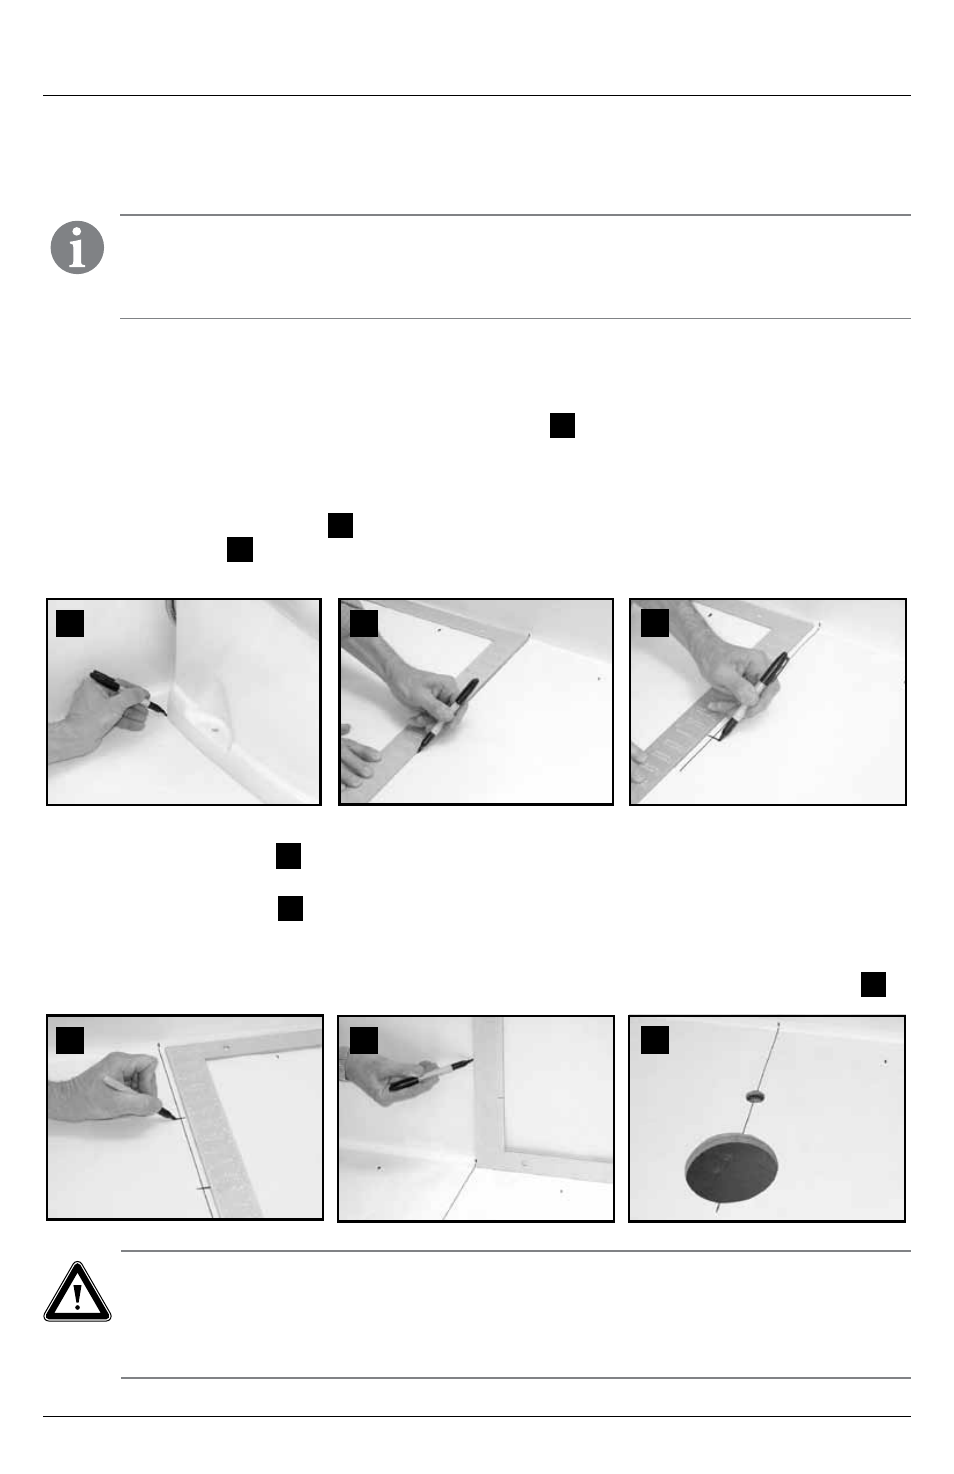
3 . Mark the floor at the rear corners of the toilet bowl (fig .
3
) . Measure the distance between
the two marks and divide by 2 to find the toilet centerline . Mark the floor at the rear wall for the
centerline .
4 . Place a carpenter’s square against the back wall, and draw a center line on the floor at least
14 inches (356 mm) long (fig .
4
) . Mark the centerline for the floor flange at 10 inches (254 mm)
from the wall (fig .
5
) . Add 0 .25 in . (6 mm) to distance from wall if installing model with
hand sprayer attached to toilet .
3
4
5
5a . For through-the-floor water line and electrical wires, mark another centerline 6 inches (152 mm)
from the back wall (fig .
6
) .
5b . For through-the-wall water line and electrical wires, mark a centerline 8 inches (203 mm) up from
the floor centerline (fig .
7
) .
6 . Make a 4-3/4 inch (121 mm) diameter hole (for most floor flanges) or a 5-1/8 inch (130 mm)
diameter hole (for swivel joint floor flange) at the centerline mark furthest from the wall . Make a
1 inch (25 mm) hole at the mark closer to the wall for the water line and electrical wires (fig .
8
) .
Caution
The preferred floor flange installation method is to mount the floor flange directly on the
finished floor . However, if the bottom of floor flange and bottom of ceramic toilet must be
mounted at different heights, the floor flange must be mounted within 3/8 inch (10 mm) of
the bottom of the toilet (see illustrations on next page) or leakage may result .
6
7
8