Channel-modification in the cursor window, Cursor window options, Basic method – OmniSistem Das Light User Manual
Page 33
- User manual - Manuel d’utilisateur - Manual del usuario -
33
Channel-modification in the cursor window
A step can contain 512 DMX levels (from 0 to 255) i.e. a different value on
each of the 512 channels. Channels can be defined from the cursor-window
at the bottom of your screen and various programming methods can be used
to adjust channel-levels.
Good command of the general procedure will make you gain a lot
of precious time when programming your scenes.
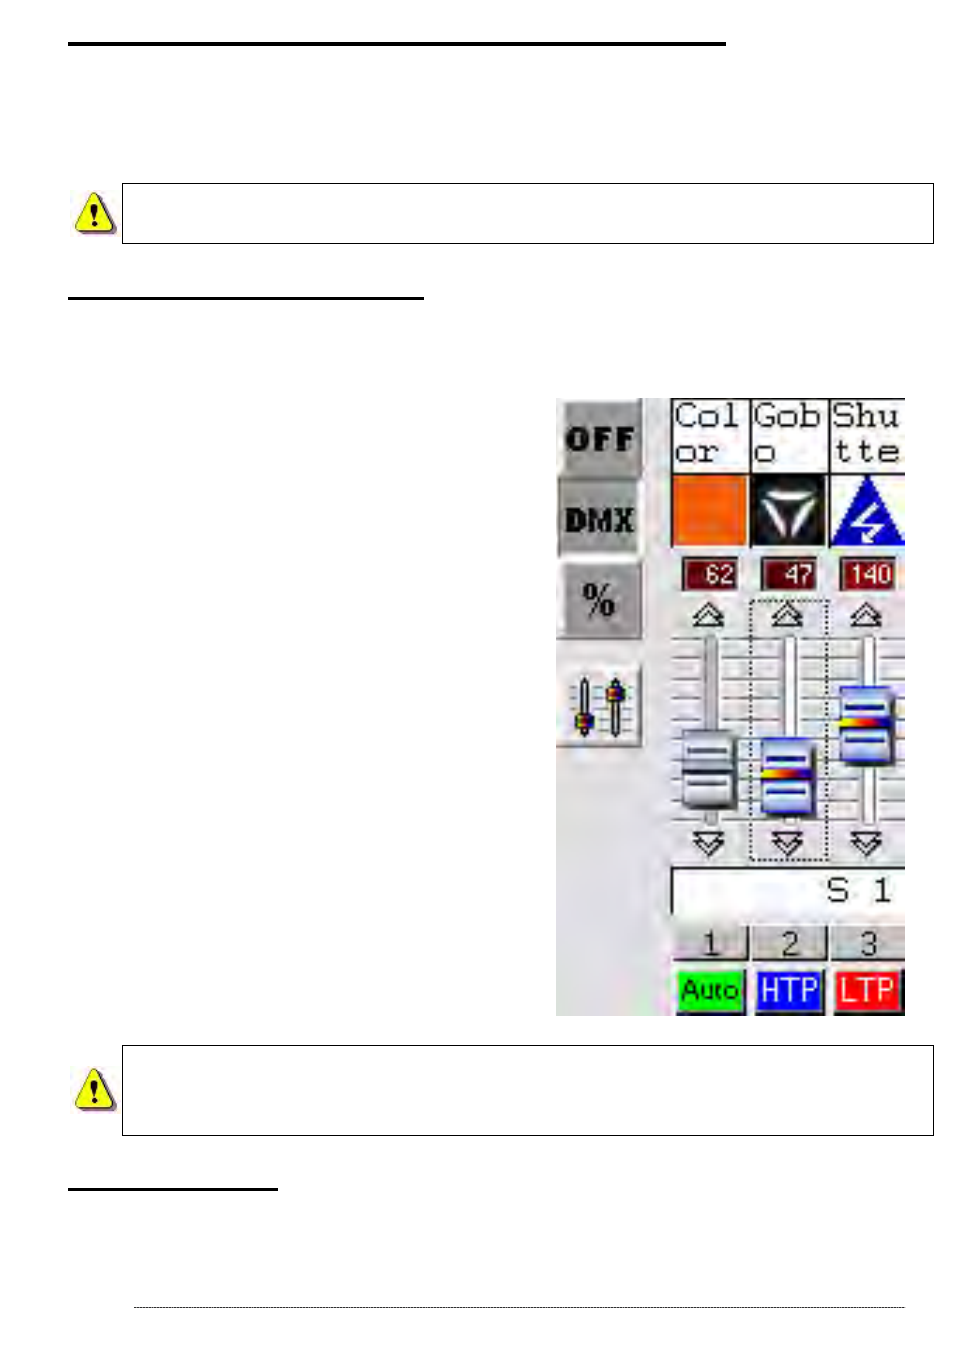
Cursor window options
The cursor-window is located at the bottom of the screen and represents the
512 DMX tracks supplied by the interface. You can re-size it, move it or close
it. There are 4 option-buttons on the left.
You can:
• Cancel display of cursor-values.
• Convert cursor-values into DMX
values.
•
Convert cursor-values into
percentage. (%)
The last button cancels or activates
cursor-move Fade rendering:
• Once activated, cursors instantly
move in Cut and fade-time is not
taken into account.
•
Once de-activated, cursors
gradually move in Fade
and
fade-time is taken into account.
In Live, 3 modes are available:
AUTO, HTP and LTP
For further details, please see “AUTO /
HTP / LTP options” Chapter.
If your computer performance drops, it is recommended to
activate the Fade rendering button to release power for more
functions.
Basic method
• Set your mouse on a DMX channel, by clicking it a DMX track can be
assigned a level.