Juniper Systems Replacing the Communications Module on the Field PC User Manual
Field pc
screw slots
hex wrench
Replacing the Communications
Module on the Field PC
Follow the instructions in this document to
replace the Field PC communications module.
Important:
Please read through all of the instructions
before beginning.
Replacing the communications module
requires you to handle small screws. To
avoid losing any screws, we recommend
replacing the communications module in
an office or enclosed area.
If you prefer not to replace the
communications module yourself, you can
ship the Field PC and replacement module
to your customer service center, and we will
replace the part for a small fee. Contact
your service center for details.
Package contents
Small hex wrench
Four stainless steel screws (M2 x 4mm
hexagon socket head cap)
Communications module
Required tools
#1 Phillips-head screwdriver
Steps
1. Close all running applications and suspend
the Field PC. (See the user’s guide that
came with your Field PC for instructions.)
2. Slowly remove the bottom latch of the hand
strap to prevent it from flipping over the top
of the Field PC and hitting the display.
•
•
•
•
•
•
•
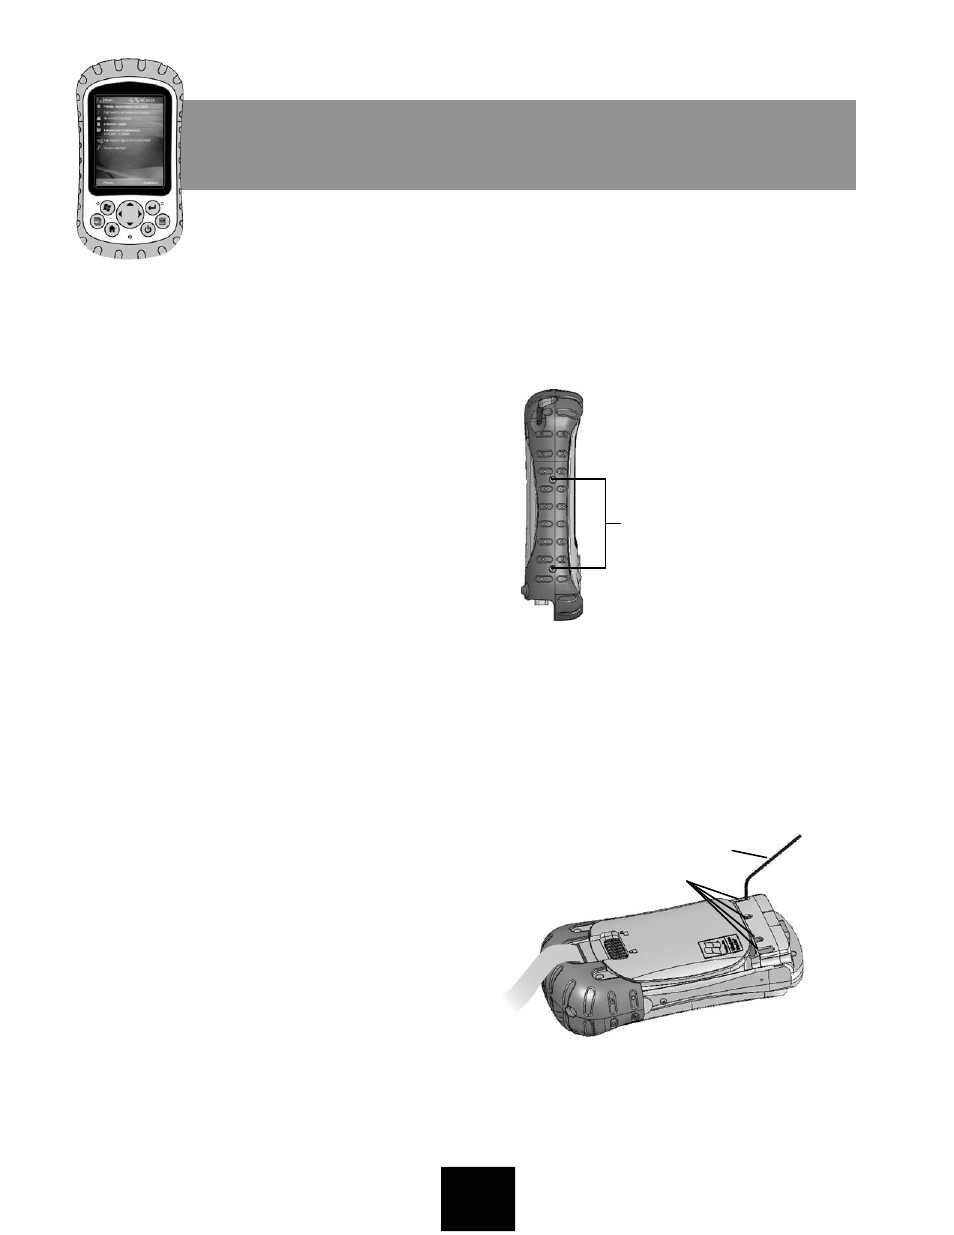
3. Remove the four side screws on the body
molding of the Field PC (see Figure 1) using
a #1 Phillips-head screwdriver.
Figure 1: Side screws on the body molding
4. Remove the body molding from the
Field PC.
5. Lay the Field PC face down.
6. Place the short end of the hex wrench onto
a screw in one of the four screw slots just
below the battery door (see Fig. 2). Slightly
loosen the screw.
Figure 2: Placement of the hex wrench
when first loosening screws
7. Repeat Step 6 to slightly loosen the other
three screws.
ULTRA-RUGGED
FIELD PC
side screws