Jaypro Sports BLCH5CUE21 User Manual
Page 9
© 2005 Jaypro Sports Equipment JSL-Inst034 Rev D 04-26-2010
9 of 14
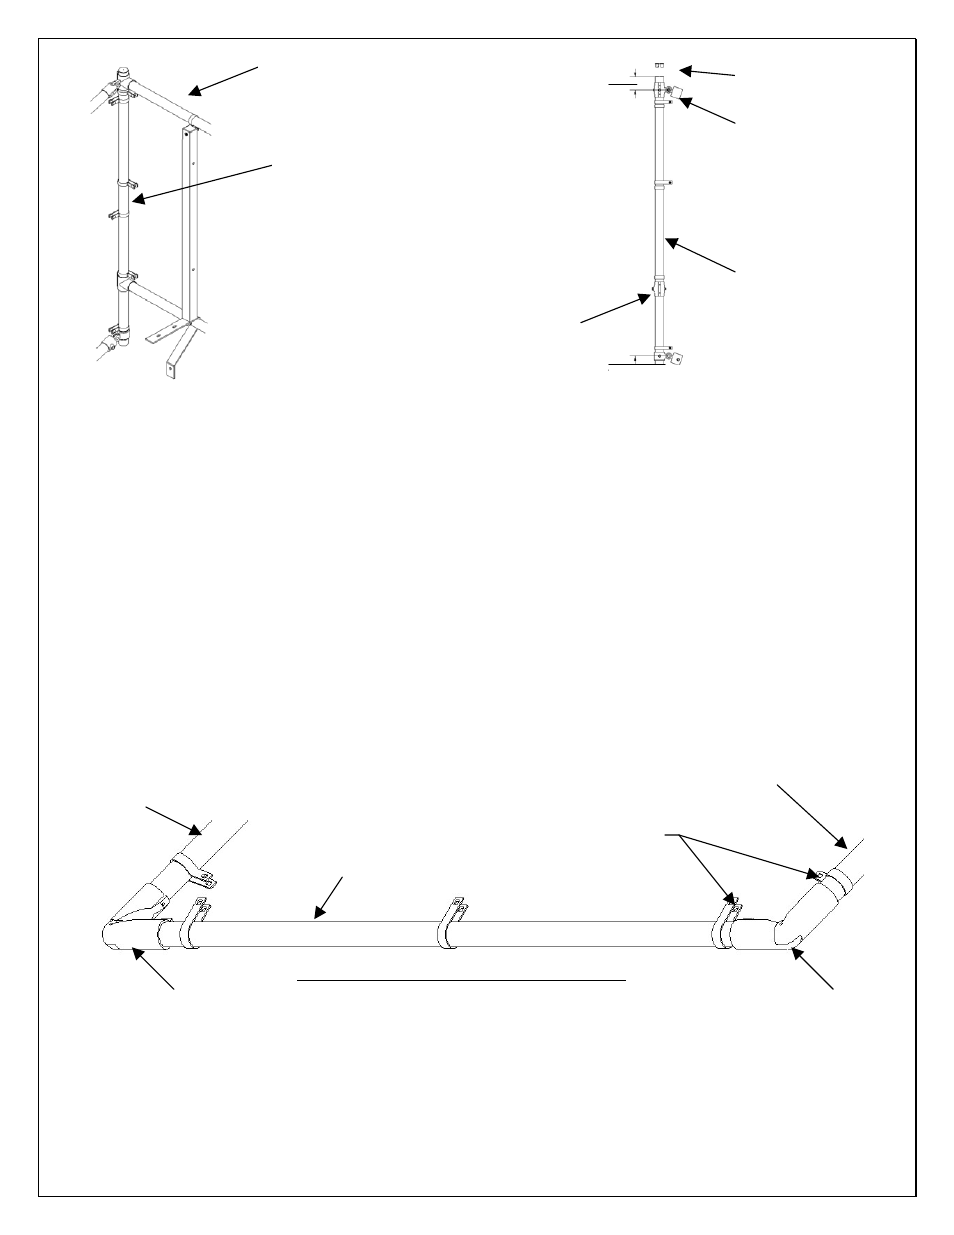
2) Attach the corner assembly onto the back support pipes as shown above. Make necessary
adjustments to the fittings (11, 12) to fully assemble. Adjust the vertical position of the corner
pipe (5) to achieve the dimensions shown. (Top of pipe to center of corner fitting is 2 ½”) and
the bottom of pipe to center of adjustable tee is 2 ½”). Fully tighten all screws in fittings (11,
12).
3) Install pipe cap (20) in the top of the corner pipe (5).
4) Repeat step for other side.
g) Assemble Side Frames:
1) Layout one 55-7/8” (4) and two 60” (3) long pipes as shown in figure H. Slide three pipe
clamps (15) onto the 55-5/8” (4) pipe as shown. Slide one pipe clamp (15) onto each of the
60” (3) pipes as shown. Pay special attention to the orientation of the pipe clamps with respect
to the tangent side – orient pipe clamps on the vertical pipe (4) with the tangents to outside of
bleacher, and orient pipe clamps on the top and bottom pipes to the inside of the bleacher.
2) Insert all three pipes into the two adjustable hinge fittings (10) as shown. Loosen the setscrew
Bottom Side Support Pipe (3)
ITEM 10
Top Side Support Pipe (3)
ITEM 15
ITEM 12
VIEW OF FINAL
BACK CORNER
FRAME FOR THE
RIGHT SIDE.
2 ½”
2 ½”
- End Cap (20) Both Ends
FIGURE H: VIEW OF RIGHT SIDE OF ENCLOSURE ABOVE
FIVE COUNT OF ITEM 15
IS BETWEEN ITEM 11 AND
ITEM 12
ITEM 11
Front Vertical Support Pipe (4)
ITEM 10
“REAR FRAME” ASSEMBLY