Testing, Maintenance, Programming – Interlogix 60-807-01-95R User Manual
Page 3
Pet Immune SAW PIR Motion Sensor w ith Lithium Battery Installation Instructions
3
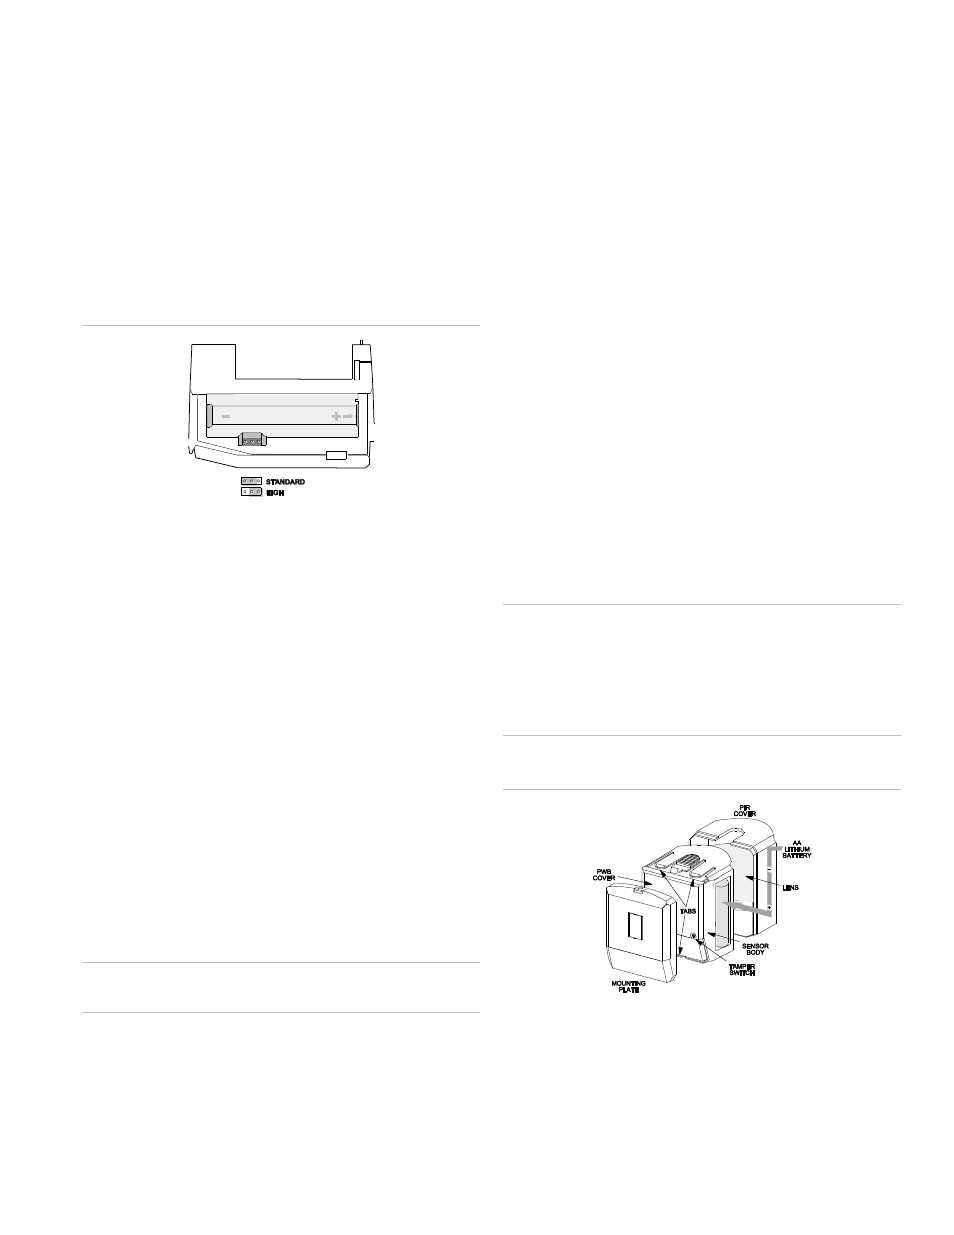
6. When testing is completed the PIR can be securely
attached to its mounting plate by screwing the smallest
enclosed screw into the mounting plate hole at the top of
the mounting plate (see Figure 7 below).
Setting the sensitivity on the indoor motion
sensor
For pet applications, the PIR must be set to standard
sensitivity.
Figure 6: Sensitivity pins locations
Testing
Walk Testing
Walk testing should be done to determine the sensor’s actual
coverage area. The edge of the coverage pattern is
determined by the first flash of the LED. This may change
slightly depending upon the sensitivity s etting. Walk test the
unit from both directions to determine the pattern boundaries.
1. Remove the sensor body from the mounted mounting
plate, activate the tamper switch, and then remount the
body to activate the 60 second walk test mode.
2. Walk across the coverage pattern to determine the
coverage area, indicated by LED activation. Each
activation extends the walk test mode for an additional 60
seconds.
After 60 seconds without motion the walk test mode times out
and the LED will no longer activate when motion is detected.
Caution:
Excessive use of the walk test mode may reduce
battery life. Use only for initial setup and maintenance testing.
Note: When the walk test mode has ended, an alarm can be
transmitted only after 3 minutes have passed since the
previous alarm. This 3 minute lockout time reduces
unnecessary RF transmissions in high traffic areas thereby
extending battery life.
Environment testing
Turn on all heating or air conditioning sources which would
normally be active during the protection period. Stand away
from the sensor and outside the coverage pattern and watch
for alarms.
Maintenance
At least once a year, the range and coverage should be
verified for proper operation. The end user should be instructed
to put the sensor in walk test mode and walk through the far
end of the coverage pattern to verify proper detection.
Replacing and Disposing of Batteries
The sensor is powered by 1 AA Lithium battery. When the
system indicates the sensor has a low battery, replace it
immediately.
When battery replacement is necessary, observe proper
polarity (as shown in the battery compartment) when installing
the new battery, or the sensor may be damaged. Be sure to
note that as you look at the battery compartment, on the le ft
side the positive battery end is down and on the right side the
positive end is up. When the battery is replaced, wait at least 3
minutes before activating the walk test mode.
Caution:
Replace only with 1 AA lithium battery. Observe
polarity when installing the new battery. Installing the battery
backwards may cause damage to the sensor. Dispose of used
batteries according to the manufacturer’s instructions, and/or
local government authorities. See Figure 7 below for the
battery location.
Figure 7: PIR com ponents
Programming
Refer to the panel installation instructions for information on
programming the sensor into the panel.