Mounting the motion sensor – Interlogix 60-807-01-95R User Manual
Page 2
2
Pet Immune SAW PIR Motion Sensor w ith Lithium Battery Installation Instructions
•
If possible, locate sensors within 100 feet (30.5 m) of the
panel. While a transmitter may have a range of 500 feet
(152 m) or more out in the open, the environment at the
installation site can have a significant effect on transmitter
range. Sometimes a change in sensor location can help
overcome adverse wireless conditions.
•
Do not mount the sensor near duct work or other large
metallic surfaces which may affect the RF signals (see
“Final Testing” on page 4). Actual acceptable transmitter
range should be verified for each installation.
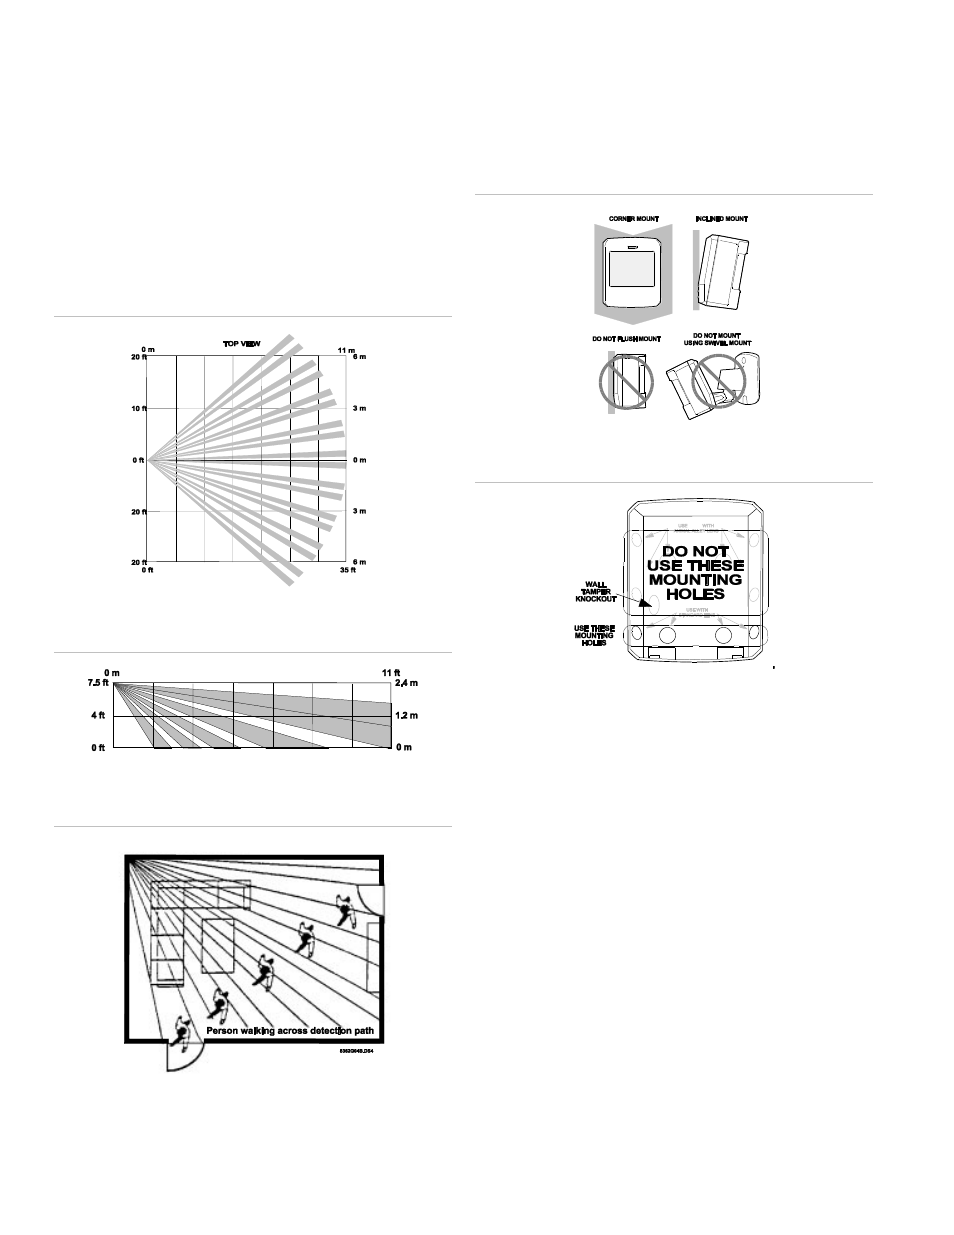
Figure 1: Top view of lens coverage area
Figure 2: Side view at a m ounting height of 7.5 feet
Figure 3: Overhead detection path
Mounting the motion sensor
This sensor must be incline-mounted on a wall surface or
incline mounted in a corner at a mounting height of 7.5 feet.
Figure 4: Wall m ount options
Figure 5: PIR m ounting plate knockouts
To mount the sensor:
1. Remove the mounting plate by depressing the button on
the top of the sensor body. With the opposite hand pull the
mounting plate away from the body of the sensor.
2. Punch out two of the bottom four mounting holes (see
Figure 5 above) to determine which knockouts to use
when mounting the motion sensor. Use the lower-side
holes for corner mounting, or the lower-middle holes for
surface mounting.
3. If you desire wall-tamper functionality, remove the wall-
tamper knockout (see Figure 5 above).
Note: The wall-tamper switch cannot be used when the
sensor is corner mounted.
4. Mark the location of the required holes on the mounting
surface.
5. Use wall anchors and screws to secure into place. Attach
the sensor to the mounting plate.