Build the stabilizer & elevators – Great Planes SlowPoke Sport 40 Kit - GPMA0492 User Manual
Page 8
Work on a flat surface over the plan covered with wax paper
or Great Planes Plan Protector. Refer to the plan and
die-cut patterns on pages 4 and 5 to identify the parts.
❏
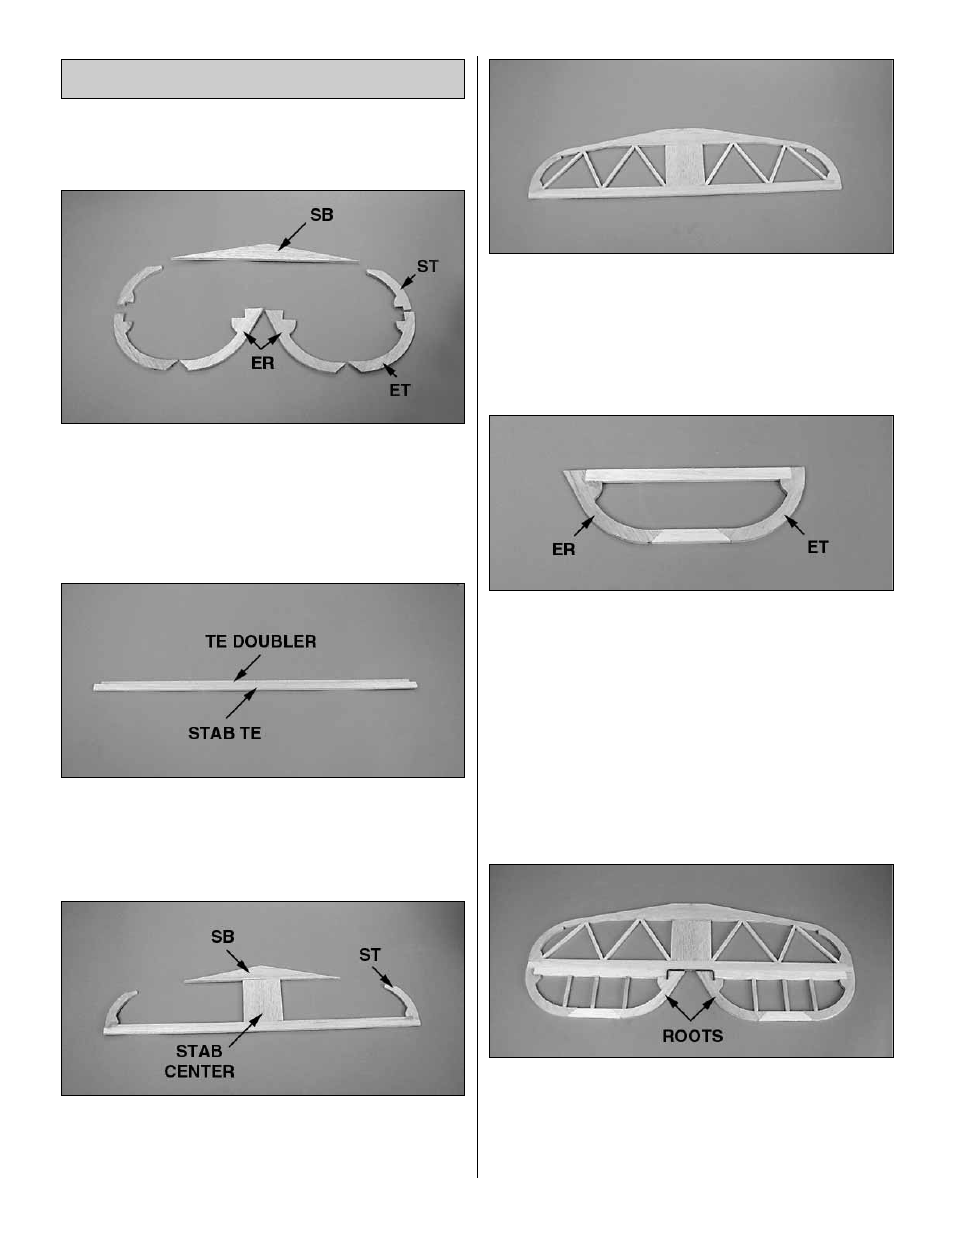
1. Locate two each of the 1/8" die-cut balsa stab brace
(SB) and four each of the stab tips (ST), elevator tips
(ET) and elevator roots (ER). Glue two pieces of each 1/8"
part together to make 1/4" thick parts, carefully aligning the
pieces for a flush fit. You will end up with one stab forward
brace, two stab tips, two elevator tips and two elevator roots.
Sand off any irregularities or excess glue.
❏
2. From a 1/4" x 1/2" x 30" balsa stick, measure and cut
a piece 24-3/8" long to make the stab trailing edge. Pin it
in position over the plan. From the 1/4" x 1/4" x 24"
basswood stick cut and glue a 23-3/8" TE doubler to the
forward edge of the balsa trailing edge.
❏
3. Position and glue the 1/4" x 3" x 3-15/16" balsa stab
center and die-cut balsa stab forward brace (SB) in
position over the plan. Position and glue the two stab tips
(ST) to the trailing edge.
❏
4. From 1/4" x 1/2" x 30" balsa measure, cut and glue the
stab leading edges in position. From 1/4" x 1/4" x 24" balsa
measure, cut and glue the cross bracing in position to
complete the stab assembly. Remove the stab from the board
and sand both sides smooth. Blend the leading edge at the
tips to match the plan. Sand a flat on the front of the leading
edge to match the plan. Leave the trailing edge square.
❏ ❏
5. Pin the die-cut balsa elevator tip (ET) and elevator
root (ER) in position over the plan. From a 1/4" x 5/8" x 30"
stick, measure, cut and pin the elevator leading edge and
trailing edge in position. When satisfied with the fit, glue the
parts together.
❏ ❏
6. From leftover 1/4" x 1/4" balsa, install the elevator
cross bracing as shown on the plan. Remove the elevator
from the board and sand both sides smooth.
❏
7. Go to step 5 and build a second elevator to match the first.
Hint:
Cover first elevator with wax paper or Plan Protector
then build an identical one right on top of the first!
❏
8. Pin the Stab to the board and then align both elevators
along its trailing edge, flush at the tips. Be sure your elevators
are positioned correctly with the “roots” to the center of the
stab. Pin the elevators in position, then using the elevator
joiner wire as a guide, accurately mark the location of the
torque arms. Remove the elevators from the board.
Build the Stabilizer & Elevators
8