Balance the airplane laterally fuelproofing, Final sanding finishing – Great Planes SlowPoke Sport 40 Kit - GPMA0492 User Manual
Page 21
❏
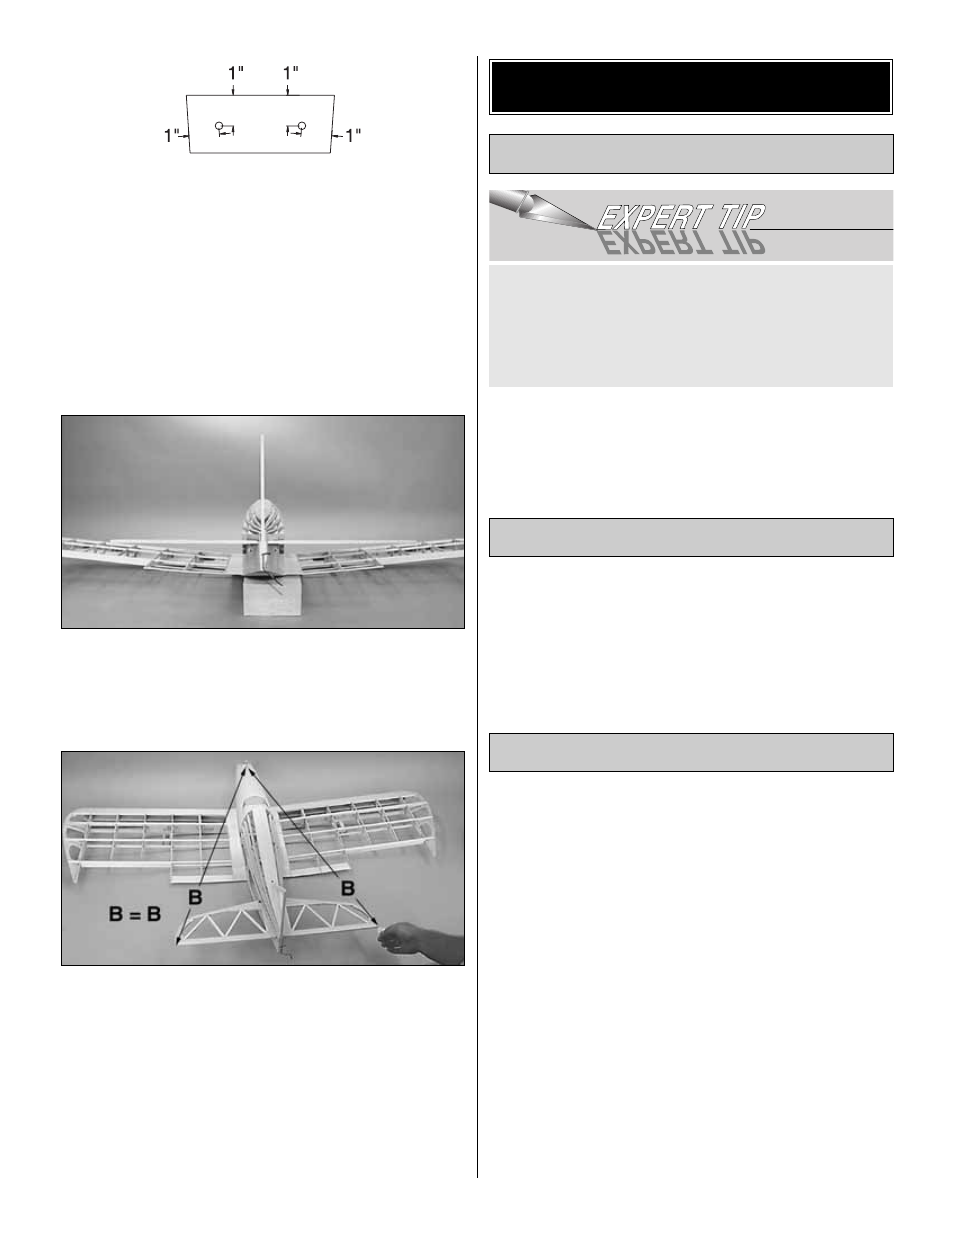
3. Using the sketch as a guide, measure and mark the
location of the two wing bolt holes. While securely holding
the wing in alignment with the reference marks you made in
the previous step, drill #10 or 13/64" holes, perpendicular to
the bottom of the wing, through the wing into the wing bolt
plate. Remove the wing and enlarge the holes in only the
wing to 17/64". Tap the holes in the bolt plate with a 1/4-20
tap. A few drops of thin CA in the threads will harden them.
Retap the holes after the CA has fully cured.
❏
4. Mount the wing using two nylon 1/4-20 x 2" wing
mounting bolts.
❏
5. Turn the fuse over and slide the stab into the stab
saddle. Stand back about ten feet and view the model from
the rear. If the stab tips are not an equal height above the
wing, remove the stab and sand the high side of the saddle
until the stab is aligned.
❏
6. Center the stab side to side in the fuse. Measure the
distance from each tip to a pin centered on top of the fuse
at the nose. When the distance is equalized, mark the stab
and fuse with some reference marks. Glue the stab in
position with 6-minute epoxy. NOTE: The stab should be
pushed forward as far as possible to allow room for the
elevator joiner.
Wow! That wasn’t too difficult was it? You should now have
a great looking frame-up ready to cover. Gulp some coffee
and let's pull an all-nighter !
❏
1. Fill any scuffs, dings and the forward end of the
pushrod tube exit slots with balsa filler. Sand the entire
structure with progressively finer grades of sandpaper,
ending with 320-grit.
Fuelproofing may be done either before or after covering.
❏
1. Fuelproof the engine compartment, paying special
attention to the firewall. LustreKote
®
paint or 30-minute epoxy
is recommended.
❏
2. Fuelproof any external exposed wood.
SPECIAL NOTE: Do not confuse this procedure with
“checking the C.G.” or “balancing the airplane fore and
aft.” That very important step will be covered later in
the manual.
Now that you have the basic airframe nearly completed, this
is a good time to balance the airplane laterally (side-to-
side). Here is how to do it:
❏
1. Temporarily attach the wing and engine (with muffler)
to the fuselage.
❏
2. With the wing level, lift the model by the engine
propeller shaft and the fin post (this may require two
people). Do this several times.
❏
3. If one wing always drops when you lift the model, it
means that side is heavy. Balance the airplane by gluing
weight to the other wing tip. NOTE: An airplane that has
been laterally balanced will track better in loops and
other maneuvers.
Balance the Airplane Laterally
Fuelproofing
Many surface blemishes on a framed model are caused by
bumps and balsa chips on the work surface. This type of
ding is best repaired by applying a drop or two of window
cleaner or tap water to the blemish, then running a sealing
iron over the spot to expand the wood fibers. After the
surface has dried, sand the
expanded area smooth.
Final Sanding
FINISHING
21