Control surface throws – Great Planes SlowPoke Sport 40 Kit - GPMA0492 User Manual
Page 25
❏
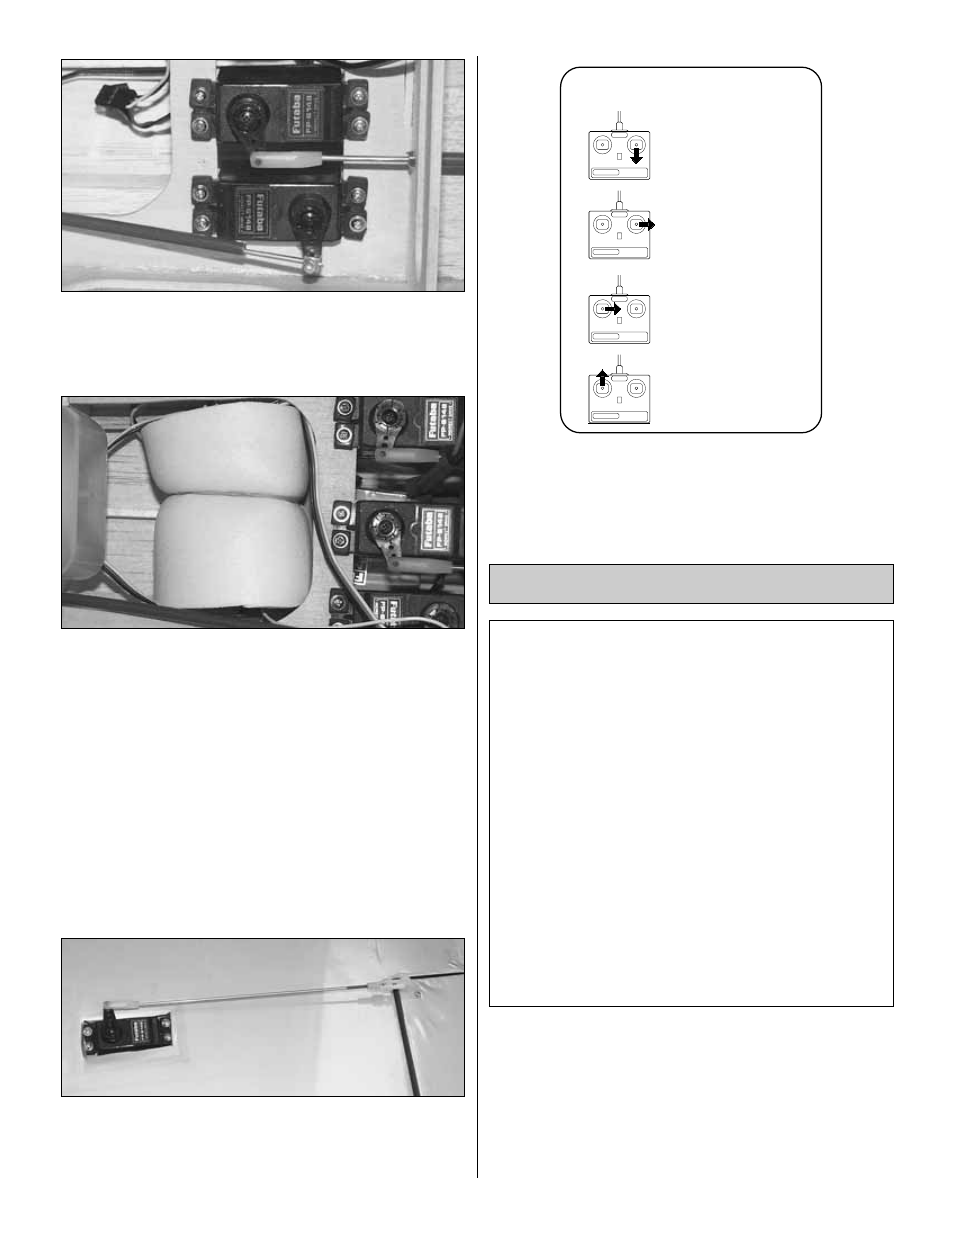
8. Hookup the throttle using the 12" white nylon pushrod, 1"
threaded stud and nylon clevis at the throttle and the 4"
threaded wire and brass pushrod connector at the servo. Make
sure that the servo does not stall at either end of its travel.
❏
9. Wrap your receiver in a plastic bag, then wrap it with
foam rubber. Secure the foam with a couple of rubber
bands. Temporarily secure the receiver in the cavity just
ahead of the servos as shown.
❏
10. Route the receiver antenna out of the fuselage
bottom behind the wing. Anchor the antenna to the tail gear
with a rubber band. Be sure to put a strain relief on the
antenna where it exits the fuse.
❏
11. Mount the receiver switch and charging jack through
the fuselage on the opposite side of the fuse to the muffler
exhaust. We suggest using a Great Planes Switch/Charging
Jack Mount (GPMM #1000) because of its ease of
installation and tidy appearance.
❏
12. Install the aileron servos and pushrods as shown
using two 12" wire pushrods, clevises and Faslinks. Fish
the servo leads through to the center of the wing and plug
them into a Y-harness.
❏
13. Turn on the radio system and check the direction of all
control functions. They must all move in the direction shown
in the sketch. If not, change the position of the reversing
switches on your transmitter.
NOTE: The balance and surface throws for this aircraft
have been extensively tested. We are confident that
they represent the settings at which the SlowPoke
Sport 40 flies best. Please set up your aircraft to the
specifications listed above. If, after a few flights, you
would like to adjust the throws to suit your tastes, that’s
fine. Too much throw can force the plane into a stall, so
remember, “
more is not better.”
We recommend the following control surface throws:
NOTE: Throws are measured at the widest part of the
elevators, rudder and ailerons.
High Rate
Low Rate
ELEVATOR:
7/16" up
1/4" up
7/16" down
1/4" down
AILERONS:
1" up
3/4" up
1" down
3/4" down
RUDDER:
1-1/2" left
1-1/2" right
NOTE: If your radio does not have “dual rates,” then set
up the control surfaces to move between the high rate
and low rate throws.
Control Surface Throws
4-CHANNEL
TRANSMITTER
4-CHANNEL
TRANSMITTER
4-CHANNEL
TRANSMITTER
4-CHANNEL RADIO SET-UP
(STANDARD MODE 2)
TRANSMITTER
4-CHANNEL
ELEVATOR MOVES UP
RIGHT AILERON MOVES UP
LEFT AILERON MOVES DOWN
RUDDER MOVES RIGHT
CARBURETOR WIDE OPEN
25