Great Planes Reactor Bipe 3D EP ARF - GPMA1580 User Manual
Page 20
20
❏
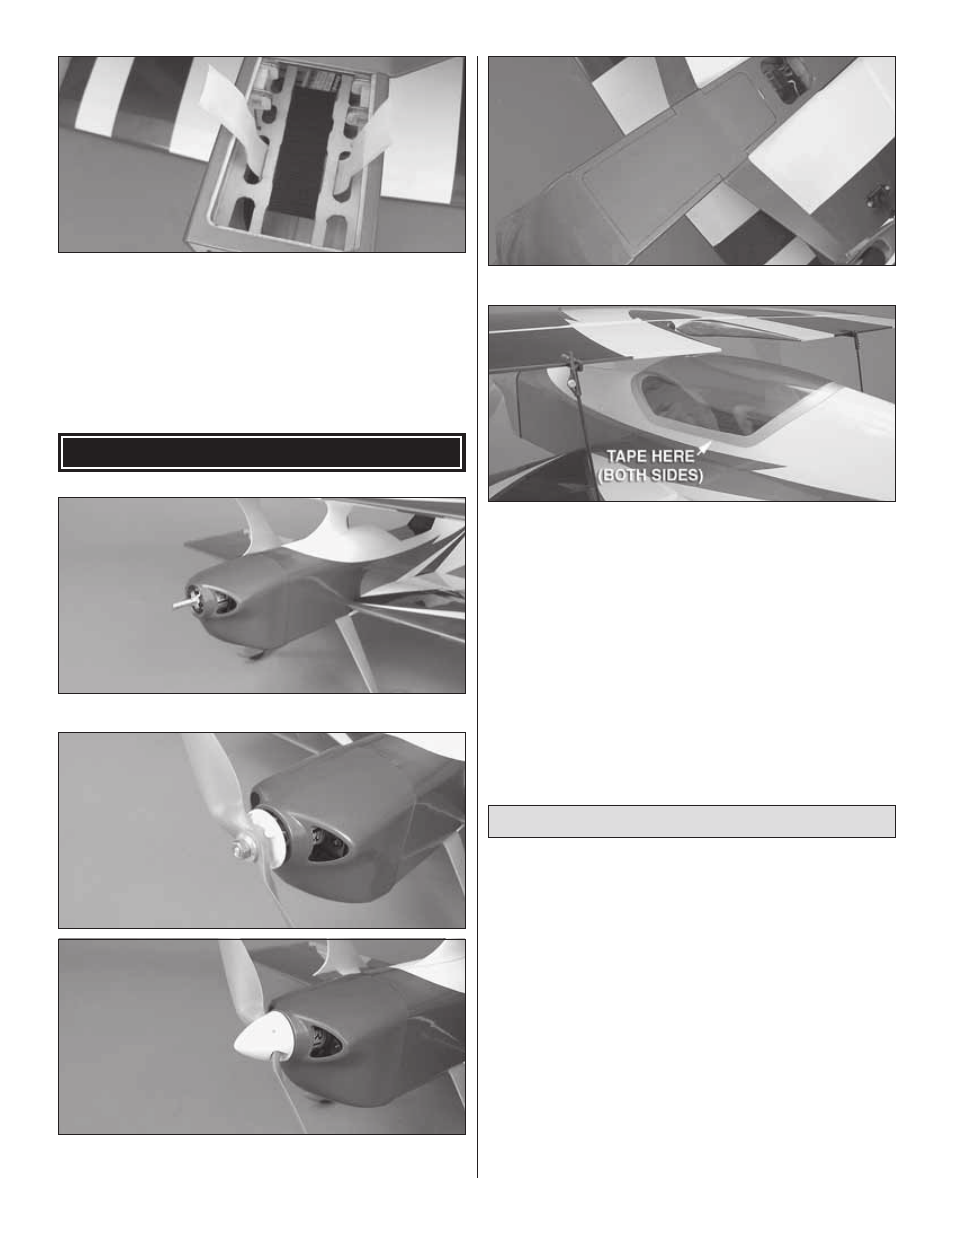
6. Attach the hook side of the included 3" [76mm] adhesive
backed hook and loop material to the battery tray.
❏
7. Without the propeller installed and your radio on, plug in
your battery and check to see which direction the motor
rotates. The motor should rotate counterclockwise as viewed
from the front. If the motor rotates in the wrong direction, you
must unplug two motor leads and swap their position.
FINAL ASSEMBLY
❏
1. Install the cowl.
❏
2. Install the spinner backplate and then the propeller
onto the motor.
❏
3. Install the battery hatch cover.
❏
4. Use clear tape to attach the canopy as shown.
❏
5. Take time to double check all of the adjustable clevises
for security and each of your servo arm screws. Make sure
that all of the screws on the adjustable clevises are tight and
that none of the clevises slip on the pushrods when you pull
on them. After the initial “test fl ight” and when the controls are
trimmed, we recommend that you remove all of the pushrods
(noting their position) and carefully apply one drop of thin
CA to each adjustable clevis to permanently bond them to
their pushrods. This will rule out the possibility of a pushrod
slipping out of position.
❏
- 12 clevises tight
❏
- 4 servo arm screws tight
Apply the Decals
1. Peel the decals from the die-cut decal sheet.
2. Be certain the model is clean and free from oily fi ngerprints
and dust. Prepare a dishpan or small bucket with a mixture
of liquid dish soap and warm water–about one teaspoon of
soap per gallon of water. Submerse the decal in the soap and
water and peel off the paper backing. Note: Even though the
decals have a “sticky-back” and are not the water transfer
type, submersing them in soap and water allows accurate
positioning and reduces air bubbles underneath.
3. Position decal on the model where desired. Holding the decal
down, use a paper towel to wipe most of the water away.
4. Use a piece of soft balsa or something similar to squeegee
remaining water from under the decal. Apply the rest of the
decals the same way.