Great Planes Reactor Bipe 3D EP ARF - GPMA1580 User Manual
Page 16
16
❏
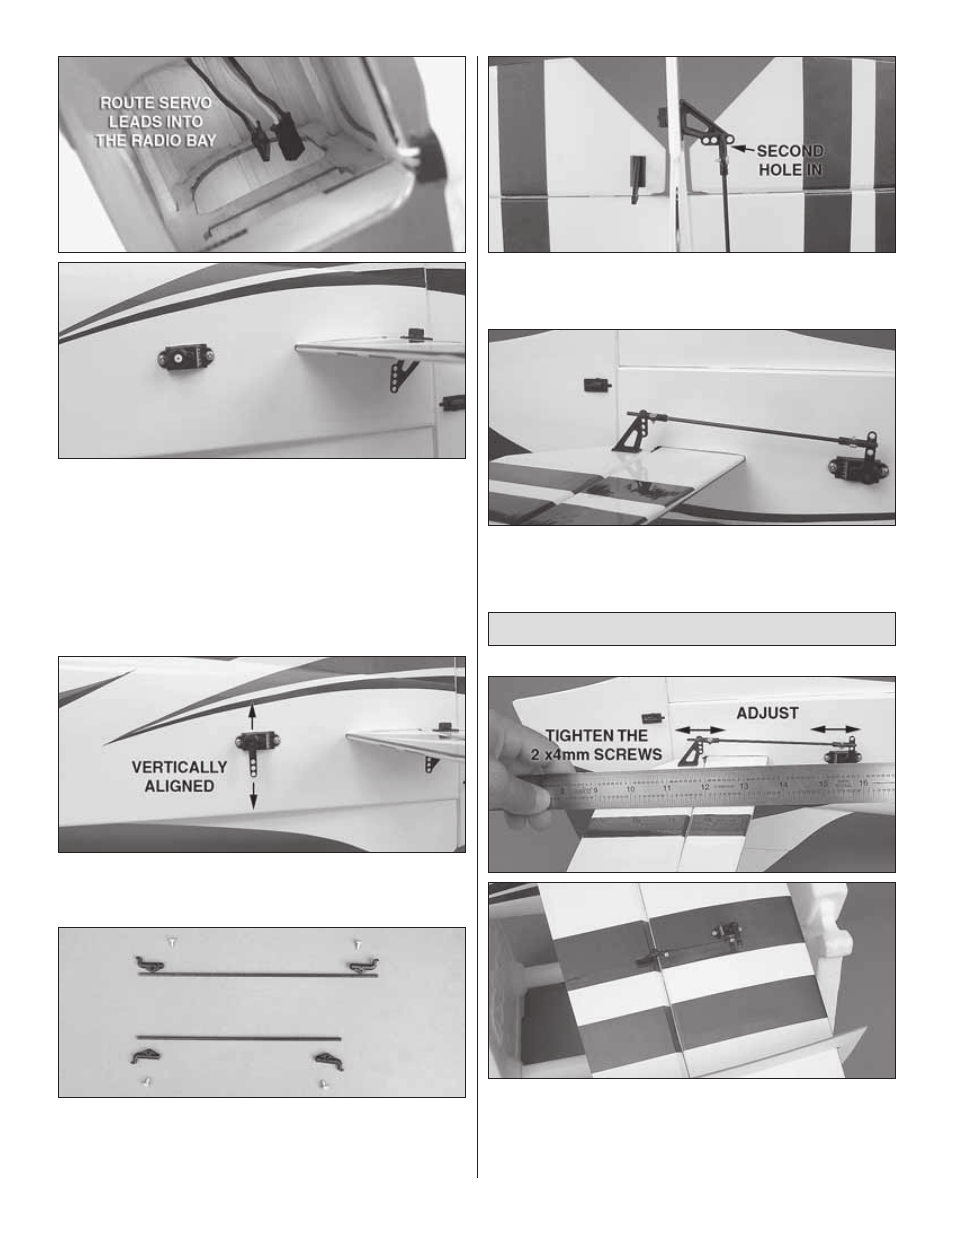
6. Feed the servo leads through the fuselage and into the
radio compartment. Position the servos so that the splines
face forward and drill 1/16" [1.6mm] holes using the servo
tabs as your guide. Thread a servo screw into each hole and
then remove the screws and pull out the servos. Apply two
to three drops of thin CA glue into each of the holes you
threaded and allow the CA to dry thoroughly.
❏
7. Reinstall the tail servos and secure them with servo
mounting screws.
❏
8. Use your radio to center the servos. Locate the servo
arms that fi t the splines of your servos. Test fi t a servo arm onto
each tail servo. Choose the arm that aligns closest to vertical.
❏
9. Prepare the 2 x 155mm rudder pushrod and the
2 x 130mm elevator pushrod the same way you prepared the
aileron pushrods. Partially thread the 2 x 4mm sheet metal
screws into the clevises.
❏
10. Install the 2 x 155mm rudder pushrod in the second
hole in from the tip of the rudder horn. Install the other clevis
in the outermost hole of the servo arm.
❏
11. Install the 2 x 130mm elevator pushrod in the outermost
hole of the elevator horn. Install the other clevis in the second
hole in from the tip of the servo arm.
Adjust the Pushrods & Link the Ailerons
❏
1. Use your radio to help you adjust the length of each
pushrod. You should adjust your elevator, rudder, and both
aileron pushrods at this time. Use a straightedge to help
you center each control surface. You may use the wing jigs
to check the ailerons after you have made an adjustment.