Great Planes Reactor Bipe 3D EP ARF - GPMA1580 User Manual
Page 17
17
For example: Turn on the radio, adjust the aileron pushrod,
check the position with the wing jig, readjust, and so on.
❏
2. Tighten the 2 x 4mm sheet metal screws when you are
satisfi ed with the pushrod alignments.
❏
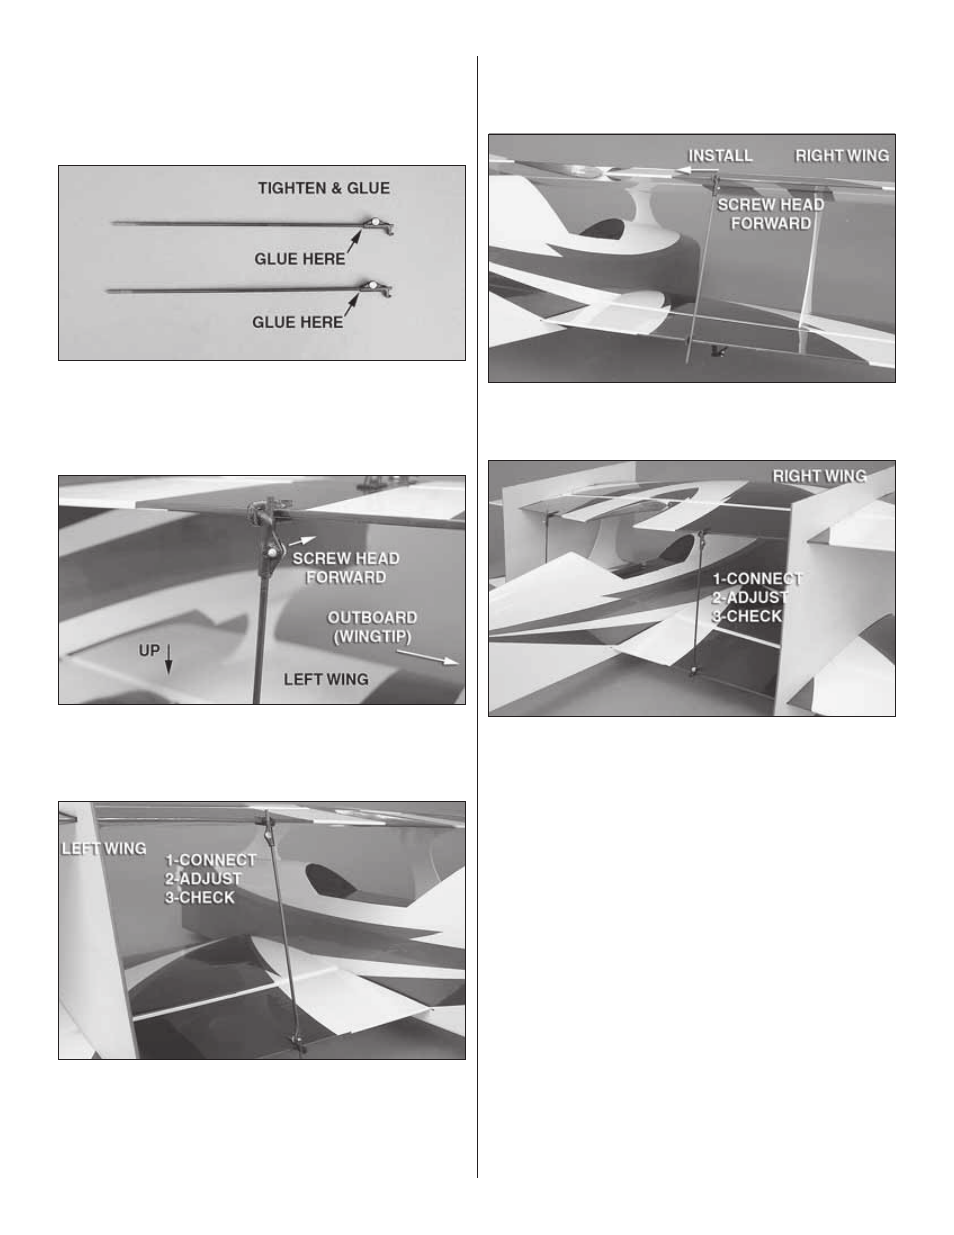
3. Locate the two 2 x 160mm aileron link rods and install
one adjustable clevis to only one side of each rod. Position
the clevises as shown and secure them using 2 x 4mm sheet
metal screws. Use two drops of thin CA to glue the clevises
to the rods.
❏
4. Install one of the aileron link rods to the lower aileron
of the left wing. Install it from the outboard side of the wing
so that the screw head is facing the front of the airplane. You
will make your adjustments to the opposite clevis.
❏
5. Install an adjustable clevis to the top left aileron from
the outboard side. Insert the aileron link rod into this clevis
and adjust the rod length so that both ailerons are at “zero
throw” and are parallel to one another. You may use a wing
jig to help you check the alignment after the top and bottom
ailerons are linked.
❏
6. When you are satisfi ed with the upper aileron alignment,
secure the clevis on the top left aileron with a 2 x 4mm
sheet metal screw.
❏
7. Install the other aileron link rod to the upper aileron of
the right wing. Install it from the outboard side of the wing so
that the screw head is facing the front of the airplane.
❏
8. Install an adjustable clevis to the bottom right aileron of
the right wing and insert the aileron link rod into the clevis.
Make the necessary adjustments and then secure the clevis
with a 2 x 4mm sheet metal screw.