Great Planes Gee Bee Profile 40 Kit - GPMA0485 User Manual
Page 15
D 4 Remove the fuse frame from your building board and
sand both sides flat Be careful that you don't sand any
area too thin.
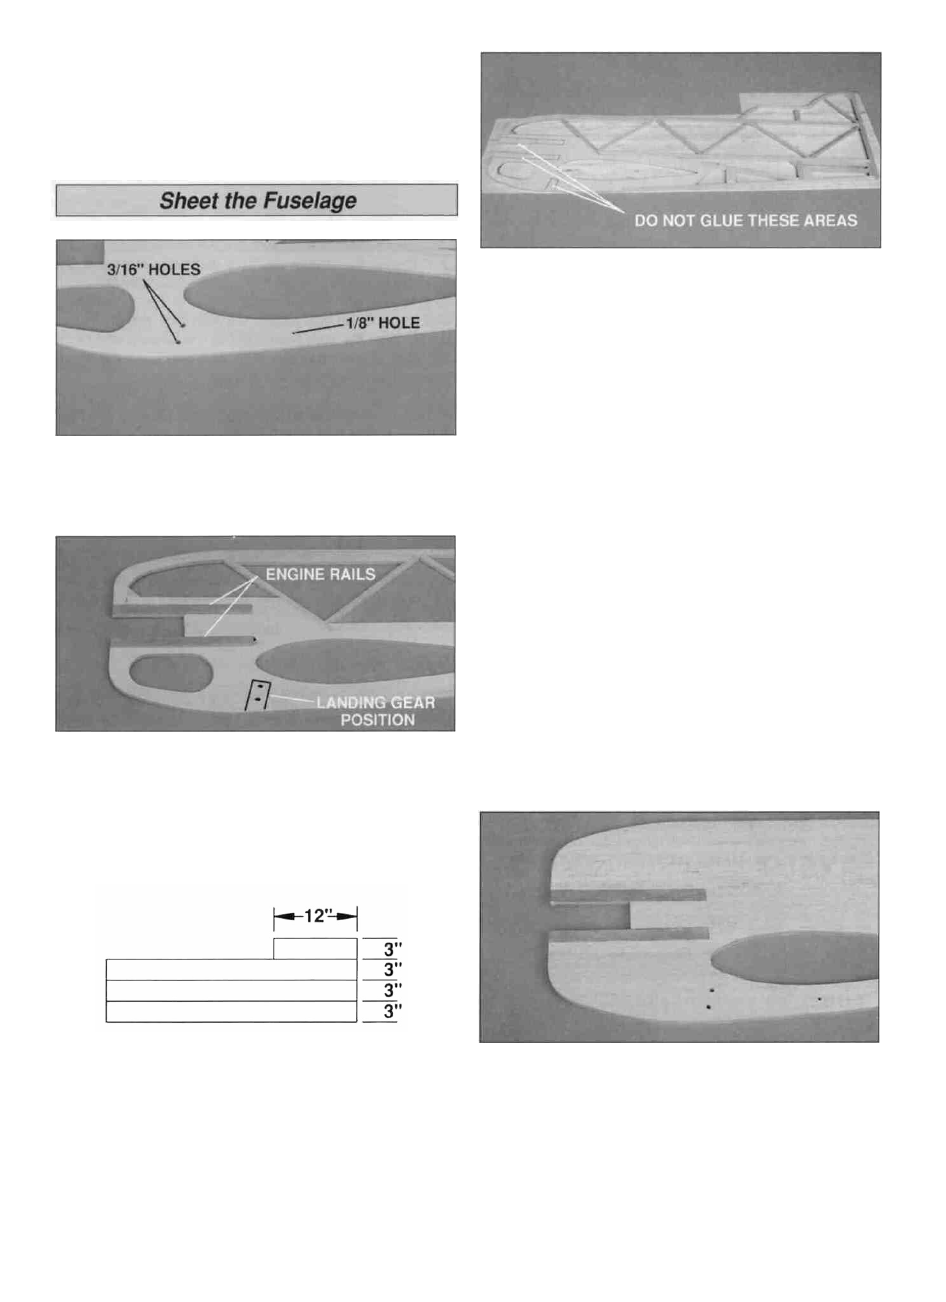
D 1 Drill a 3/16" hole at the punch marks for the landing
gear and a 1/8" hole at the balance point.
D 4 Glue the fuse skins to the right side of the fuse frame.
Do not glue the fuse skin to the fuse frame at the engine
rail or landing gear locations.
D 5. Use a 3/16" and 1/8" drill bit to drill through the fuse
skin at the landing gear mounting holes and balance point.
Make sure to back the skin with a piece of leftover wood to
prevent the balsa skin from splitting when the drill bit exits.
Trim and sand the fuse skin flush with the outside edge of
the fuse frame and the center of the wing and stab "cut-
out " Keep the sheeting you cut from the wing opening to
use as a template when covering the fuse To dress-up
your Gee Bee Profile, the cockpit center can also be
trimmed out.
D 2 Place two of the 1/16" x 1/2" x 6" plywood engine
rails in position on each side of the engine opening and the
landing gear in position on the bottom of the fuse frame
Trace around the engine rails and landing gear Repeat the
process on the other side of the fuse.
D 6. Use the remaining three sheets of 1/16" x 3" x 36"
and the 1/16" x 3 x 12" to sheet the left side of the fuselage.
Trim and drill the skin as before.
D 7. Place two of the plywood engine rails in position on
each side of the engine opening and the landing gear at the
bottom of the fuse Again, trace around them Repeat the
process on the other side of the fuse Carefully trim the
balsa skin from the engine rail and landing gear area.
D 3. To make the fuse skins, edge glue three 1/16" x 3" x
36" balsa sheets together to make a skin 1/16" x 9" x 36".
Cut a 1/16" x 3" x 24" sheet in half and edge glue one 12"
piece to the three sheets as shown Sand the sheets flat
with fresh 220-grit sandpaper.
D 8 Use 30-minute epoxy to glue the engine rails to both
sides of the plywood fuse body Use clamps or weights to
hold the rails tightly in position.
D 9 Sand a slight radius on the edges of the fuse to
remove the sharp edge.
15