Great Planes Gee Bee Profile 40 Kit - GPMA0485 User Manual
Page 11
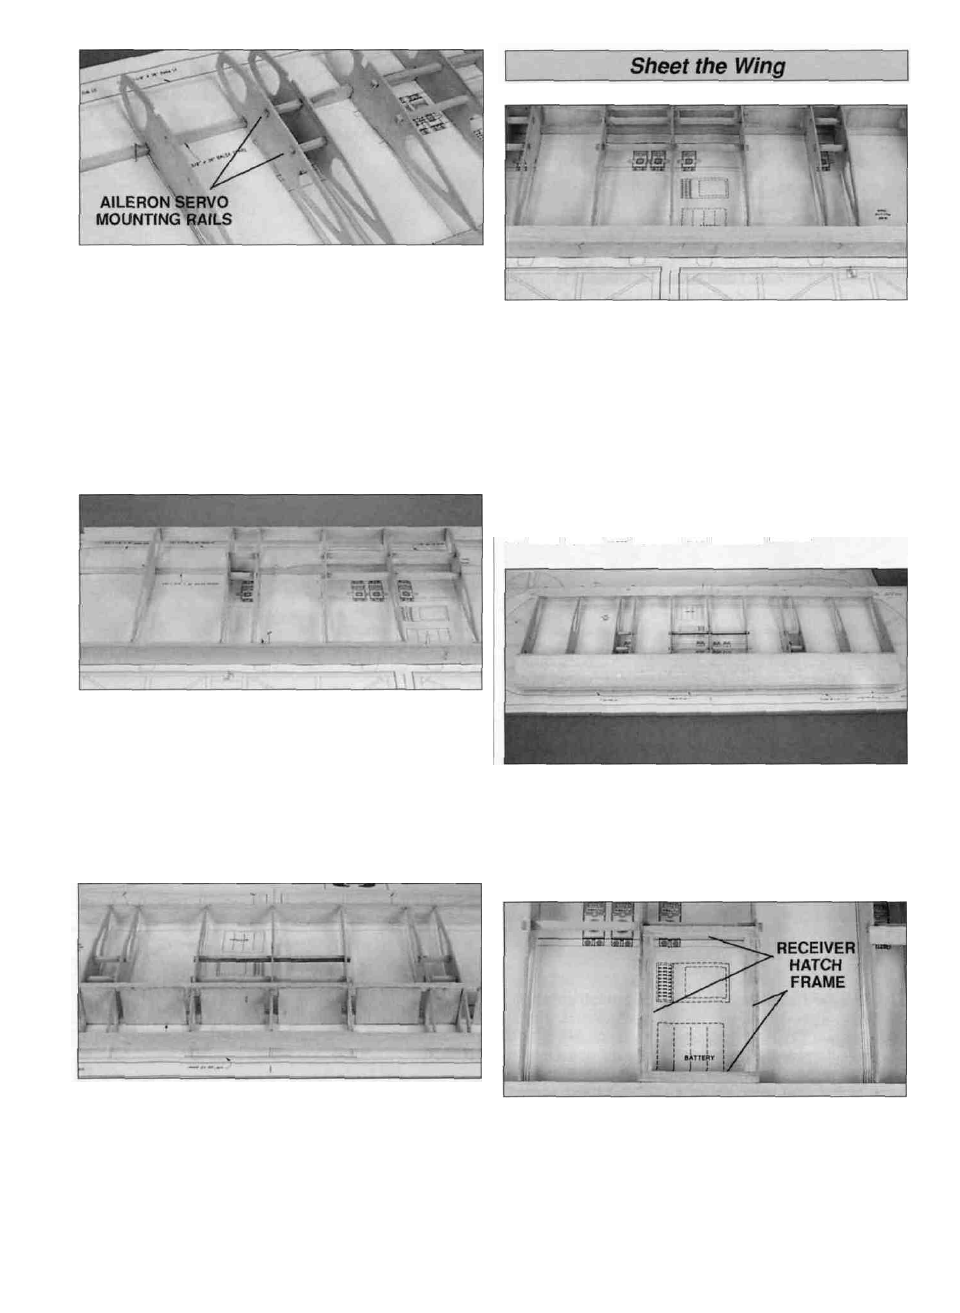
D 8. Glue all of the die-cut 3/32" balsa #2 and #3 ribs onto
the bottom spar and trailing edge. Once again make sure
all of the 1/4" square holes are facing up. From the
remaining 1/4" x 1/4" hardwood stick, cut and glue four 1/4"
square hardwood aileron servo mounting rails into the
square holes in the #2 ribs.
D 9. Center the 3/32" x 7/8" x 36" balsa sub-leading edge
on the forward edge of the #2 and #3 ribs and to the
leading edge doubler. Glue the sub-leading edge to the ribs
and doubler. Insert and glue the top wing spar into
notches in the ribs.
D 1. Glue the 1/16" x 7/8" x 36" balsa trailing edge
sheeting to the ribs and to the 1/8" x 3/8" balsa
trailing edge.
D 2. Use a long sanding block to sand the sub-leading
edge flush with the tops of all wing ribs.
D 3. Test fit the 1/16" x 3" x 36" LE wing sheet to the
wing. The aft edge of the wing sheeting should cover the
forward half of the wing spar. Remove any pins that are
holding the wing to the building board in front of the wing
spar. You may need to place weights on the wing to keep
the wing spars flat against the building board.
D 4. Apply medium CA to the top of the sub-leading edge
and the ribs from the wing spar forward. Working quickly,
center the LE wing sheet on the wing spar and press it
down against the ribs and the sub-leading edge. Use thin
CA to glue the wing sheet to the wing spar.
D 10. From a 1/16" x 3" x 30" balsa sheet, cut and glue
shear webs, perpendicular to the forward edge of the wing
spars. The shear webs must be glued securely to the
wing spars.
D 5. Use leftover 1/4" x 3/8" balsa sticks to make a frame
for the receiver hatch. The frame should be glued flush with
the top of the wing ribs.
11