Garelick 31900 OUTBOARD MOTOR CARRIER User Manual
Page 2
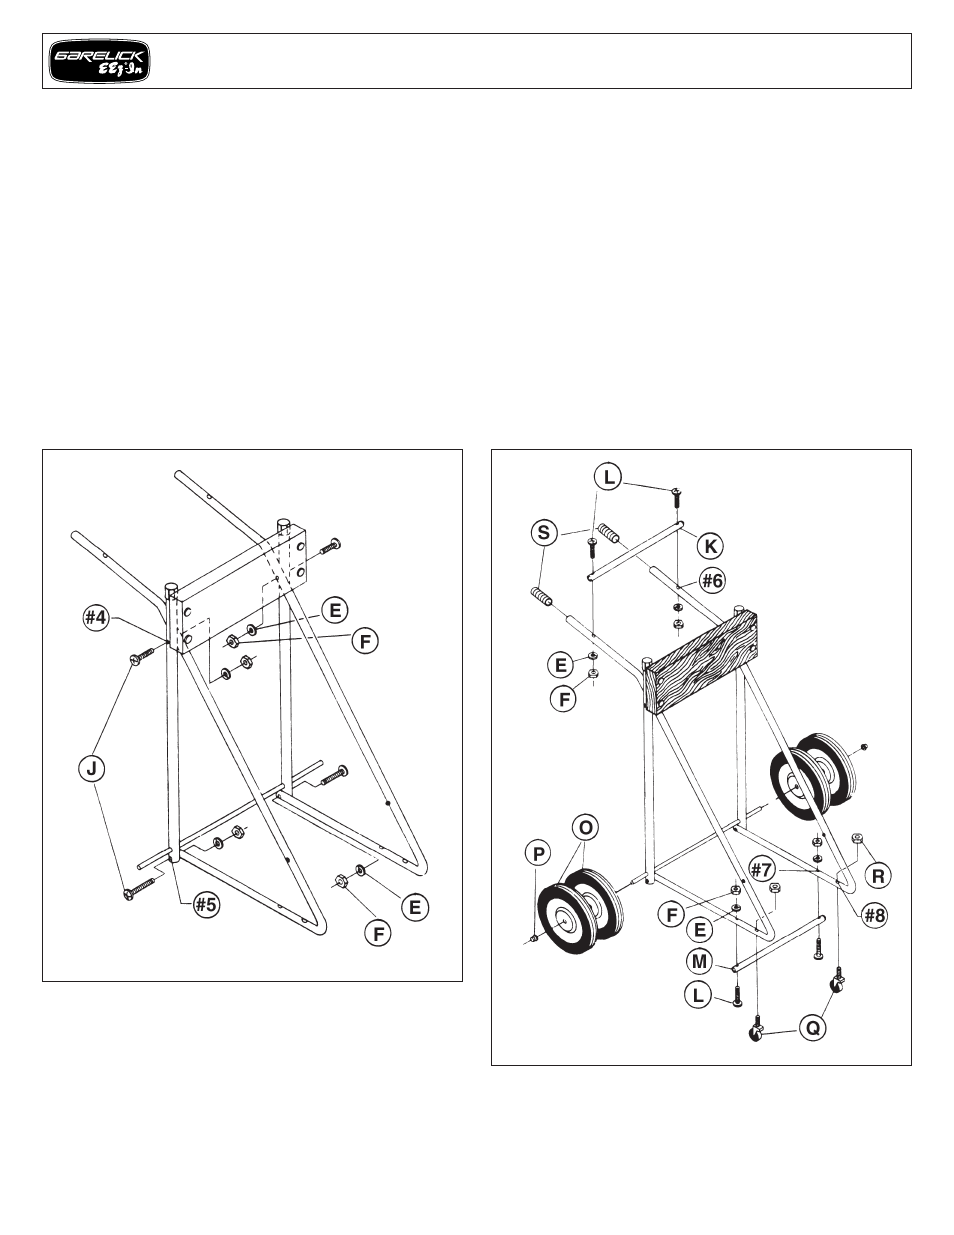
Refer to Fig. 3:
1. Place handle assemblies from fig. 2 on the INSIDES of
upright support tubes as illustrated. NOTE: Make certain
that handles point AWAY from each other.
2. Align holes #4, insert bolts (J); secure with fasteners (E)
and (F) as illustrated (finger tighten).
3. Align holes #5, insert bolts (J); secure with fasteners (E)
and (F) as illustrated (finger tighten).
Refer to Fig. 4:
1. Attach handle brace (K) across TOP of handles by
aligning holes #6, inserting bolts (L) and securing with
fasteners (E) and (F) as illustrated (finger tighten).
2. Attach bottom brace (M) across BOTTOM of J-tubes by
aligning holes #7, inserting bolts (L) and securing with
fasteners (E) and (F) as illustrated (finger tighten).
3. Mount two wheels (O) on each end of axle.
4. Using pushnuts (P), secure wheels by tapping them on axle
squarely with hammer.
5. Thread caster shanks (Q) through large holes #8 in J-tubes
and secure with locknuts (R) as illustrated (finger tighten).
6. Tighten all nuts and bolts on carrier.
7. Slip poly handgrips (S) on handles. NOTE: Grips go on
more easily after being heated in warm water.
8. Periodically lubricate wheels and polish* aluminum to
ensure a long life.
NOTE: Recommended for motors 30–115 H.P./315 lbs.
**EEz-In marine polish, Model 65010, available.
FIG. 3
FIG. 4
Assembly Instructions – Model 31900 Motor Carrier
Form 12.123