Garelick 18118 TRANSOM LADDER User Manual
Page 2
Instructions for: 18117 / 18118
TRANSOM LADDER
Write for Garelick Mfg. Co. Phone: 651-459-9795
A complete 644 2
ND
Street, P.O. Box 8 E-mail: [email protected]
EEz-In Catalog St. Paul Park, Minnesota 55071 Website: www.garelick.com
Rev A 09/11
12.630
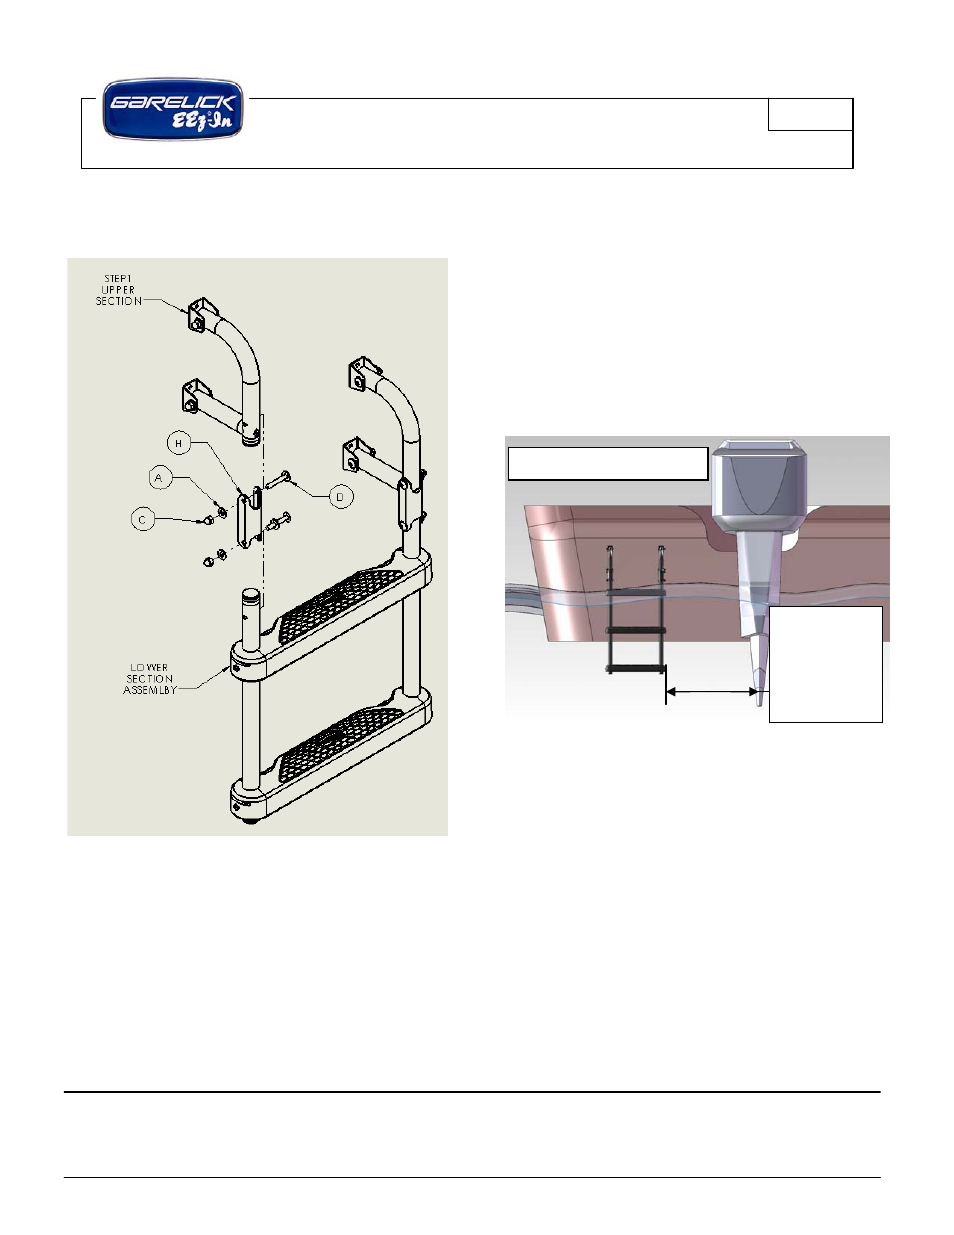
Step 2: Attach the upper sections of the ladder to the
lower section assembly as shown in “Figure 2”.
Figure 2: Ladder Assembly
Step 3: Choose the most suitable side of transom for
mounting ladder. Locate a place on the transom where
all four tube ends of the ladder make contact with the
boat and will not interfere with the operation of the
motor or have potential for injury. Also, ensure that
prior to mounting the ladder that there are NO
electrical wires, hydraulic hoses, water hoses or
steering cables in the selected mounting location. In
addition, check to see that the transom area is
sufficiently strong enough to support the ladder while
it is in use. If necessary, a backing plate may need to
be installed to reinforce the area where the ladder is to
be located.
WARNING: If you have questions to the integrity of
your boat or to the location of unseen equipment such
as wiring or hoses then it is imperative that you contact
the boat manufacturer prior cutting into your boat.
Step 4: Place ladder so that when folded down, bottom
step should ideally be in water, however, when folded
up the ladder is out of water.
NOTES: When mounting the ladder keep step surface
parallel to the water and perpendicular to centerline of
the boat as shown in “Figure 3”. If necessary, modify
the “I” standoffs from the upper assembly by cutting
the tube rail to desired length and drilling a ¼” cross-
hole ½” from the end.
Step 5: Locate and mark where the mounting brackets
attach to the boat. Due to difference in transom widths
across boating manufacturers mounting hardware has
not been provided.
Step 6: Attach mounting brackets to boat transom and
secure the ladder in place by tightening all hardware
and ensuring smooth operation.
Step 7: Ladder is now ready for use.
Mount
ladder as far
away of
motor as
possible.
Figure 3: Mounting