Audio dubbing, Recording features (cant,), Rto audio dub – RCA CC-285 User Manual
Page 36
Attention! The text in this document has been recognized automatically. To view the original document, you can use the "Original mode".
Recording Features (cant,)
Audio Dubbing
The audio dubbing feature lets you
record new audio (sound) on a
previously recorded tape without
erasing the original video (picture).
When you audio dub a tape, the
previous audio is erased and replaced
with the new audio.
The audio dubbing feature also
increases your editing flexibility.
Video segments can first be
assembled, and then a single narration
or music background can be added to
the tape.
The new audio you want to put on
the tape can be added one of three
different ways:
• from speaking into the camcorder’s
built-in microphone.
• from speaking into an external
microphone connected to the
MIC
jack. (The built-in microphone is
inoperable when an external
microphone is attached.)
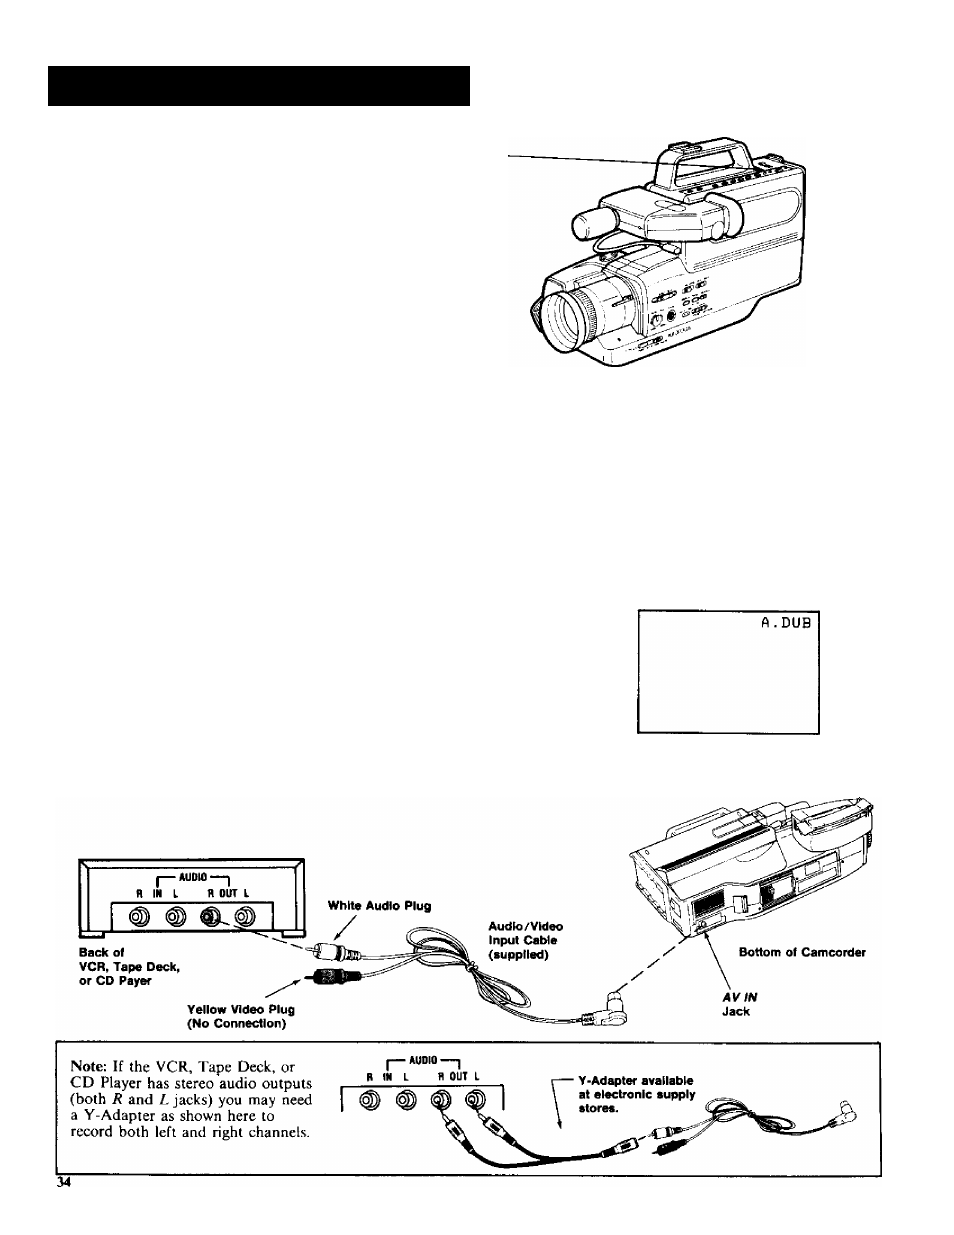
• from an external sound system
connected to the w jack on the
camcorder by using the Audio/
Video Input Cable as shown below.
(Be sure to disconnect external
microphone, if connected, when
recording.)
• See pages 44 and 45 for optional
accessories.
AUDIO VIDEO
rTo Audio Dub
1. Slide the
power
button to
turn on the camcorder.
2. Slide the
camera
/
playback
switch to the
playback
position.
3. Insert the tape and press
PLAY
and then
rewind
to locate a
point on the tape a few
seconds before you want to
begin dubbing.
4. Press the
PAUSE
button
exactly where dubbing is to
begin. The camcorder will
enter the Play/Pause mode.
5. Press and hold
AUDIO DUB
button. Then press
PLAY.
Release both buttons.
6
. To begin dubbing, press the
pause
button. The word
A.DUB
will appear in the
viewfinder to let you know
when the camcorder is audio
dubbing.
7. To end dubbing, press the
STOP
button.
Note: You can also dub both the
video and audio simultaneously if
desired. To do so, press
AUDIO DUB
and
PLA Y
first, then press
VIDEO
DUB
and
PLAY
in step 5 above.