Oven racksupports, Oven racks, Installation instructions – GE ZET1SMSS User Manual
Page 12: Installing the oven rack supports and oven racks, C4 installingthemetal bottom trim
Attention! The text in this document has been recognized automatically. To view the original document, you can use the "Original mode".
Installation Instructions
C3
Installing the Oven
Rack Supports and Oven
Racks
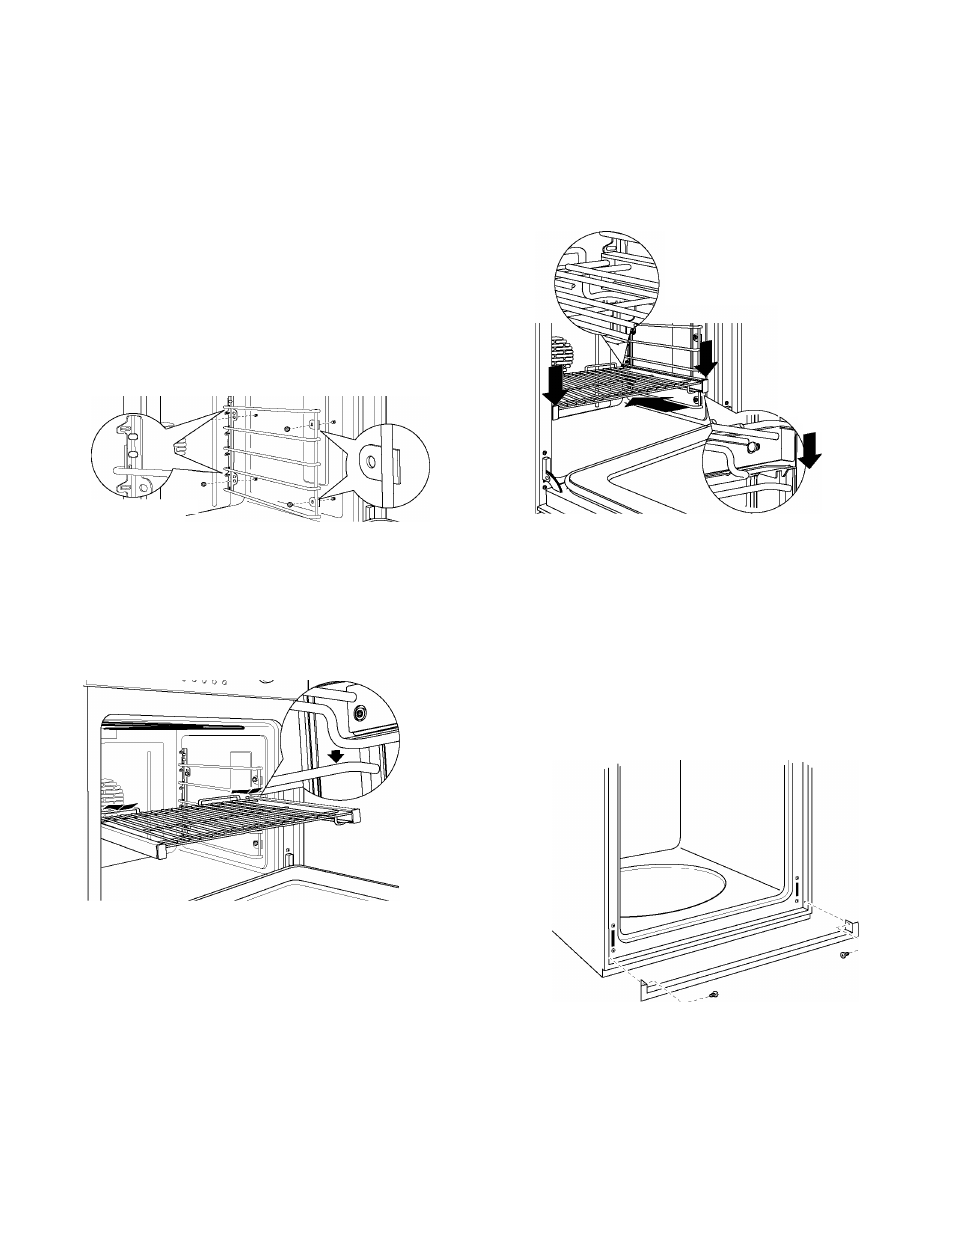
Oven RackSupports
Place the rack support with the slotted
holes overthe rear bolts and the round holes
over the front bolts. Using an adjustable wrench,
lightly secure with four nuts but
do not overtighten or the enamel could be
chipped. Repeat for the second rack support.
(Top bracket shown)
I II'
Slotted
holes over
rear bolts
Round holes
over front
bolts
Oven Racks
a. Place the rear rack locks over and onto
the rack supports (five rack positions are
available, including the top position).
b. Slide the rack all the way in until the rear rack
locks are secure on the rear rack supports,
and press the front rack locks onto the front
rack supports.
C3
Installing the Oven
Rack Supports and Oven
Racks (Cont.)
Rock secure under
rear supports
Slide the rack
all the way In
and push down
to lock the
front rack locks
onto the front
rack supports
c. Slide the rack all the way out to ensure that
the rack is locked.
C4 InstallingtheMetal
Bottom Trim
a. Place the bottom trim between the side trim
and against the bottom ofthe cutout.
b. Using two trim screws provided, secure the
bottom trim through the holes in the trim.
(ÍF
IMPORTANT: Ifthis unit is ever removed
from the cabinet or the oven is ever
pulled out for service, the trim must be
removed first or damage to the trim will
occur.
12