Carl Goldberg GPMA0960 Gentle Lady User Manual
Page 9
9
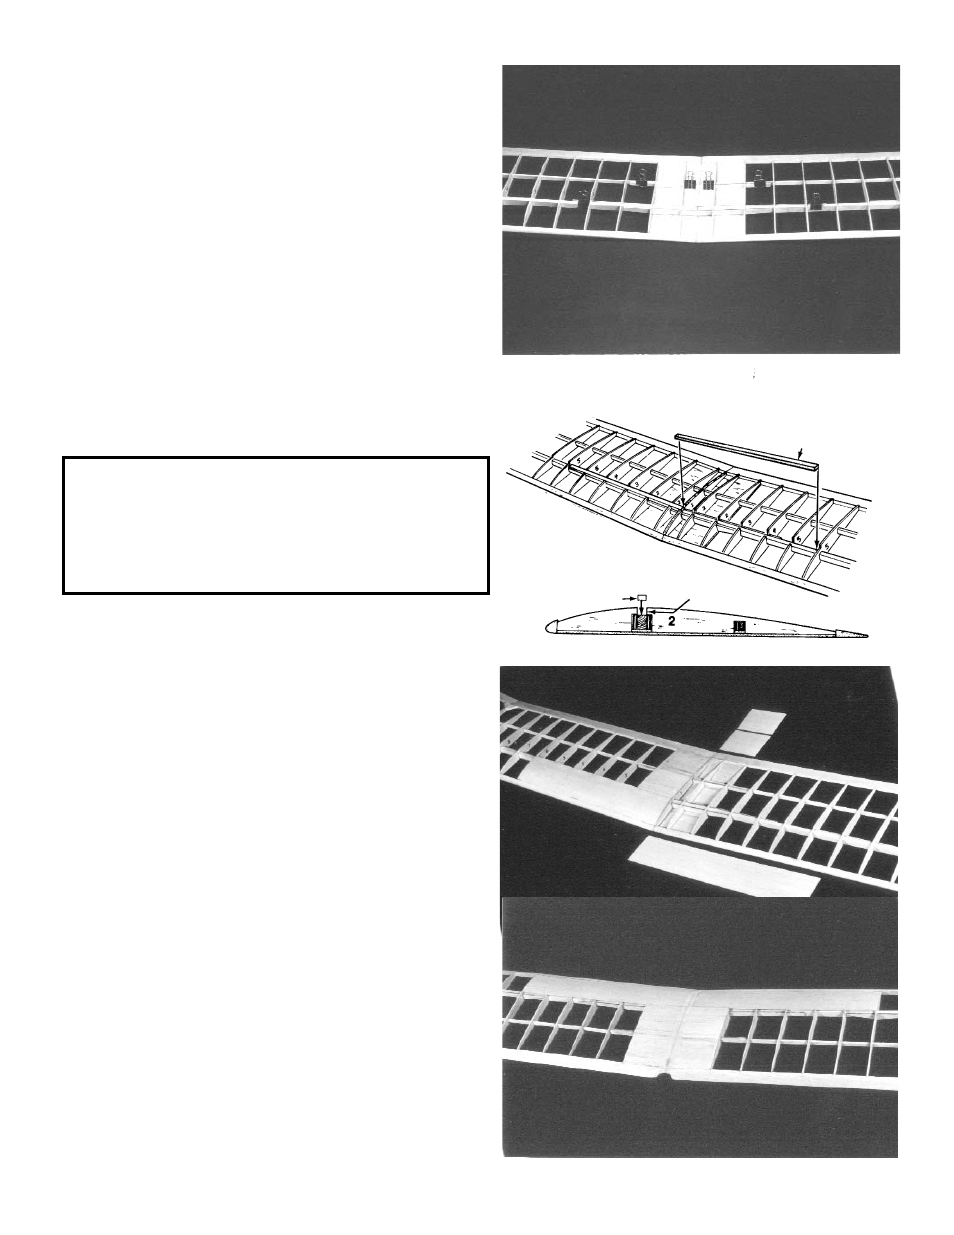
11.
DO NOT USE GLUE YET. Temporarily join wing
panels, using 1/8” ply joiners. Observe and correct fit and
placement of parts for proper dihedral angle. (Each tip
should be about 6-3/8” above the work surface.) Separate
panels and remove joiners.
Now, permanently glue joiners into one side of wing.
Working carefully, apply a slow setting glue, such as
Slow ZAP, to joiners and slide them into position. Clamp
until dry.
Apply glue to joiners, ect., and join both wing halves.
Again check for correct dihedral-each wing tip should be
about 6-3/8” above the table. Clamp joiners and let wing
assembly dry thoroughly.
Glue ribs #2, 3 and 4 to spars and joiners. Turn wing
upside down and glue ribs #3 through #18 to spar
bottoms. Examine entire wing, top and bottom, for any
joints which still need to be glued.
12.
Glue two of rib 1 together to make double thickness rib.
Glue doubled rib 1 at dihedral joint.
Cut L.E. sheeting from 2-1/2” balsa. Glue sheeting
securely to L.E., ribs and center joint.
From 2-1/2” and 3” wide balsa, make remaining sheeting
pieces and glue in place.
13.
Cut and sand a recess in T.E. at dihedral joint for
rubber bands.
Flat sand entire wing smooth.
NOTE: If you’re going to fly a lot in windy weather or use a
powerful winch, you may want to strengthen the wing as follows.
Before adding the sheeting in step 12, notch each rib from the top
down to the spar, on ribs #1,2,2,3, 4 and 5. Glue to the top of the
spar a strip of hard balsa 3/16”x1/4”x10-3/4” (not furnished),and
sand it lightly to match the rib curvature. When the sheeting is
glued in place, glue it also to the 3/16” strip.
Balsa strip
Typical Rib
Notching
From two 3/16”x1/4” strips
(not furnished)
cut 10-3/4” pieces